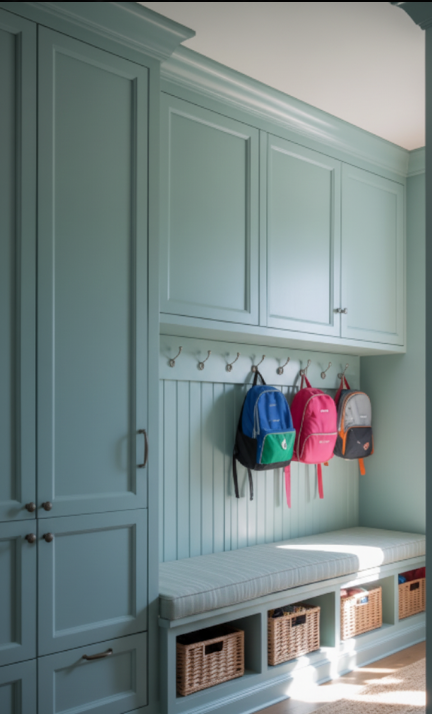
Introduction
If your entryway or closet constantly feels cluttered with sneakers, boots, and everyday shoes, you’re not alone. Small spaces make storage tricky—but with the right DIY solution, you can create a shoe organizer that looks stylish and maximizes every inch. Today’s project is all about building a chic, functional shoe organizer that fits tight corners, narrow hallways, or compact closets—without requiring advanced woodworking skills. Whether you prefer a modern floating style, a hidden cabinet, or a modular crate design, you’ll learn simple ways to transform messy piles into a streamlined, beautiful setup.
1. Floating Wall-Mounted Shoe Shelves
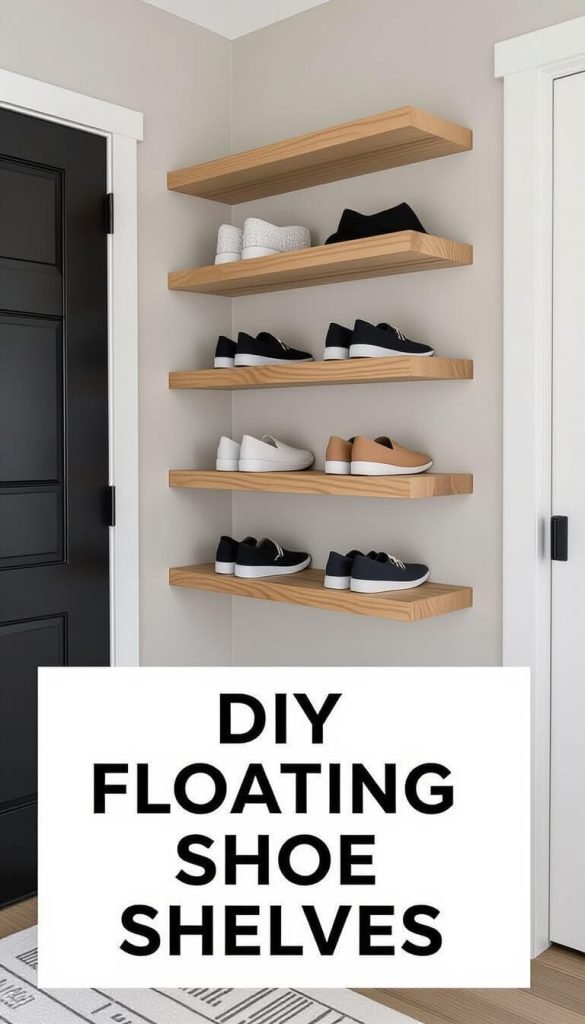
Tools & Materials
- 1×6 or 1×8 boards (pine is fine)
- Measuring tape
- Pencil
- Level
- Stud finder (optional but helpful)
- Drill + drill bits
- Wood screws
- Wall anchors (if not screwing into studs)
- Sandpaper (120–220 grit)
- Paint or stain + brush/roller
- Optional: L-brackets or decorative shelf brackets
Step 1: Measure Your Space
- Decide where the shelves will go (entryway wall, closet, behind a door, etc.).
- Measure the width of the area to determine how long your shelves can be.
- Decide how many shelves you want and how far apart they’ll be:
- 6–8″ between shelves for regular shoes.
- 10–12″ for boots.
Step 2: Plan Your Shelf Layout
- On a piece of paper, sketch the wall and shelves.
- Mark:
- Shelf length
- Number of shelves
- Height from the floor for the bottom shelf (usually 8–12″ up).
- Use painter’s tape on the wall to mock up where shelves will sit. Adjust until it feels right.
Step 3: Cut and Prep the Boards
- Have boards cut at the store or cut at home to your planned lengths.
- Lightly sand all surfaces and edges until smooth.
- Wipe off dust with a dry cloth.
- Apply paint or stain:
- Work in thin coats.
- Allow to dry fully between coats.
- Optional: Seal with a clear topcoat for extra durability.
Step 4: Mark Shelf Positions on the Wall
- Use a level and pencil to draw light horizontal lines where each shelf will go.
- If using brackets:
- Mark bracket positions along those lines (typically 1–2″ in from each end).
- If screwing through the board from above:
- Mark your screw positions directly on the wall where the board will sit.
Step 5: Find Studs (If Possible)
- Use a stud finder to locate studs along your lines.
- Mark stud locations with a small pencil line.
- Plan to put at least one screw or bracket into a stud for strength.
Step 6: Install Anchors or Brackets
If using brackets:
- Drill pilot holes where each bracket will go (into studs if you can).
- If there’s no stud, insert wall anchors according to package instructions.
- Screw brackets into place, checking with a level as you go.
If not using brackets (screwing boards directly to the wall):
- Drill pilot holes through the wall where your board will sit.
- Insert anchors where there’s no stud.
- Leave the anchors flush with the wall.
Step 7: Attach the Shelves
With brackets:
- Place a shelf board on top of the brackets.
- Make sure it’s level front-to-back and side-to-side.
- Screw up through the brackets into the underside of the shelf.
Without brackets:
- Hold the shelf board against the wall along your pencil line (a helper is handy here).
- Drive screws down through the top of the board into studs/anchors.
- Use at least two screws per shelf; more for longer shelves.
Step 8: Check Level and Adjust
- Place the level on the shelf and check both directions.
- If slightly off, loosen screws, adjust, and retighten.
Step 9: Load and Style
- Place your most-used shoes on the middle shelves for easy reach.
- Use upper shelves for dress shoes or seasonal pairs.
- Add a small plant, basket, or decorative tray on the top shelf to make it feel styled, not just functional.
2. Slim Vertical Shoe Cabinet (Flip-Down or Open-Shelf Style)
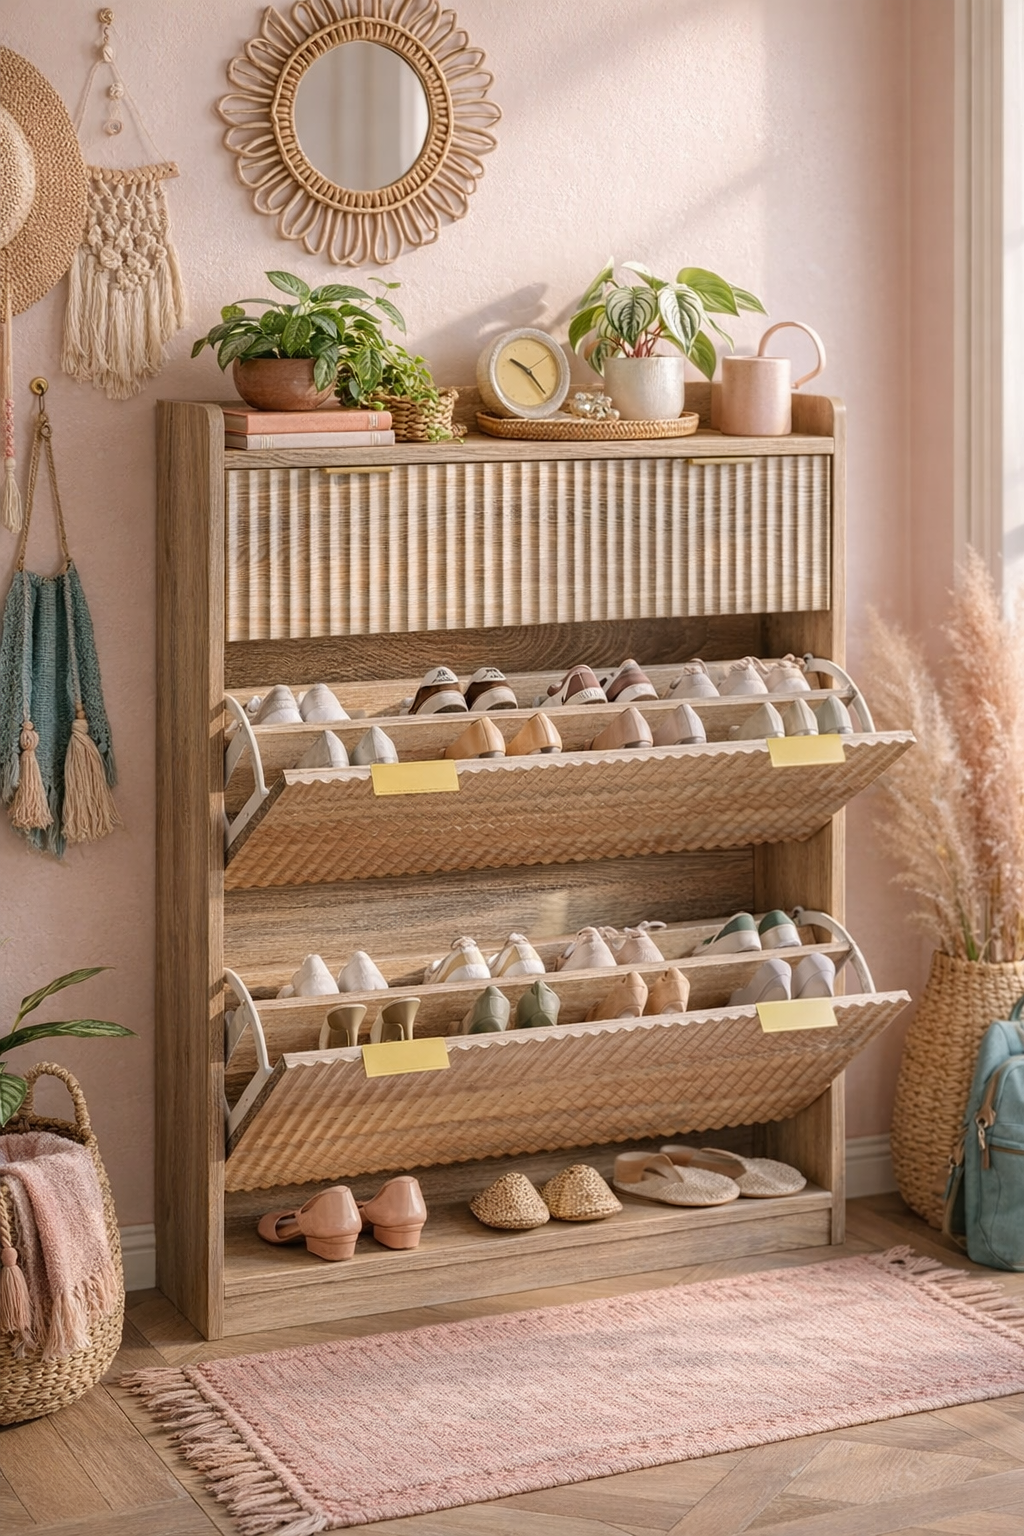
Tools & Materials
- ¾” plywood or furniture-grade boards for sides, top, bottom, and shelves
- 1×2 boards for face frame or trim (optional)
- Hinges (for doors/flip-down fronts, if using)
- Magnetic catches or small knobs/pulls (if doors)
- Screws and wood glue
- Drill + bits
- Measuring tape, square, level
- Sandpaper
- Paint or stain
Step 1: Decide Size and Style
- Measure your wall space:
- Width (often 12–16″ for a slim cabinet).
- Height (you might go 36–60″+, depending on ceiling height).
- Decide:
- Open shelves (easier build) or
- Flip-down fronts / doors (more hidden and polished).
Step 2: Cut Main Cabinet Panels
- Cut:
- 2 side panels (height of cabinet x desired depth, e.g., 48″ x 10″).
- 1 top panel (width x depth).
- 1 bottom panel (width x depth).
- Optional: 1 or 2 fixed shelves (for structure).
- Sand all cut edges smooth.
Step 3: Assemble the Cabinet Box
- Stand the two side panels upright.
- Position the top panel between them and attach with wood glue and screws (through the sides into the ends of the top panel).
- Repeat with the bottom panel.
- Check for square using a carpenter’s square or by measuring diagonals (they should be equal).
Step 4: Add Shelves Inside
- Mark shelf locations inside the side panels:
- 6–8″ apart for regular shoes; leave one taller section if you wear boots.
- Pre-drill holes through the sides at each shelf location.
- Place shelves in position and screw through the sides into the ends of the shelves.
- Double-check that each shelf is level before fully tightening.
Step 5: Decide on Back Panel (Optional but Recommended)
- Cut a thin sheet of plywood or hardboard to size for the back.
- Attach with brad nails or short screws around the perimeter.
- The back helps square and strengthen the cabinet.
Step 6: Add Doors or Flip-Down Fronts (Optional)
For simple hinged doors:
- Measure and cut door panels to match cabinet height and width (either one full door or two narrower doors).
- Attach hinges to the door and then to the cabinet side.
- Install magnetic catches or roller catches inside.
- Add knobs or pulls.
For flip-down fronts (more advanced but still doable):
- Cut shallow front panels to cover only the shoe shelf area.
- Install small hinges along the bottom edge of each panel so it flips down.
- Use small chains or stays inside to prevent the front from opening too far.
Step 7: Finish the Cabinet
- Fill any visible screw holes with wood filler if you want a smoother look.
- Sand flush once dry.
- Paint or stain the entire cabinet; let it fully cure.
Step 8: Secure the Cabinet to the Wall
- Move the cabinet into place.
- Locate wall studs behind it with a stud finder.
- Drill through the cabinet back into studs and use long screws to secure.
- If no stud is available where you need it, use appropriate heavy-duty wall anchors.
Step 9: Load and Organize
- Store heavier shoes (boots, winter shoes) on lower shelves.
- Place lighter shoes higher up.
- Use a small basket inside for socks, insoles, or polishing supplies.
3. Modular Wooden Crate Shoe Organizer
Tools & Materials
- Ready-made wooden crates or 1×3/1×4 boards to build your own
- Sandpaper
- Paint or stain
- Screws or small brackets (for connecting crates, if desired)
- Drill/screwdriver
- Optional: Furniture pads, small casters, or felt feet
Step 1: Decide How Many Crates You Need
- Count your shoes and estimate:
- A medium crate usually holds 3–4 pairs of adult shoes.
- Decide whether this will:
- Sit under a bench,
- Stack as a vertical tower, or
- Form a low, wide storage wall.
Step 2: Prep the Crates
If using store-bought crates:
- Sand any rough edges or splinters.
- Wipe clean.
If building simple crates:
- Cut boards for:
- 2 long sides
- 2 short ends
- Slats or a solid piece for the base
- Screw the frame together (like a simple open box), then attach slats on the bottom.
Step 3: Paint or Stain
- Choose a color scheme:
- All one color for a minimalist look.
- A gradient or mixed pastels for a playful effect.
- Paint or stain each crate and let them dry completely.
- Optionally seal with a clear coat for durability.
Step 4: Plan Your Layout
- On the floor or wall, test different configurations:
- Two or three crates stacked vertically for a slim tower.
- A 2×2 grid for a small entryway “console.”
- A long row under a bench.
- Make sure stacks feel stable and accessible.
Step 5: Stabilize the Stack (If Stacking)
- Once you like the arrangement, decide whether you want the crates to be:
- Fixed together (more stable, less flexible) or
- Loose and modular (easy to move and reconfigure).
To fix together:
- Use small L-brackets or screws from one crate into the next at their touching corners.
- Keep screws short so they don’t poke through.
- For tall stacks, secure the top crate to the wall with a small angle bracket or anti-tip strap.
Step 6: Add Feet or Casters (Optional)
- Flip the crate stack or individual crates upside-down.
- Attach felt pads to protect floors, or screw on small casters if you want them to roll (nice for closets).
Step 7: Load and Style
- Store everyday shoes in the crates closest to your natural traffic path (like right by the door).
- Assign one crate per person or per shoe type:
- Kids, adults, dress shoes, workout shoes, etc.
- Add small labels, tags, or painted icons on the front for a cute, organized look.
Step 8: Reconfigure as Needed
- If your needs change (more shoes, seasonal gear, kids’ sizes changing), rearrange:
- Add more crates to the top or side.
- Split the stack into two smaller units in different areas.
- That flexibility is the big advantage of this style
4. Flip-Down Entryway Shoe Cabinet
Tools & Materials
- ¾” plywood or furniture boards (for case + fronts)
- 1×2 boards (for internal supports/dividers)
- Piano hinge or pairs of small hinges (for each flip-down front)
- Small chains or lid-support stays (to stop fronts from opening too far)
- Screws + wall anchors
- Wood glue
- Drill + bits, screwdriver
- Measuring tape, pencil, level, square
- Sandpaper (120–220 grit)
- Paint or stain + brush/roller
- Knobs or pulls
- Optional: thin plywood/hardboard for cabinet back
Step 1: Plan Cabinet Size & Layout
- Measure the wall where the cabinet will go.
- Decide cabinet depth—6–8″ is typical for a slim shoe cabinet.
- Decide:
- Overall height and width.
- How many flip-down compartments you want (for example, 2–3 fronts stacked vertically).
- Sketch a quick front view and side view with compartment heights (usually 10–12″ tall each).
Step 2: Cut Main Cabinet Pieces
- Cut:
- (2) side panels = cabinet height x depth
- (1) top panel = width x depth
- (1) bottom panel = width x depth
- (Optional) internal horizontal dividers = width x depth (between compartments)
- Sand all edges smooth.
Step 3: Assemble the Cabinet Box
- Lay the two side panels on edge.
- Attach the top panel between them with wood glue and screws (through the sides into the top).
- Repeat with the bottom panel.
- If using fixed dividers, mark their positions inside and attach the same way.
- Check that the box is square using a square or by comparing diagonal measurements.
Step 4: Add a Back (Optional but Helpful)
- Cut a back panel from thin plywood/hardboard to fit the cabinet.
- Attach with brad nails or short screws around the perimeter of the back edges.
- This strengthens the cabinet and makes wall-mounting easier.
Step 5: Build the Flip-Down Compartments
Option A: Single-depth front (shoes sit directly inside box)
- Measure each compartment opening.
- Cut a front panel for each, slightly smaller than the opening so it has a small reveal around the edges.
- Sand and finish (paint/stain) the panels.
Option B: Tilt-out inner bin (more contained) – slightly more advanced
- Build simple shallow boxes that will sit behind each front, sized to fit inside each compartment.
- Attach the inner box to the front panel with screws or brackets along the bottom edge so they move as one unit.
If you’re a beginner, Option A (just a front with a simple shoe rail inside the cabinet) is easiest.
Step 6: Install Hinges
- Place a front panel in its opening and decide how far it should tilt out (usually 45–60°).
- Mark hinge locations along the bottom edge of the compartment:
- Use a continuous piano hinge or two/three small hinges spaced evenly.
- Attach the hinge to the front panel first.
- Then attach the other side of the hinge to the cabinet bottom/divider edge so the front can tilt out.
Step 7: Add Chains or Stays
- With the front tilted open to your desired angle, hold a small chain or stay from the inside of the cabinet to the inside of the front.
- Mark attachment points.
- Screw the ends in place so the chain/stay stops the panel at the right open angle (and doesn’t flop all the way down).
Step 8: Add Internal Shoe Support (Optional but Nice)
- Inside each compartment, add a simple angled rail or shallow shelf:
- Attach a 1×2 to each side interior, angled slightly so shoes lean back.
- Or attach a shallow bottom shelf a few inches above the lower edge so shoes sit at an angle.
- Secure with screws and glue.
Step 9: Finish & Install Hardware
- Fill visible screw holes with wood filler, let dry, and sand smooth.
- Paint or stain the entire cabinet and fronts; let fully cure.
- Attach knobs or pulls to each flip-down front.
Step 10: Mount the Cabinet to the Wall
- Move the cabinet into position.
- Use a stud finder to locate studs behind the cabinet.
- Drill through the cabinet back into studs and secure with long screws at the top and middle.
- If no stud is available, use heavy-duty wall anchors.
Step 11: Load Shoes
- Place lighter shoes in upper compartments, heavier ones lower.
- Adjust the internal rail or shelf if needed so shoes sit neatly and don’t slide.
5. Under-Bench Shoe Cubbies
Tools & Materials
- ¾” plywood or furniture boards (bench top + cubby dividers)
- 1×2 boards (front trim/supports, optional)
- Screws + wood glue
- Drill + bits
- Measuring tape, square, level
- Sandpaper
- Paint or stain + brush/roller
- Optional: baskets or bins to slide into cubbies
Step 1: Measure Your Bench & Space
- Decide whether you’re:
- Building a new bench with cubbies, or
- Adding cubbies under an existing bench.
- Measure:
- Bench length.
- Desired bench height (18–20″ is typical seating height).
- Depth (14–16″ works for most shoes).
Step 2: Plan Cubby Layout
- Decide how many cubbies you want across the width.
- Standard cubby width for shoes is about 8–10″.
- Sketch a front view:
- Total width ÷ desired cubby width = how many sections you can fit.
- Decide if you want:
- One row of cubbies, or
- Two shorter rows stacked (for more storage).
Step 3: Cut Panels and Dividers
- Cut:
- (2) side panels = bench height x depth
- (1) top panel (bench seat) = length x depth
- (1) bottom panel (cubby base) = length x depth
- Cut vertical dividers:
- Height = distance from bottom panel to underside of bench top
- Depth = same as bench depth (minus a tiny bit for easy fit)
- Sand all edges.
Step 4: Assemble Base and Sides
- Lay the bottom panel flat.
- Stand the two side panels at each end of the bottom and attach with glue and screws.
- Make sure everything is square.
Step 5: Mark Cubby Divider Positions
- Measure and mark equal spacing along the bottom panel where each vertical divider will sit.
- Transfer marks up the inside of the top area so you know where to secure the dividers.
Step 6: Install Vertical Dividers
- Apply a bead of wood glue along the bottom edge of a divider.
- Stand it up on its mark and clamp if you have clamps.
- From the underside of the bottom panel, drive a screw up into the divider.
- Repeat for each divider.
- Add screws through the top panel into the tops of the dividers once the top is attached (next step).
Step 7: Attach the Bench Top
- Place the top panel (bench seat) on top of the side panels and dividers.
- Flush the edges with the sides and center it front-to-back.
- Drill pilot holes and then drive screws down from the top into each side panel and divider.
- Check for stability.
Step 8: Add Front Trim (Optional)
- To hide raw plywood edges, cut 1×2 trim pieces to fit along the front bottom and around the openings.
- Attach with glue and brad nails or small screws.
- This gives a more polished, furniture-like look.
Step 9: Finish the Bench
- Fill any visible screw holes with wood filler.
- Sand everything smooth, especially the seat edges.
- Paint or stain, then seal if desired.
- Let dry thoroughly.
Step 10: Add Shoes and Styling
- Slide shoes into each cubby—one pair per cubby or stacked if tall enough.
- Use baskets or bins for kids’ shoes, hats, or gloves.
- Add cushions or pillows on top of the bench for a cozy entryway feel.
6. Floating Toe-Kick Shoe Rack
This is a minimalist rack that uses a slim rail or “lip” along the wall to hold shoes off the floor—great under existing cabinetry or along a hallway baseboard.
Tools & Materials
- 1×2 or 1×3 wood strip (length to fit along the wall)
- Optional: second strip or thin dowel for a two-rail design
- Screws + wall anchors
- Drill + bits
- Stud finder
- Level, measuring tape, pencil
- Sandpaper
- Paint or stain
Step 1: Choose the Location
- Decide where the rack will go:
- Under existing cabinets as a “toe-kick” rail, or
- Low along a wall in the entryway or closet.
- Make sure the wall area is clear and shoes won’t block door swings.
Step 2: Determine Height and Angle
- For most sneakers and flats, mount the rail about 3–5″ above the floor.
- If you want shoes to lean back against the wall:
- A single rail works for heels (heel catches on top edge).
- For sneakers, you can add a second rail a few inches above the first to cradle the toes.
Step 3: Cut and Prep the Rail(s)
- Cut your 1×2 or 1×3 to the desired length.
- Sand edges and corners so there are no splinters.
- Paint or stain the rail(s) to match the wall, trim, or cabinetry.
- Allow to dry completely.
Step 4: Mark Mounting Line on the Wall
- Use a level to draw a light horizontal line at your chosen height above the floor.
- This line is where the top of your rail will sit (or where the screws will go, depending on your design).
Step 5: Locate Studs
- Use a stud finder to locate studs along your line.
- Mark their positions with a small pencil mark above the line.
- Plan to put at least a couple of screws into studs for strength.
Step 6: Pre-Drill Rail
- Lay the rail on a flat surface.
- Mark screw positions along the length (over studs and in between, if needed).
- Pre-drill holes through the rail so it’s easier to screw into the wall.
Step 7: Attach Rail to the Wall
- Hold the rail along your level line (a helper is handy).
- Starting at a stud location, drive a screw through the rail and into the stud.
- Check for level, adjust as needed, and then add additional screws along the length, using anchors where there is no stud.
For a two-rail design:
- Repeat the process for the second rail, mounted a few inches above the first (usually 3–4″).
- Make sure they are parallel and level.
Step 8: Fine-Tune Shoe Position
- Test a pair of shoes:
- For heels: hook the heel over the top of the rail so they hang neatly.
- For sneakers/flats: lean them with the sole resting on the lower rail and toes touching the wall, or toes against the upper rail if you used two rails.
- Adjust rail height if necessary (better to test before filling all screw holes).
Step 9: Fill & Touch Up
- If you’d like a clean look, countersink screws slightly.
- Fill screw holes with wood filler, sand smooth once dry.
- Touch up paint or stain on the rail and around holes if needed.
Step 10: Load Shoes and Enjoy the Clear Floor
- Line shoes along the rack, grouping by person or shoe type.
- Use the wall space above for hooks, a mirror, or artwork to complete the area.