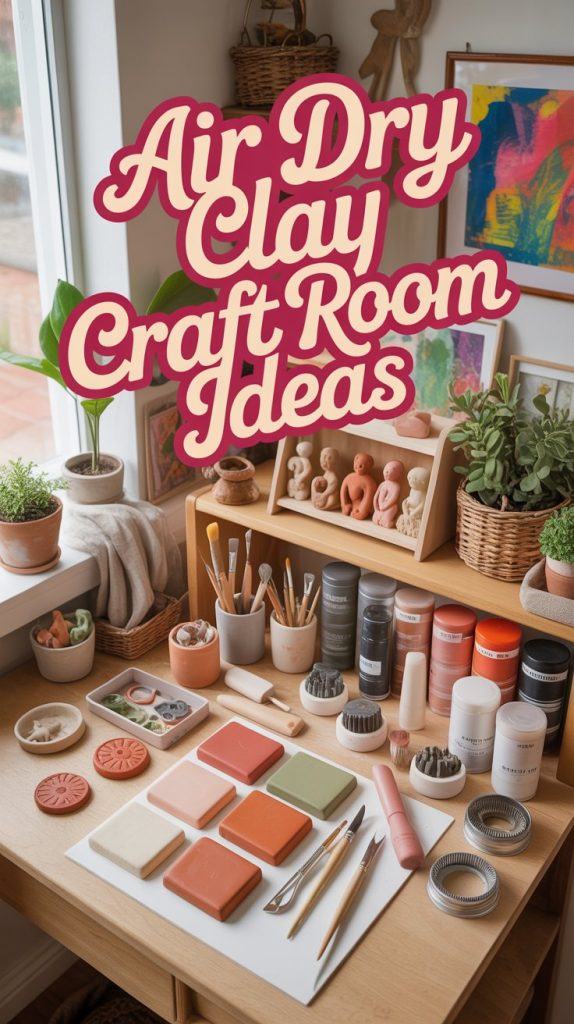
Air dry clay is one of my favorite crafts because it’s inexpensive, beginner-friendly, and incredibly versatile. With just a few basic supplies, you can create everything from home decor and ornaments to gifts and seasonal decorations. But if you’ve spent any time working with clay, you know it doesn’t stay neatly contained for long. Rolling pins, sculpting tools, paint brushes, half-finished projects, and little containers of embellishments seem to multiply overnight.
Unlike many other crafts, air dry clay also has a unique workflow. You might be sculpting one project, waiting for another to dry, sanding a third, and painting one you started earlier in the week—all at the same time. That means your craft space needs to support multiple projects in different stages without turning into a cluttered mess. That’s exactly the problem my Project Bin system solves, and I’ll walk you through it later in this post. You also have to think about things like protecting unused clay from drying out, giving projects a safe place to cure, and choosing a room with the right temperature and airflow so your creations dry evenly.
The good news is that you don’t need a huge craft room to enjoy working with air dry clay. Whether you have an entire room, a corner of your home office, or a rolling cart that tucks into a closet, a thoughtfully organized workspace can make crafting more enjoyable and less stressful. When your favorite tools are easy to find, your works in progress stay organized, and you have a dedicated drying area with the right conditions, you’ll spend more time creating and less time searching for supplies—or wondering where that half-finished ornament disappeared to.
In this guide, I’ll share practical air dry clay craft room ideas to help you create a workspace that fits your space, budget, and crafting style. We’ll cover storage solutions, workstation essentials, organization tips, and simple ways to create an efficient workflow from the moment you open a new package of clay to the final coat of sealant.
Before deciding where everything belongs, though, resist the temptation to start shopping for storage containers. The best organization systems begin by organizing what you already own. That’s where the CRAFT Planning Method comes in. By following these five simple steps, you’ll create a workspace that’s functional, clutter-free, and easy to maintain—whether you’re setting up a brand-new craft room or simply refreshing an existing one. Check out my Ultimate Craft Room Planning post for an in-depth overview of the CRAFT method if you want more details! The basic steps tailored to air dry clay craft space are laid out below
.
The CRAFT Method: Organizing Your Air Dry Clay Craft Space
A beautiful craft room isn’t just about having matching bins or a perfectly styled shelf. The best creative spaces are the ones that make it easier to start a project. When your supplies are organized around the way you actually create, crafting feels less like a chore and more like an invitation.
The CRAFT Method is a simple five-step process for organizing any craft space:
C — Clear the Space
R — Reduce the Clutter
A — Assess Your Space
F — Follow the Flow
T — Take measurements
This method works especially well for air dry clay because it helps you organize not just your supplies, but your entire creative workflow.
C — Clear the Space
The first step is to start with a blank slate.
Before buying storage containers or rearranging shelves, take everything out of your current craft area. Gather all of your air dry clay supplies in one place so you can see exactly what you have.
This includes:
- unopened and opened clay packages
- sculpting tools
- molds and cutters
- texture rollers and stamps
- paints and brushes
- unfinished projects
- sealers and finishing supplies
- craft supplies that may have wandered into this space
At this stage, don’t worry about organizing anything. The goal is simply to see the full picture.
Many craft spaces become frustrating because supplies are scattered in different drawers, closets, and cabinets. You might buy a new set of tools only to discover you already owned three similar ones hiding somewhere else.
Clearing everything out gives you a fresh starting point and helps you design a system based on what you actually use.
R — Reduce the Clutter
Once everything is gathered together, it’s time to decide what deserves a spot in your creative space.
Craft supplies can be especially difficult to declutter because they often represent ideas we hope to make someday. That unopened clay kit might remind you of the project you wanted to try six months ago, but if it no longer excites you, it may be taking up valuable creative energy.
As you sort, create a few categories:
Keep the Supplies that Support Your Crafting
As you sort through your air dry clay supplies, it can help to understand which tools are truly useful and which ones are simply taking up valuable space.
You don’t need every specialty tool to create beautiful projects. Many beginners are surprised by how much they can make with a small collection of reliable basics.
A well-rounded air dry clay setup usually includes:
Clay & Storage
- Air dry clay in colors or quantities you actually use
- Airtight containers or zip-top bags for storing opened clay
- Plastic wrap for keeping clay fresh between sessions
Work Surface
- Silicone craft mat, wax paper, canvas sheet, or smooth board to protect your workspace
Basic Shaping Tools
- Rolling pin or acrylic roller
- Thickness guides or wooden dowels
- Craft knife or cutting tool
- Needle tool or toothpicks for details
Texture & Design Tools
- Cookie cutters
- Texture stamps or mats
- Household items that create interesting impressions
Finishing Supplies
- Fine-grit sandpaper
- Acrylic paints
- Paint brushes
- Clear sealant
As you sort, ask yourself:
- Do I use this tool regularly?
- Does this help me create projects I enjoy?
- Would I notice if this disappeared?
- Am I keeping this because I use it—or because I might use it someday?
The goal is not to have the largest collection of supplies. The goal is to keep the materials that make you excited to create.
Donate or Discard
Donate good-quality supplies that someone else could enjoy but no longer fit your crafting style, or are duplicates (for example, your cookie cutter collection might not need 3 different heart shapes).
Discard things that are dried out, broken, empty, or no longer usable.
For air dry clay specifically, check:
- Is the clay still soft and workable?
- Are tools broken or missing pieces?
- Are paint bottles dried out?
- Do you actually enjoy using this supply?
Remember, the goal isn’t to create the biggest craft collection. It’s to create a space that makes you excited to sit down and make something.
A — Assess Your Space
Your workspace isn’t just about storage and organization—the room itself can affect how well your air dry clay projects turn out. So we want to make sure we pay attention to the environmental factors in your room.
Avoid Direct Heat
It can be tempting to place projects near a sunny window, space heater, radiator, fireplace, or heating vent to help them dry faster. Unfortunately, rapid drying often causes the outer surface to shrink before the inside has finished drying, which can lead to cracks, warping, or uneven drying.
Instead, let your pieces dry naturally at room temperature on a flat surface.
Watch the Humidity
Humidity also plays a role in drying time.
- High humidity slows drying and may add an extra day or two before projects are ready to sand or paint.
- Very dry conditions can cause clay to dry too quickly, especially around delicate edges or thin pieces.
If you live in a humid climate, simply plan for longer drying times rather than trying to force the process with heat.
Choose the Right Drying Location
Your drying area should be just as intentional as your workspace.
When choosing a location for unfinished pieces, consider:
- Is it away from pets and kids?
- Is it protected from accidental bumps?
- Is it away from direct sunlight, heating vents, and drafts?
- Does it have enough space for multiple projects drying at once?
A dedicated shelf, tray, or cabinet can prevent damaged projects and make it easier to manage multiple pieces at different stages. Avoid placing drying projects directly beneath heating or air-conditioning vents where constant airflow can dry one side faster than the other.
Gentle Airflow Is Fine
Good overall room ventilation helps moisture leave the room naturally, but direct airflow isn’t necessary.
If your craft room feels stuffy, a ceiling fan on a low setting or a small desktop fan positioned to circulate air around the room (rather than blowing directly on your projects) can help maintain comfortable working conditions. The goal is gentle air circulation—not creating a wind tunnel aimed at your clay.
A little patience during the drying stage usually results in smoother, stronger, and less crack-prone finished pieces.
Evaluate Your Lighting
Good lighting can make the difference between a frustrating crafting session and an enjoyable one. Air dry clay projects often involve tiny details, subtle textures, and careful painting, so it’s worth thinking about your lighting before you set up your workspace.
Take advantage of natural light whenever possible.
If your craft room has a window, position your work surface nearby to make the most of daylight. Natural light makes it easier to judge paint colors, spot fingerprints before the clay dries, and see fine details while sculpting.
Of course, many of us craft in the evenings or on rainy days, so don’t rely on natural light alone.
Layer your lighting with task lights.
A dedicated desk lamp or adjustable LED task light provides focused illumination exactly where you need it. Look for lamps with adjustable brightness and flexible arms so you can direct the light onto your project without creating harsh shadows.
If your craft room is larger, combine task lighting with good overhead lighting to evenly illuminate the entire space. This makes it easier to move between your work surface, drying shelves, and storage areas without constantly carrying supplies into better light.
Reduce shadows whenever possible.
If you’re right-handed, place your task light on the left side of your workspace so your hand doesn’t cast a shadow over your project while sculpting or painting. Left-handed crafters should do the opposite.
Finally, take a moment to notice when you naturally like to craft. If you’re usually creating after dinner, test your lighting at night—not just during the day—to make sure your workspace is bright enough for detailed work without causing eye strain.
Pro tip: Before settling on your workspace, make sure you have convenient access to electrical outlets. You’ll likely want to plug in a task light, charge your phone while following tutorials, or use small craft tools without running extension cords across the room.
Protect Your Projects
F — Follow the Flow
This is where we organize your supplies for a smoother workflow. One of the easiest ways to make air dry clay projects more enjoyable is to organize your supplies in the order you use them. Instead of storing all your tools in one drawer and all your paints in another, create small “stations” that follow the natural progression of a project. You’ll spend less time hunting for supplies and more time creating.
Prep Station
Keep everything you need to begin a project together so you can start crafting in just a few minutes.
Store together:
- Silicone craft mat or non-stick work surface
- Rolling pin or acrylic roller
- Thickness guides or wooden dowels
- Airtight containers of clay
- Plastic wrap and heavy-duty zip-top bags
- Small spray bottle or bowl for water
Organization Tips:
- Store your silicone mat rolled loosely in a basket or flat in a drawer to prevent permanent creases.
- Keep unopened clay in an airtight container or bin with extra zip-top bags and plastic wrap nearby. As soon as you’re finished with a project, wrap leftover clay tightly in plastic wrap before sealing it inside a bag or container.
- Keep a small lidded container in your prep station for your water bowl so it’s always ready when you sit down to craft.
- Place your prep station closest to your main work surface since you’ll use these supplies first every time.
Sculpting Station
These are the tools you’ll reach for constantly while shaping your project.
Store together:
- Needle tool or toothpicks
- Craft knife
- Wire cutter
- Silicone sculpting tools
- Texture tools
- Cookie cutters
Organization Tips:
- Use divided drawer organizers or clear compartment boxes to separate tools by type.
- Stand frequently used tools upright in a pencil cup or rotating caddy so they’re easy to grab without searching through a drawer.
- Keep sharp blades in a labeled container with protective covers for safety.
- Store cookie cutters by theme (flowers, holidays, geometric shapes, etc.) in small labeled bins or zipper pouches.
Texture & Design Station
These supplies add personality and detail to your creations.
Store together:
- Texture mats
- Rubber stamps
- Lace samples
- Burlap scraps
- Embossing tools
Organization Tips:
- Store flat texture sheets vertically in magazine files or document organizers so you can quickly flip through your options.
- Keep fabric textures folded inside labeled zip-top bags to prevent dust from collecting on them.
- Save small scraps of lace, ribbon, and textured materials in a single “texture inspiration” basket instead of scattering them throughout your craft room.
Drying Station
One of the biggest mistakes beginners make is leaving projects wherever they happen to finish working. Giving your clay a dedicated drying space protects your hard work.
Organization Tips:
- Dedicate a shelf, tray, or portable baking rack exclusively for drying projects.
- Line trays with parchment paper so pieces won’t stick.
- Leave enough space between projects for good air circulation.
- If you often work on multiple projects at once, use small labels with the project name or date to help keep track of what’s ready for sanding or painting.
- Place the drying station somewhere it won’t be bumped by kids, pets, or everyday household traffic.
Finishing Station
Once your clay has fully dried, it’s time to sand, paint, and seal.
Store together:
- Fine-grit sandpaper
- Acrylic paints
- Paintbrushes
- Palettes
- Sealants such as Mod Podge or acrylic varnish
Organization Tips:
- Store paint bottles upright in shallow drawers or tiered organizers so every color is visible.
- Keep brushes standing with the bristles facing upward to help maintain their shape.
- Separate everyday colors from specialty metallics or seasonal paints so you aren’t digging through dozens of bottles.
- Keep sanding supplies in a small labeled container since you’ll typically use them before painting.
- Store sealants together on a higher shelf away from direct sunlight and extreme temperatures.
Create a Cleanup Station
A great craft room isn’t just designed for creating—it should also make cleanup quick and painless. One of the biggest barriers to starting a creative project is knowing you’ll have a big mess to deal with afterward.
With air dry clay, a simple cleanup routine helps protect your workspace, keep supplies organized, and make it easier to jump back into your next project.
Keep these cleanup supplies within easy reach of your workspace:
Paper Towels or Reusable Cloths
Paper towels are helpful for quickly wiping clay residue, drying your hands, cleaning tools, and soaking up small spills. If you craft often, consider keeping a stack of washable microfiber cloths nearby as a more sustainable option.
Baby Wipes or Cleaning Wipes
Baby wipes are one of the most useful supplies for air dry clay projects. They can help:
- Remove clay residue from your hands
- Clean small amounts of clay from tools
- Wipe down your work surface
- Clean paint drips before they dry
Keep a container nearby so you can quickly grab one without leaving your workspace.
Trash Can or Scrap Bowl
Having a small trash can right next to your crafting area prevents scraps and packaging from piling up around your workspace.
You may also want a small bowl or container for clay scraps while you’re working. Depending on the project, some scraps can be reused by adding a little water and conditioning them again. Other scraps may be too dried out and are best discarded.
Small Brush or Dustpan
Tiny clay crumbs and sanding dust can quickly collect around your workspace. A small handheld brush, mini dustpan, or rechargeable handheld vacuum makes it easy to clean your work surface without disrupting the rest of your craft room.
Dedicated Tool Cleaning Area
At the end of each project session:
- Remove leftover clay from tools before it hardens.
- Wipe tools clean with a damp cloth or baby wipe.
- Dry tools completely before storing them.
- Return supplies to their designated locations.
This prevents tools from becoming sticky, damaged, or buried under supplies before your next project.
Your 5-minute reset routine – do this after every session:
- Toss scraps and packaging — jot down your next step on the project card
- Wrap and store leftover clay (see my [Ultimate Guide to Air Dry Clay Crafts] for how to keep it fresh long-term)
- Wipe down tools and work surface
- Place unfinished pieces in their project bin
- Return tools to their designated spot
- Label opened clay with the date and color/type so you know what you have available.
- Consider storing frequently used clay colors together in a labeled bin so they are easy to grab before starting a project.
The easier it is to clean up, the easier it becomes to start creating again.
T — Take Measurements Before Adding Storage
The final step in the CRAFT Method is Take Measurements—and this step can save you from one of the most common organizing mistakes: buying storage solutions before you know exactly what you need.
After you have cleared out your supplies, reduced the clutter, assessed your space, and created a workflow, you’ll have a much better idea of what storage will actually support your crafting style.
Before shopping, take inventory of the gaps in your current setup:
- Do you need more space for clay and unfinished projects?
- Are your tools difficult to find when you’re working?
- Do paints and small supplies need better organization?
- Do you need a dedicated drying area?
- Are your most-used supplies within easy reach?
- Are you trying to maximize a small corner instead of an entire craft room?
Once you know what problems you need to solve, it’s time to measure.
Measure Before You Buy
It can be tempting to purchase a beautiful rolling cart or set of storage drawers because it looks perfect online—but the wrong size can quickly become another source of frustration.
Before buying any storage solution, measure:
- Available floor space
- Height and width of shelves or cabinets
- Desk or countertop space
- Wall space for vertical storage
- Distance between furniture pieces
- Doorways and closet openings (especially for larger pieces)
Also consider what needs to fit inside the storage. A drawer that looks spacious may not be tall enough for paint bottles. A narrow shelf may not fit drying trays or project bins.
A few minutes with a measuring tape can prevent returns, wasted money, and storage that doesn’t actually improve your workflow.
Air Dry Clay Storage Options
There is no single perfect craft room setup. The best storage solution depends on your available space, the types of projects you make, and how often you use your supplies.
Storage Drawers: Best for Small Supplies
Clear drawer units are one of the most versatile options for air dry clay organization.
Great for storing: Paint bottles, bottles, clay tools, texture stamps, cookie cutters, small embellishments, finishing supplies.
Pros:
- Keeps supplies contained and dust-free
- Makes it easy to organize by category
- Clear drawers allow you to see what you own
- Works well in small spaces
Cons:
- Drawers can become “junk drawers” without labels
- Small drawers may not fit larger tools or project supplies
- Requires opening multiple drawers to find things
Best tip: Use labels even with clear drawers. A simple label helps everyone know where supplies belong and makes cleanup faster.
Rolling Carts: Best for Flexible Workspaces
A rolling cart is one of my favorite solutions for craft spaces because it allows your supplies to come to you.
Great for storing:
- Everyday clay tools
- Current projects
- Paint supplies
- Frequently used materials
Pros:
- Easy to move around the room
- Perfect for small spaces
- Creates a portable craft station
- Can tuck beside a desk or closet when not in use
Cons:
- Open storage can collect dust
- Easy to overload with too many supplies
- Not ideal for storing large quantities of materials
Best tip: Dedicate each shelf to a stage of your workflow:
- Top shelf: supplies you use every project
- Middle shelf: tools and materials
- Bottom shelf: heavier items or project bins
Pegboards: Best for Frequently Used Tools
A pegboard turns unused wall space into functional storage and keeps your favorite tools visible.
Great for storing:
- Sculpting tools
- Scissors
- Rulers
- Paint brushes
- Cutting tools
- Texture tools
Pros:
- Keeps frequently used tools within reach
- Frees up valuable drawer space
- Makes tools easy to see
- Can be customized as your needs change
Cons:
- Requires wall space and installation
- Open storage can look visually busy
- Less useful for small supplies
Best tip: Use pegboard for tools you reach for regularly, not everything you own. A wall full of supplies can quickly become overwhelming.
Vertical Shelving: Best for Maximizing Space
When floor space is limited, think upward.
Tall shelves can provide valuable storage without taking over your workspace.
Great for storing:
- Project bins
- Drying trays
- Craft books
- Baskets
- Larger supplies
Pros:
- Maximizes small rooms
- Creates dedicated storage zones
- Keeps supplies organized and visible
Cons:
- Higher shelves can be inconvenient for frequently used items
- Open shelves require more visual organization
- May need bins to prevent clutter
Best tip: Store everyday supplies between waist and eye level. Use higher shelves for seasonal materials or specialty tools you use less often.
Small Tool Organization: Don’t Forget the Tiny Things
Air dry clay projects often involve many small tools that can quickly become messy.
Consider using:
- Divided organizers
- Pencil cups
- Small jars
- Bead storage containers
- Drawer inserts
- Magnetic strips
These are perfect for:
- Toothpicks
- Needle tools
- Small cutters
- Jewelry findings
- Detail brushes
- Embellishments
The goal isn’t to have the most storage—the goal is to make your supplies easy to find when inspiration strikes.
After measuring your space and choosing storage solutions that fit your workflow, you’ll be ready to shop with confidence. The result won’t just be a prettier craft room—it will be a space designed to help you actually create.
Create a “Project Bin” for Every Work in Progress
Now that your space is organized into stations, there’s one more piece of the puzzle: keeping track of a project as it moves between them. Unlike many crafts, air dry clay projects rarely happen in a single afternoon. You might sculpt one day, wait 24–48 hours for the clay to dry, sand it the next evening, and finally paint and seal it a few days later. Without a system, it’s easy to forget which paints you planned to use, misplace a specialty cookie cutter, or accidentally let leftover clay dry out before you’re ready to continue.
A simple Project Bin solves all of those problems. Choose a clear plastic bin with a lid that’s large enough to hold everything for one project. When you’re finished crafting for the day, place all of the related supplies back into the bin instead of putting them away in different drawers around your craft room.
Your project bin might include:
- Unfinished clay pieces (only after they’ve firmed up enough to move safely)
- Leftover clay wrapped tightly in plastic wrap and sealed inside an airtight zip-top bag or container
- Specialty tools, cookie cutters, or texture stamps used for that project
- The paint colors, brushes, and sealant you’ll need later
- Sandpaper or finishing supplies for the final steps
- A printed template, sketch, or inspiration photo
- Small embellishments such as ribbon, magnets, jewelry findings, or hanging hardware
Keeping everything together means you can simply grab one bin and start crafting, rather than trying to remember where you left off or searching your craft room for supplies.
Keep a Simple Project Card
Take the idea one step further by adding a small index card or printable project tracker to the front of each bin. Jot down a few notes before you put the project away, such as:
- Date started
- Clay brand and color
- Paint colors you plan to use
- Drying date
- Next step (sand, paint, seal, assemble, etc.)
- Any ideas or changes you want to remember
You’ll be surprised how helpful this is if life gets busy and you don’t return to the project for a week—or even a month.
Store Bins by Stage
If you regularly have multiple projects going at once, consider organizing your bins by where they are in the process:
- Ready to Sculpt – Supplies gathered and inspiration collected
- Drying – Clay pieces curing before sanding
- Ready to Paint – Fully dried and sanded projects waiting for color
- Ready to Finish – Painted projects waiting for sealant or assembly
This simple system gives you an instant snapshot of what you can work on next. If you only have 20 minutes to craft, you can grab a “Ready to Paint” bin and make progress without starting a brand-new project.
The Project Bin system also makes cleanup much easier. At the end of each crafting session, everything has a designated home, your workspace stays clear, and your unfinished projects remain protected until you’re ready to pick them up again. It’s a small habit that can make your craft room feel far more organized—and help ensure more of your creative ideas actually get finished.
Final Thoughts
Craft rooms don’t have to be large to be effective. A thoughtfully organized air dry clay station can fit in a spare bedroom, a corner of the dining room, or even a rolling cart tucked into a closet. By following the CRAFT Method—Clear, Reduce, Assess, Follow the Flow, and Take Measurements—you’ll spend less time searching for supplies and more time creating.