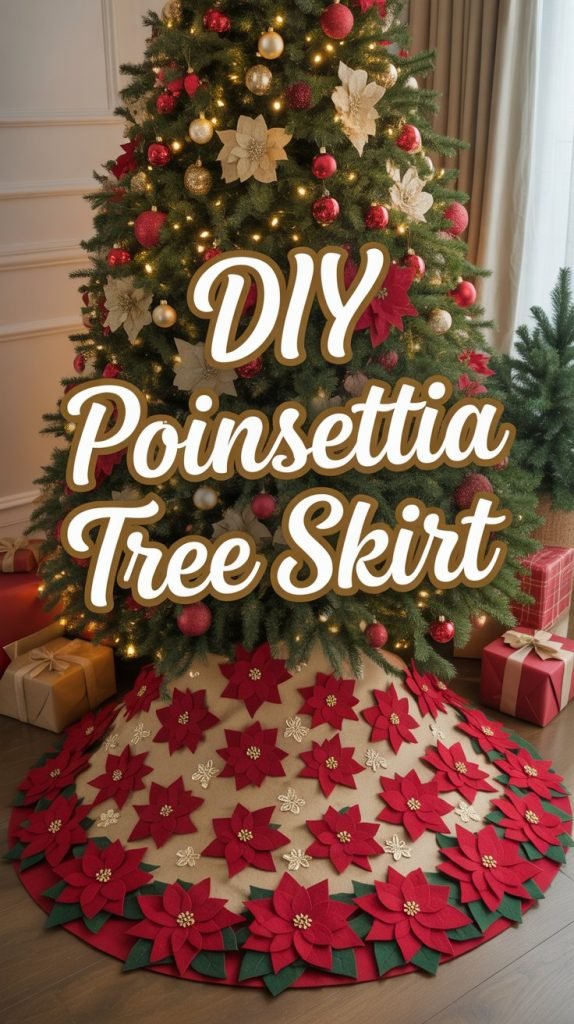
If you love the look of rich red poinsettias and elegant holiday florals, this DIY tree skirt is the perfect way to bring that beauty beneath your tree. Layered felt petals give the design texture and dimension, while gold accents add a festive glow. It’s surprisingly simple to make—and you can adapt the colors or materials to match your holiday style.
Supplies You’ll Need
- 1–1.5 yards red felt (for base)
- ½ yard green felt (for leaves)
- ¼ yard gold or cream felt (for flower centers)
- Fabric scissors or rotary cutter
- Fabric glue or sewing machine
- Pins or clips
- Pencil or chalk
- String (for measuring circle)
- Optional: glitter fabric paint, sequins, or gold trim
Pro Tip: Felt is ideal because it’s sturdy, easy to cut, and doesn’t fray—perfect for both sewing and no-sew methods.
Step 1: Create the Tree Skirt Base
Fold the red felt in quarters and tie a pencil to one end of a string. Hold the other end at the corner fold to draw a quarter-circle measuring 22–30 inches wide, depending on your tree size. Cut along the line to form your large circle.
Cut a small inner circle in the center (about 3–4 inches) for the trunk opening, then cut one straight line from the outer edge to the center so it can wrap around the base.
Pro Tip: If your fabric isn’t wide enough for one full circle, cut two half-circles and glue or sew them together—once covered with petals, the seam will be invisible.
Step 2: Cut the Poinsettia Petals and Leaves
Cut red felt into petal shapes about 6–8 inches long. You’ll need around 20–24 to create several large poinsettias. Then cut 10–12 green leaves about 8–9 inches long.
For added texture, snip a small notch into the tip of each petal or gently curve the edges. You can also brush the edges with glitter fabric paint or metallic gold for a subtle shimmer.
Pro Tip: For a coordinated look, use the same gold paint on your ornaments or gift tags—it ties your tree décor together beautifully.
Step 3: Arrange the Flowers

Lay out your petals in clusters of 5–6 around the outer edge of the skirt to form blooms. Tuck the green leaves underneath each flower so they peek out naturally. Add a 1-inch gold or cream felt circle to the center of each bloom.
Before gluing or sewing, step back and take a quick photo of your layout. It helps you keep track of placement as you attach everything.
Step 4: Attach the Petals and Centers
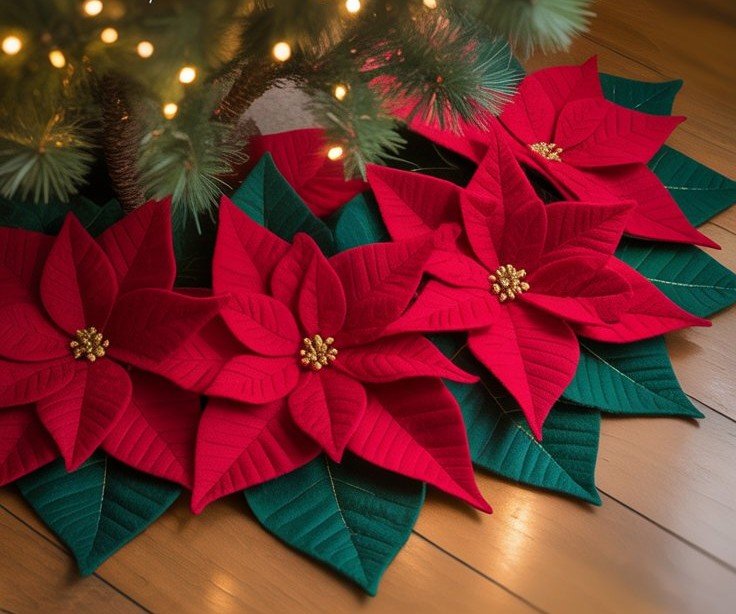
No-Sew Option: Use fabric glue to attach leaves first, then petals, and finally the gold centers. Press firmly and let everything dry flat for several hours.
Sewing Option: Pin the layers in place, then stitch around each flower center with a zigzag or straight stitch. For extra detail, top-stitch along a few petals to define their shape.
Pro Tip: If you’re sewing by machine, use a contrasting gold thread for a decorative finish—it will sparkle under your tree lights.
Step 5: Add Finishing Touches
Trim the edges of your skirt with gold ribbon, braided cord, or bias tape for a polished look. Add ribbon ties, buttons, or Velcro strips along the back opening so it’s easy to fasten around the tree.
For a more ornate look, sew sequins or small beads in the flower centers or dot the petals with glitter fabric paint.
Pro Tip: Arrange a few smaller felt petals between the larger flowers to fill gaps and create a lush, full appearance.
Step 6: Style and Display
Once the skirt is complete, wrap it gently around your tree base and smooth it into place. The layered poinsettia design adds beautiful depth and instantly makes your holiday décor feel more polished.
For an elegant, coordinated theme, pair your poinsettia skirt with gold ornaments, red velvet ribbons, and greenery garlands woven with twinkle lights.
Pro Tip: A few small lanterns or votive candles placed nearby (battery-powered, of course!) highlight the shimmer and make your skirt glow beautifully in the evening light.
Troubleshooting
Even with a simple design, poinsettia tree skirts can have a few tricky spots. Here’s how to handle the most common challenges for a flawless finish.
- Petals Curling Up: If the felt petals start to curl after gluing, place a clean towel over the skirt and press gently with a warm iron to flatten them.
- Glue Showing Through: Use a small paintbrush or craft stick to apply glue only at the petal base—this prevents seepage and keeps your design neat.
- Uneven Flower Placement: Step back often as you attach each bloom. Align the flowers in even intervals around the skirt to maintain balance.
- Fabric Puckering When Sewing: If your fabric stretches, lower your machine tension slightly or use a walking foot for smoother stitching.
- Edges Lifting Over Time: For a long-lasting skirt, reinforce key points (like flower centers and trim edges) with an extra dab of fabric glue or a few hand stitches.
Pro Tip: After the holidays, store your skirt flat or rolled in tissue paper so the petals don’t crease. A quick press next season will bring it back to perfect shape.
FAQ
Can I use different colors for the poinsettias?
Definitely! White poinsettias with gold centers look stunning for a neutral or glam holiday palette, while pink or burgundy petals feel more modern and playful.
What’s the best size for a poinsettia tree skirt?
Most full-size trees look great with a 48–60 inch diameter skirt. For small tabletop trees, reduce the size to 30–36 inches and scale down the petals proportionally.
Can I make this project without sewing?
Yes! The entire skirt can be made with fabric glue. Just let each section dry completely before moving to the next to keep your design crisp.
How can I make it more durable for reuse?
Add a layer of interfacing or quilt batting beneath the base fabric before attaching petals. It strengthens the skirt and helps the flowers hold their shape year after year.
How should I clean it?
Spot-clean felt with a damp cloth and mild soap. Avoid soaking, as excess water can warp the fabric.