Introduction
A Christmas tree skirt does more than hide the stand—it completes the whole holiday scene. Whether your home leans cozy and traditional, modern and minimal, or full of bold, whimsical color, you can easily create a tree skirt that fits your style perfectly. Making your own lets you choose fabrics, trims, and finishes that reflect your décor theme while adding a meaningful handmade touch.
In this guide, we’ll walk through how to design and make a Christmas tree skirt that looks like it was made just for your living room. You’ll learn how to select the right materials, explore different style directions, and customize it with simple finishing details. By the end, you’ll have a beautiful, durable skirt ready to show off beneath your twinkling tree—and a new holiday tradition you’ll look forward to each year.
1. Choose Your Base Fabric
The foundation of your tree skirt sets the tone for the entire look, so start with a fabric that complements your home’s holiday style and feels easy to work with. Here are a few favorite options:
- Felt: Soft, sturdy, and won’t fray—perfect for beginners. Available in nearly every color, it’s ideal for layering or adding appliqués.
- Velvet: Luxurious and classic. Choose deep jewel tones or creamy neutrals for an elegant look. Pair it with metallic trim for a glam touch.
- Burlap or Linen: Ideal for rustic or farmhouse décor. Their natural texture adds warmth and contrast against shiny ornaments and twinkle lights.
- Faux Fur: Cozy and plush, this fabric instantly adds winter charm. It looks best under flocked or neutral trees.
- Quilted Cotton: Great for traditional or cottage-style homes. You can even repurpose a vintage quilt or patchwork piece for extra nostalgia.
Pro Tip: If you’re new to DIY sewing, choose felt—it’s thick enough to lay smoothly and doesn’t require hemming. For a no-sew option, use pinking shears to cut your circle and prevent fraying edges instantly.
2. Pick a Style Direction
Once you’ve chosen your base fabric, decide on a style that fits the mood of your holiday décor. This step is where your creativity shines—your skirt can echo your tree theme, complement your wrapping paper, or simply showcase your favorite colors and textures.
Here are a few style ideas to inspire you:
- Classic & Cozy: Think red plaid, cream felt, and a soft pom-pom trim. Add hand-stitched stars or ribbon ties for a homespun feel.
- Elegant & Glam: White faux fur or blush velvet trimmed with gold or silver braid. Add satin bows or sequin appliqués for sparkle.
- Rustic Natural: Burlap or linen paired with twine bows, evergreen sprigs, and wooden button details. Perfect for Scandinavian or farmhouse décor.
- Whimsical Modern: Bold color-blocked felt panels or metallic fabrics with playful trim—like tassels or neon cording—for a fun, unexpected twist.
- Vintage-Inspired: Quilted cotton, lace edging, or crocheted doilies layered for charm that feels like it’s been passed down for generations.
Pro Tip: To pull your entire tree area together, use the same ribbons or accent materials on your gifts and wreaths. It’s a simple trick that makes your holiday setup look thoughtfully designed.
3. Decorating & Finishing Touches

Now it’s time to add the details that make your tree skirt truly one-of-a-kind. Whether you prefer delicate embroidery or bold, colorful trims, these finishing touches will bring your chosen style to life.
Ideas for Embellishments:
- Trim and Ribbon: Sew or glue decorative trim, pom-poms, tassels, or lace around the edges. Metallic ribbon adds sparkle, while cotton or burlap tape gives a rustic finish.
- Appliqués or Cutouts: Create felt snowflakes, stars, or holly leaves and attach them with fabric glue or hand stitching. Layer contrasting colors for depth.
- Embroidery or Fabric Paint: Add names, monograms, or festive phrases like “Merry & Bright.” For a quicker option, use iron-on letters or stencils.
- Buttons, Beads, or Sequins: A scattering of small accents can mimic twinkling lights and catch the glow from your tree beautifully.
Supply List:
- Decorative trim or ribbon
- Fabric glue or needle and thread
- Embroidery floss or fabric paint
- Scissors or rotary cutter
- Pins or clips for securing layers
Pro Tip: Before attaching embellishments, lay them out in a circle to preview your design. Photograph it from above—this helps you visualize balance and spacing before committing to glue or stitching.
4. How to Assemble (No-Sew and Sew Options)
Once you’ve planned your design, it’s time to assemble the skirt. Whether you’re using a sewing machine or prefer an easy no-sew method, both approaches can yield a professional-looking finish.
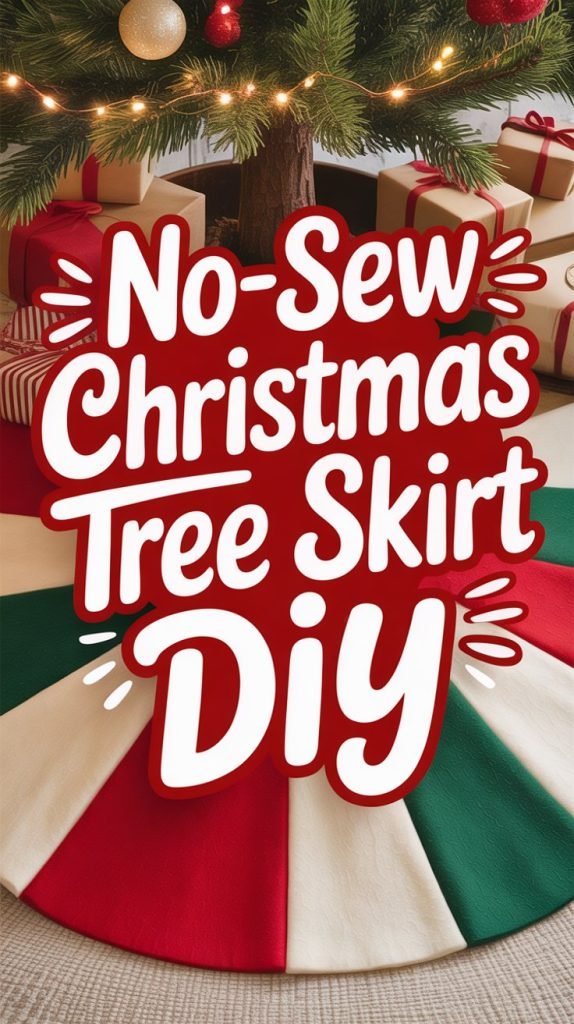
Step-by-Step (No-Sew Method):
- Cut your circle: Fold your fabric in quarters and cut a quarter-circle to fit around your tree base. Cut a small inner circle in the center for the trunk opening.
- Create an opening: Cut a straight line from the outer edge to the inner circle so it can wrap easily around the base.
- Finish the edges: Use fabric glue or iron-on hem tape to seal and smooth raw edges. For felt, you can leave them unfinished.
- Add trim: Attach your chosen edge detailing with glue. Press gently and let it dry completely before placing it under the tree.
Step-by-Step (Sewing Method):
- Cut two fabric layers the same size (for a lined skirt). Place right sides together and sew around the outer edge, leaving a small gap to turn right-side out.
- Cut the inner circle and slit, then turn right-side out and top-stitch around edges for a clean finish.
- Add closures: Sew on ribbon ties, buttons, or Velcro strips along the opening for easy wrapping.
Pro Tip: For a crisp circle, use a piece of string tied to a pencil as a compass. Mark and cut evenly—this simple hack gives your skirt a perfectly smooth shape.
5. Styling Ideas Around the Tree
Your new tree skirt is the anchor of your holiday setup—now it’s time to style the scene around it for maximum impact. The right mix of textures, colors, and cozy details can make your entire tree area look intentional and festive.
Ideas to Try:
- Coordinate with Wrapping Paper: Choose gift wrap that picks up the colors or patterns in your skirt. A plaid skirt looks beautiful with solid red or kraft paper; a glam metallic skirt shines with white or gold paper.
- Add a Layer of Texture: Place a soft faux fur throw or a woven basket nearby to complement the look. This creates depth and warmth in photos.
- Accent Lighting: Arrange a few small lanterns or battery-powered candles around the base to highlight your handiwork and add soft evening glow.
- Mix in Natural Elements: Scatter pinecones, evergreen sprigs, or a few ornaments around the skirt for a natural, effortless finish.
Pro Tip: If you love sharing holiday décor photos, use a low camera angle focused slightly upward toward the tree. It emphasizes the skirt’s texture and adds a magical perspective that’s perfect for Pinterest or Instagram.
Troubleshooting
Even simple tree skirt projects can come with a few hiccups. Here’s how to handle the most common issues so your finished piece looks polished and professional.
- Uneven Circle: If your skirt looks lopsided, fold it in half and trim around the edges using the shorter side as a guide. For next time, trace your circle with chalk and a string compass before cutting.
- Fraying Edges: Some fabrics, like linen or cotton, can fray easily. Seal edges with fabric glue or use pinking shears for a decorative finish that prevents unraveling.
- Wrinkling or Puckering: Press your fabric before assembly and use lightweight interfacing for stability. For no-sew skirts, smooth edges with your hands while glue is drying.
- Uneven Trim Placement: Pin or tape trims in place before gluing or sewing. Always start at the back opening and work your way around evenly.
- Glue Stains or Seep-Through: Apply fabric glue sparingly with a small brush and let it tack for a few seconds before pressing on trim.
Pro Tip: Keep a lint roller handy—especially for velvet or faux fur fabrics. A quick roll before placing it under the tree keeps everything looking crisp and photo-ready.
FAQ
What size should my tree skirt be?
A good rule of thumb is that your tree skirt should be about 6–12 inches wider than the full diameter of your tree’s base. For example, a 7-foot tree usually looks best with a skirt between 48 and 60 inches wide.
Can I make a tree skirt without sewing?
Absolutely! Felt, fleece, or faux fur are great choices for no-sew projects. You can use fabric glue, fusible hem tape, or even a hot glue gun to attach trims and ties.
How do I store my tree skirt after Christmas?
Clean it gently according to the fabric type, then fold or roll it loosely and store it in a breathable cotton bag or pillowcase. Avoid plastic bins for natural fabrics—they can trap moisture and cause musty odors.
How can I make my skirt reversible?
Cut two coordinating fabrics and sew them together (right sides facing), then turn them right-side out. Add trim to both sides if you’d like a finished edge all around.
What’s the easiest way to personalize it?
Iron-on lettering, embroidered initials, or appliquéd shapes are simple ways to make your skirt unique. You can even create a family keepsake by adding a new stitched name each year.
Final Thoughts
Making your own Christmas tree skirt is one of those creative projects that instantly makes the holidays feel more personal. Whether you go for cozy and classic, sparkly and elegant, or playful and bright, the beauty of a DIY tree skirt is that it can evolve with your décor year after year.
Once your skirt is finished, step back and enjoy the transformation—your tree will look beautifully grounded and cohesive, and your handmade touch will be a charming detail guests can’t help but notice. It’s a small project that adds a big sense of joy and accomplishment to your holiday decorating.
Next year, you might even find yourself making a second one as a thoughtful gift or to match a different tree theme. However you style it, this simple DIY is a wonderful way to express your creativity and celebrate the magic of Christmas at home.