Introduction
There’s something extra magical about trimming the tree with ornaments your kids made themselves — the crooked stars, sparkly snowmen, and glitter-sprinkled shapes that capture the joy of the season. This year, make those memories even more special with a collection of whimsical DIY Christmas ornaments that are as fun to make as they are to hang.
These crafts are designed to be kid-friendly, colorful, and full of imagination — no fancy supplies needed. From cupcake liner trees to glittery snow globes, each one invites little makers to play, create, and add their own personality to your holiday décor. Whether you craft together on a cozy weekend or set up a mini ornament-making station during a party, these projects are guaranteed to bring out giggles, gluey fingers, and pure Christmas cheer.
1. Cupcake Liner Christmas Tree Ornaments
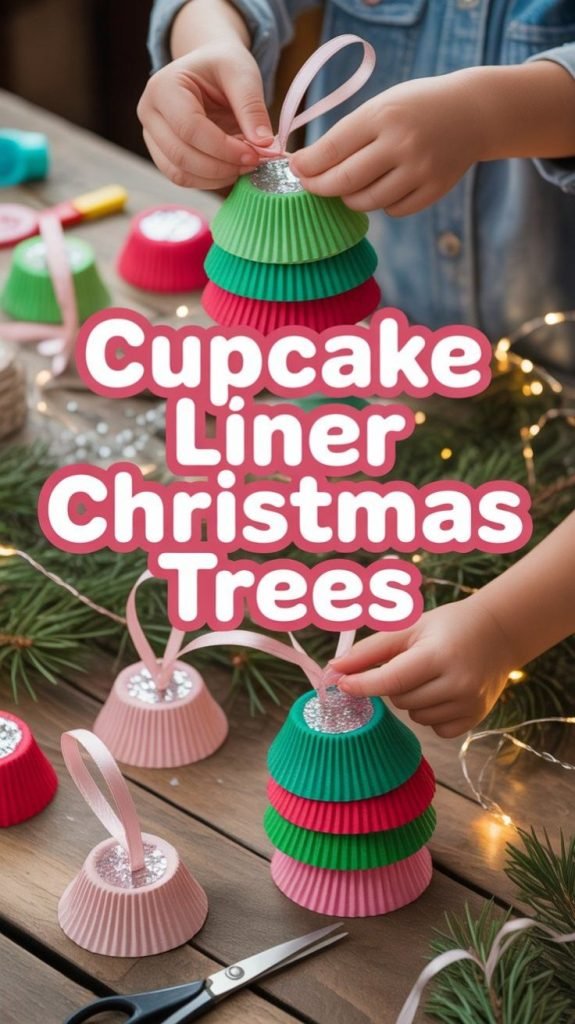
Why you’ll love it: These whimsical little trees come together in minutes and shimmer like something straight out of a storybook. Cupcake liners make the perfect “tree branches,” creating layers of color and texture that look magical on any Christmas tree.
Supplies:
- Assorted cupcake liners (mix solids, prints, metallics)
- Scissors
- Glue stick or craft glue
- Small cardstock triangles (for backing)
- Mini star stickers or foam stars
- String or ribbon for hanging
- Optional: sequins, glitter glue, tiny pom-poms
How to make it:
- Flatten 3–4 cupcake liners and fold each in half, then into quarters to create triangle “tree layers.”
- Stack the liners from largest to smallest on your cardstock triangle, gluing each one down as you go.
- Add a sparkly star at the top and decorate with sequins or pom-poms for ornaments.
- Glue or tape a loop of ribbon to the back so it’s ready to hang.
Whimsical twist: Try using pastel liners — pink, mint, or gold — for a “candy shop Christmas” theme.
Pro tip: If kids want to get extra creative, have them draw tiny presents under their tree or sprinkle glitter glue “snow” along the edges before it dries.
2. Popsicle Stick Nutcracker
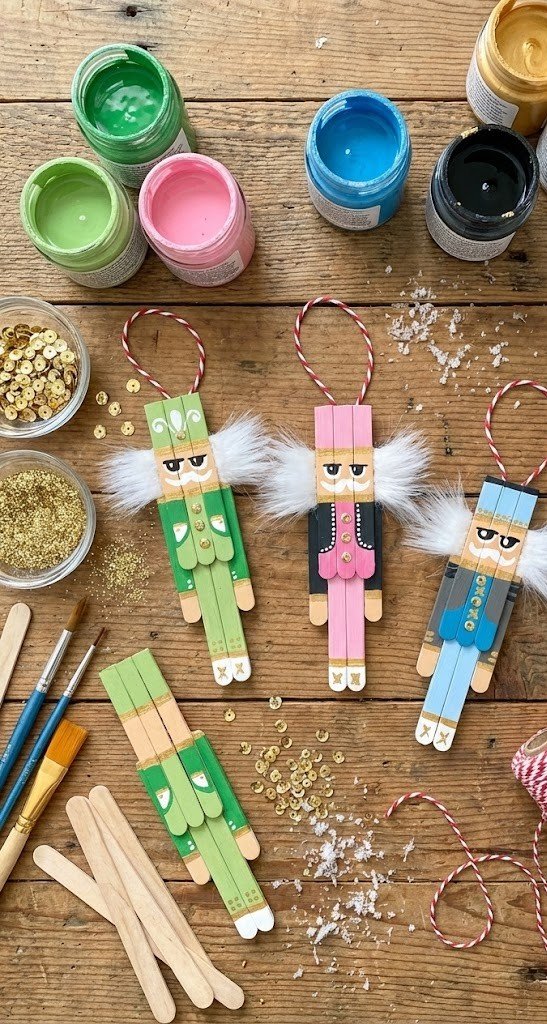
Why you’ll love it: The classic Nutcracker gets a playful, handmade makeover with this colorful popsicle stick craft. It’s full of character — every child’s nutcracker looks a little different, which makes the end result a fun mini parade of toy soldiers!
Supplies:
- Regular and mini popsicle sticks
- Paint (red, blue, black, white, gold)
- Paintbrushes or paint markers
- Glue
- Googly eyes (optional)
- Cotton balls or white felt (for beard)
- Small gems, sequins, or metallic stickers
- Ribbon or string for hanging
How to make it:
- Line up four popsicle sticks vertically for the body and glue a fifth across the top for the hat brim.
- Paint the top half for the hat and the lower half for the uniform — bold colors look great here.
- Add details like buttons, a belt, and a face using paint pens or markers.
- Glue on a bit of cotton for the beard and a small strip of felt or foam for the hat top.
- Finish with a ribbon loop for hanging and a sprinkle of sparkle if desired.
Whimsical twist: Instead of traditional red and navy, let kids paint pastel uniforms — think mint coats with gold trim or lavender hats with sparkly stars.
Pro tip: Write each child’s name and the year on the back — these make adorable keepsakes to revisit every Christmas.
3. Popsicle Stick Holiday Cabin Ornament
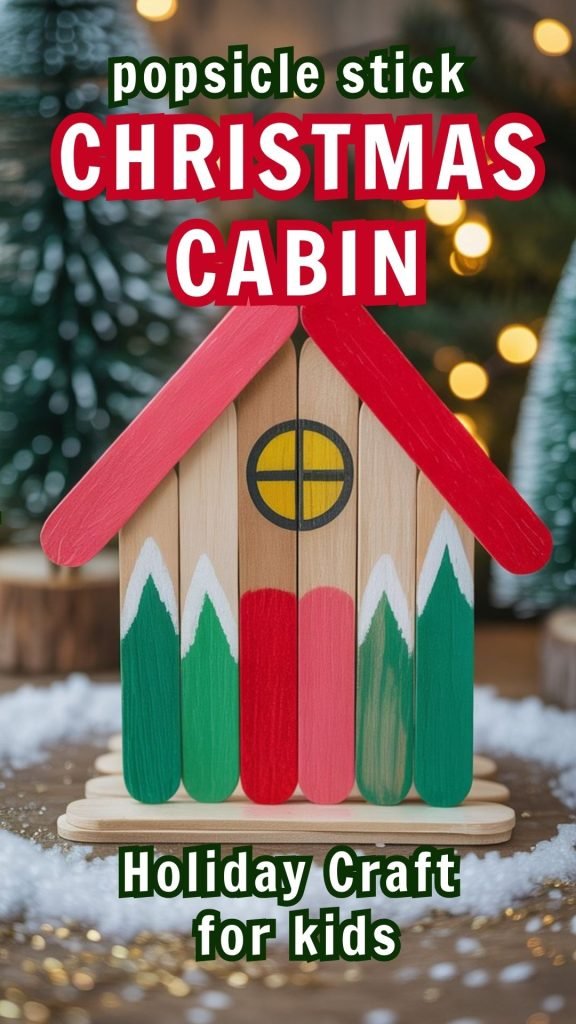
Why you’ll love it: This cozy little cabin captures the spirit of a snowy Christmas village — and building it feels like playing architect for the North Pole.
Supplies:
- Popsicle sticks (standard and mini)
- Cardboard or craft foam base
- Brown, white, and red paint
- Craft glue or hot glue (adult help)
- Mini wreaths, faux snow, or moss for accents
- Ribbon or twine for hanging
How to make it:
- Arrange and glue four sticks into a square or rectangle for the cabin frame.
- Add a roof by overlapping two sticks at an angle.
- Paint the cabin brown and roof white for a snowy look.
- Add a small door, windows, and a wreath or cotton “snow” on the roof.
- Glue on twine for hanging and sprinkle a little glitter snow to finish.
Whimsical twist: Paint the cabin pink or aqua for a “storybook ski lodge” vibe and use metallic confetti for lights.
Pro tip: Mount several on a string of twine to create a “tiny cabin village” garland across a window or mantel.
4. Glitter Snow Globe Ornaments

Why you’ll love it: Shakeable, sparkly, and endlessly fun, these mini snow globes bring a touch of winter wonderland to your tree. They double as both a craft and a sensory toy for kids.
Supplies:
- Small clear plastic ornaments (fillable type)
- Mini Christmas figurines or bottlebrush trees
- Iridescent glitter or fake snow
- Glycerin (optional, for slower “snowfall”)
- Water (if using liquid) or white cotton for a dry version
- Glue or hot glue gun (adult supervision)
- Ribbon for hanging
How to make it:
- Open the ornament and glue the figurine to the base.
- Add a sprinkle of glitter and a few pinches of fake snow.
- Fill halfway with water and a few drops of glycerin if using the liquid version.
- Seal the ornament tightly with glue and attach a ribbon for hanging.
Whimsical twist: Use unicorns, candy canes, or pastel bottlebrush trees inside for a dreamy fantasy theme.
Pro tip: Label the bottom with your child’s name and year — they’ll love seeing their “frozen creation” each Christmas.
5. Felt Gingerbread Friends
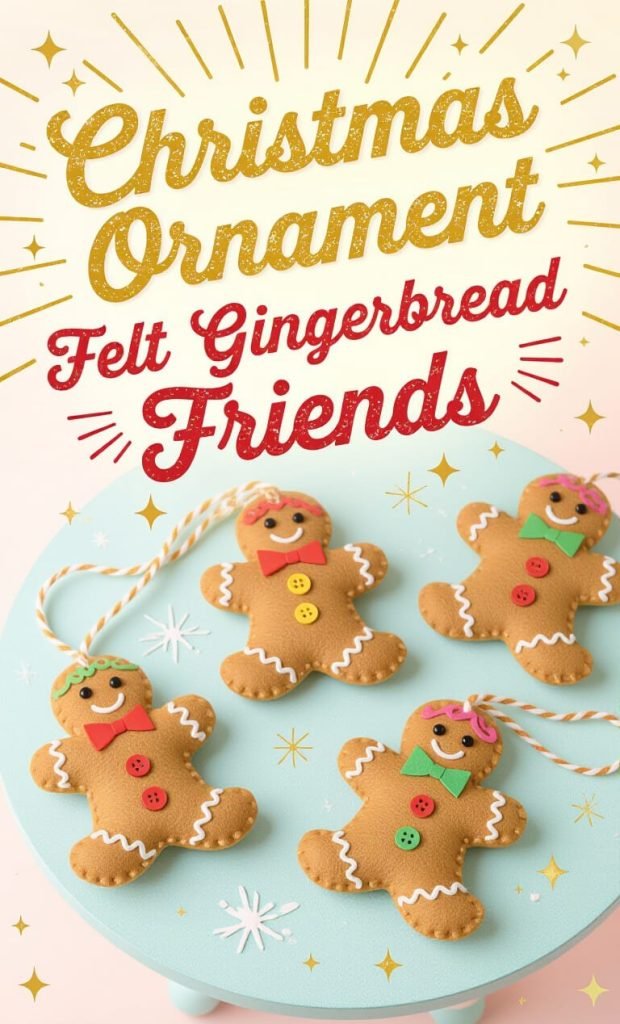
Why you’ll love it: These soft, smiling gingerbread cuties are pure holiday joy — and kids can decorate them endlessly without the sugar rush.
Supplies:
- Brown felt sheets
- Scissors
- Fabric glue or hot glue (with supervision)
- White puff paint or fabric paint
- Mini buttons, pom-poms, sequins, and ribbons
- Stuffing or cotton balls (optional for plush effect)
- Twine or ribbon for hanging
How to make it:
- Cut two matching gingerbread shapes from brown felt.
- Decorate one side with paint “icing,” buttons, and ribbon before assembling.
- Glue around the edges, leaving a small gap to stuff lightly with cotton, then seal.
- Add a ribbon loop for hanging.
Whimsical twist: Try candy-colored icing lines — pink, teal, or lavender — instead of white for a playful, pastel bakery look.
Pro tip: Let each child design a unique expression — sleepy, silly, or surprised — for a set of characters that tell a story on your tree.
6. Cinammon Stick Reindeer Ornaments
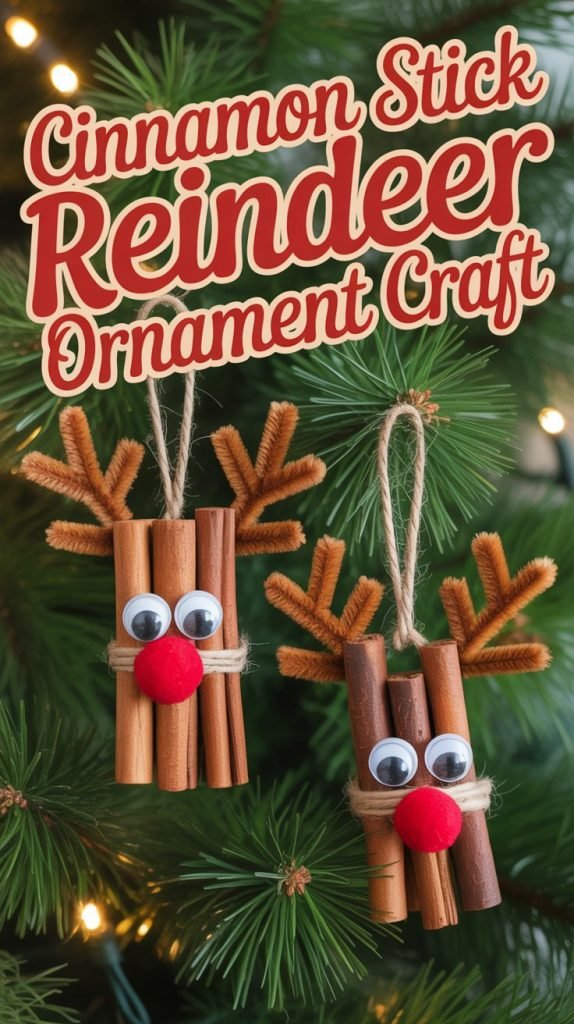
WThese cinnamon stick reindeer ornaments are a simple, festive craft that adds cozy holiday charm to your tree. They’re quick to make, kid-friendly, and smell amazing thanks to the natural cinnamon.
Supplies Needed
- 3–4 cinnamon sticks per ornament
- Brown pipe cleaners
- Small googly eyes
- Red pom-poms (for the nose)
- Twine or jute string
- Hot glue gun or strong craft glue
- Scissors
Step-by-Step Instructions
- Create the Reindeer Body
Line up 3 or 4 cinnamon sticks vertically, keeping them close together. Secure them by wrapping twine tightly around the middle and tying a knot in the back. This forms the reindeer’s body and face. - Add the Hanging Loop
Cut a piece of twine about 6–8 inches long. Fold it in half to create a loop and glue the ends to the back top of the cinnamon sticks. This will be used to hang the ornament on the tree. - Make the Antlers
Cut one brown pipe cleaner in half. Twist each piece into a simple antler shape with small branches. Glue one antler to each side of the cinnamon bundle near the top, slightly behind the front sticks. - Attach the Eyes
Glue two googly eyes to the front of the cinnamon sticks, positioning them just above the twine wrap. Let them set for a few seconds. - Add the Nose
Glue a red pom-pom below the eyes, centered on the twine wrap, to create the reindeer’s nose. - Let Dry Completely
Allow all glue to dry fully before hanging the ornament or gifting it.
Tips & Variations
- Use different sizes of cinnamon sticks for playful variety
- Swap red noses for brown or gold for a more rustic look
- Add a small bow or bell to the hanging loop for extra charm
These cinnamon stick reindeer ornaments make perfect handmade gifts, classroom crafts, or cozy Christmas tree decorations.
7. Mini Wrapped Gift Box Ornaments
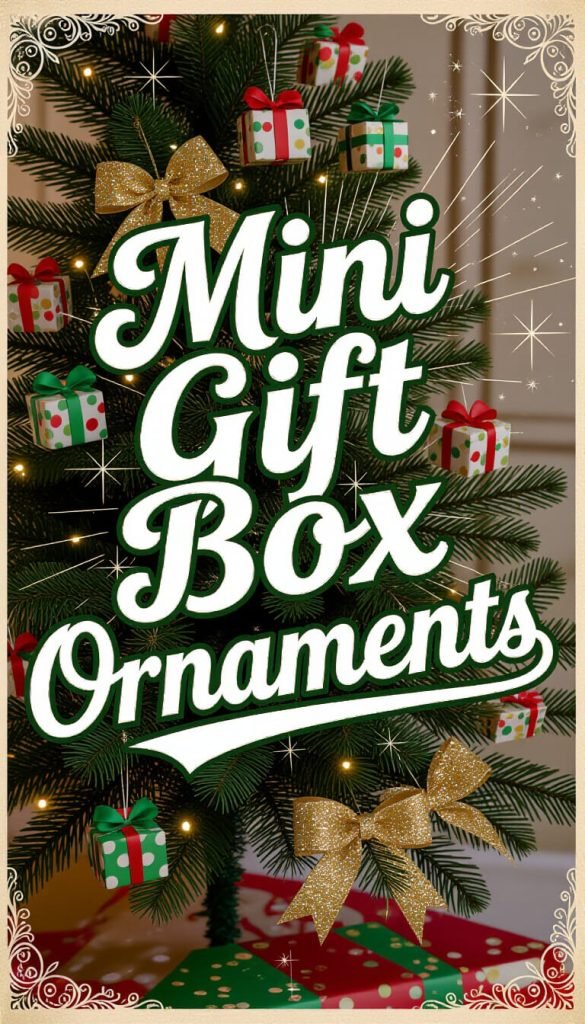
Why you’ll love it: Tiny wrapped presents on the tree feel straight out of Santa’s workshop — and kids love choosing the “wrapping paper” and ribbons for each one.
Supplies:
- Small craft boxes or blocks (wood, cardboard, or foam)
- Colorful wrapping paper or patterned scrapbook paper
- Ribbon or twine
- Glue or double-sided tape
- Mini tags, bells, or stickers for decoration
- String for hanging
How to make it:
- Wrap each small box in bright paper and tie it with ribbon or twine.
- Glue the ribbon in place so it stays neat.
- Add a mini tag or bell and tape or glue a loop of string to the back for hanging.
Whimsical twist: Use metallic or holographic paper for a sparkly “toy shop window” look. Kids can even draw tiny names on the tags to turn each one into a personalized surprise.
Pro tip: Hang several together as a cluster ornament or string them into a “present garland” for the mantel.
8. Beaded Candy Cane Ornaments
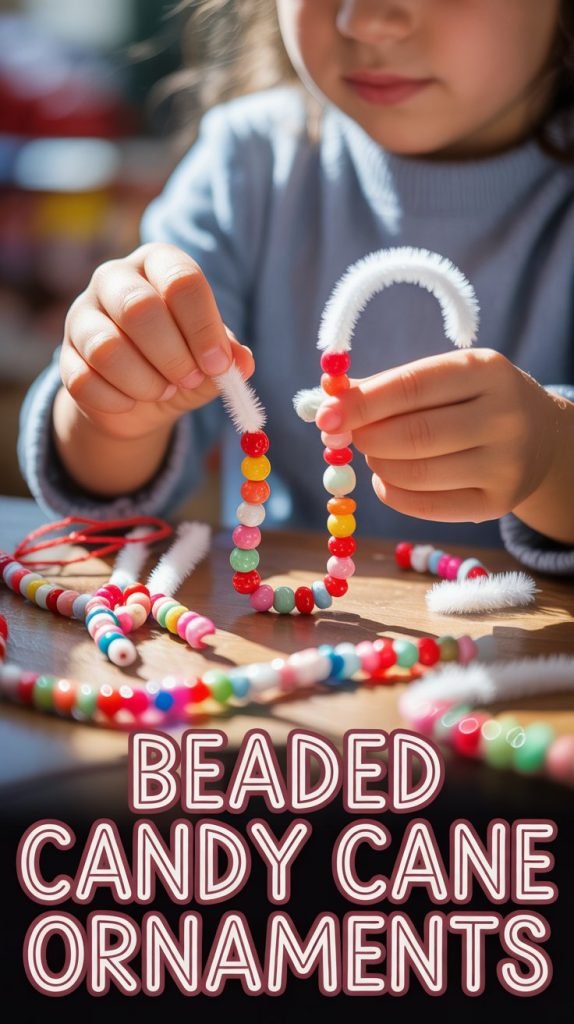
Why you’ll love it: Simple, sparkly, and sweet — this craft keeps little hands busy threading beads while creating a candy-cane classic that lasts year after year.
Supplies:
- Red, white, and clear pony beads (or pastel variations)
- Pipe cleaners (white or metallic)
- Scissors (for trimming ends)
How to make it:
- Slide beads onto a pipe cleaner, alternating colors to form the candy cane pattern.
- Once filled, bend both ends slightly to secure the beads.
- Curve into a candy cane shape and hang on the tree.
Whimsical twist: Switch the traditional red and white for rainbow or pink-and-gold combinations for a dreamy candyland theme.
Pro tip: Kids can spell their names with letter beads between stripes for a personalized touch.
9. Acorn Santa Ornaments
Why you’ll love it: These tiny acorn Santas are full of woodland charm — part nature craft, part Christmas magic. Each one has its own personality, making them irresistible keepsakes or gifts for grandparents.
Supplies:
- Acorns with caps (cleaned and dried)
- Red and white acrylic paint
- Fine-tipped paintbrushes
- Glue (for loose caps)
- Tiny bits of white felt, cotton, or yarn (for beards)
- Ribbon or twine for hanging
How to make it:
- Paint the acorn body red for Santa’s suit, leaving a small oval unpainted for the face.
- Once dry, paint a white trim line at the top of the red suit and add rosy cheeks with a dab of pink.
- Glue on a small tuft of cotton or yarn for the beard.
- Paint the acorn cap red or leave it natural as Santa’s hat; add a dot of white paint or a tiny pom-pom on top.
- Glue a loop of ribbon to the cap for hanging.
Whimsical twist: Paint a whole family of “forest Santas” — acorns of different sizes with slightly different expressions.
Pro tip: Add a sprinkle of iridescent glitter to their hats to make them shimmer under the tree lights.
10. Paper Plate Snow Fairy Ornaments
Why you’ll love it: With fluttery wings and shimmering details, these snow fairies bring a sprinkle of magic to your holiday décor. Kids can customize each one — no two fairies will ever look the same!
Supplies:
- White paper plates or cardstock circles
- Scissors
- Glue stick
- Iridescent glitter, sequins, or metallic confetti
- Markers or crayons
- Coffee filters or tissue paper (for wings)
- Ribbon or string for hanging
How to make it:
- Cut a small circle from a paper plate for the fairy’s face and draw a cheerful expression.
- Cut the remaining paper plate into a dress shape and decorate with glitter and confetti.
- Fold and cut coffee filters or tissue paper into wing shapes, then glue them behind the dress.
- Add a loop of ribbon for hanging.
Whimsical twist: Use pastel papers and gold details to turn your fairies into “frost sprites” that look like they flew right out of a winter storybook.
Pro tip: Write each child’s name and the year on the back — they’ll love finding “their fairy” on the tree every December.
Troubleshooting & Tips for Crafting with Kids
Even the most magical craft sessions can get a little messy — but that’s part of the fun! Here are a few tips to make your ornament-making days smoother and stress-free:
- Contain the glitter: Use trays or shallow boxes to keep glitter and small supplies in one place. Shake off excess glitter over a sheet of paper so it’s easy to pour back into the container.
- Batch your steps: Paint or glue items first, then decorate once everything is dry. This makes it easier for younger kids to succeed without smudging their hard work.
- Use washable supplies: Washable paints, markers, and glue make cleanup much easier — especially if you’re crafting with toddlers or multiple kids at once.
- Hang dry: Have a drying area ready! A clothesline with clothespins or a baking rack works great for ornaments that need to sit flat.
- Label everything: Write names and the year on the back or bottom of each ornament before storing. It’s a sweet time capsule for years to come.
Pro tip: Keep a few blank ornaments aside — they’re perfect for spontaneous creativity or last-minute gift add-ons.
FAQ: DIY Ornament Crafts for Kids
Q: What’s the best age for these crafts?
Most of these projects are great for ages 4 and up, with a few adult-assisted steps (like using hot glue or scissors). Toddlers can join in on simpler ones like the beaded candy canes or pom-pom reindeer with some supervision.
Q: How can I make these ornaments last for years?
Use sturdy materials like cardstock, wood, or felt when possible. A quick coat of Mod Podge or clear sealant can help preserve paint and glitter. Store ornaments in tissue paper or small boxes to prevent crushing.
Q: What’s a good way to display these if I don’t have a tree?
Hang them from garlands, window frames, or a simple branch display in a vase. You can even string several together to make a cheerful kids’ “memory garland.”
Q: Can these be used as gifts?
Absolutely! Kids love giving their creations as presents. Pair each ornament with a small tag or note for teachers, grandparents, or friends.
Q: What if I don’t have all the exact supplies?
Improvise! Substituting is half the fun. Use buttons instead of sequins, scrap paper for wrapping, or twist ties instead of pipe cleaners. The goal is creativity, not perfection.
Final Thoughts
There’s nothing quite like seeing a Christmas tree sparkling with handmade ornaments — each one a tiny memory of laughter, gluey fingers, and proud little smiles. These whimsical DIY ornament crafts aren’t just decorations; they’re stories your family will unpack and relive year after year.
Whether you’re crafting on a snowy afternoon, hosting a holiday playdate, or setting up a creative corner at a family gathering, remember that the joy is in the making. Let kids experiment with colors, mix materials, and make a delightful mess — because that’s where the magic happens.
Hang these creations proudly, gift them to loved ones, and celebrate the beauty of imperfection that makes every homemade ornament shine. After all, the best holiday décor is the kind made with love.