The temps are finally dropping, the leaves are showing off, and all I want to do is curl up with a blanket and a chai latte. If you’re the same way, then you’re going to love these super easy DIYs. We’re talking warm textures, soft fabrics, and all the snuggly vibes. You don’t even need to be “crafty” to pull these off – Promise!
1. DIY Hand-Painted Pillow Covers
If you’re looking for an easy way to refresh your space for fall, hand-painted pillow covers are a total win. They add a custom, seasonal touch without requiring a ton of time or money. Plus—you can change up the designs every season if you stick to removable covers.
Supplies You’ll Need:
- Plain pillow covers (cotton or linen works best — they take paint evenly)
- Fabric paint (choose fall colors like rust, mustard, olive, burgundy, cream, or copper)
- Paintbrushes or foam brushes
- Stencils (leaves, acorns, pumpkins, or geometric shapes) optional but handy
- Painter’s tape (to hold stencils or create clean lines)
- Cardboard or thick paper (to slip inside the pillow cover so paint doesn’t bleed through)
- Iron (for setting the paint once dry — follow paint instructions)
Step-by-Step Instructions:
- Prep Your Pillow Cover
- Wash and dry it first (no fabric softener) so the paint adheres better.
- Slip cardboard inside the cover to keep the paint from bleeding.
- Plan Your Design
- If you’re freehanding, lightly sketch with chalk or pencil.
- If you’re stenciling, tape the stencil down securely.
- Start Painting
- Use a light hand at first; fabric absorbs paint differently than paper.
- For stencils, dab with a foam brush rather than brushing (to avoid bleeding under the stencil).
- Dry & Set
- Let your design dry for at least 24 hours.
- Heat-set the paint with an iron (place a thin cloth between the iron and your design).
- Style & Enjoy
- Pop in a pillow insert and style it on your sofa, bed, or entryway bench for instant fall coziness.
Extra Tips for Success:
Longevity: Wash pillow covers inside out on gentle cycle; air dry to preserve your design.rs are a total win. They add a custom, seasonal touch without requiring a ton of time or money. Plus—you can change up the designs every season if you stick to removable covers.
Fabric Choice: Natural fabrics like cotton and linen give the best results. Avoid anything stretchy (like jersey knit) because the paint can crack.
Design Ideas:
Minimalist: A single oversized leaf in the corner.
Playful: Scatter painted acorns or pumpkins across the cover.
Chic: Use painter’s tape to create stripes or plaid patterns.
Mix & Match: Do a set of pillows in coordinating designs (like one with painted leaves, one with plaid, and one with a simple autumn word like “gather”).
2. DIY No-Sew Flannel Throw Blanket
A cozy throw blanket instantly makes a room feel warm and inviting—and the best part is, you don’t even need to sew one yourself. With just a few yards of flannel and a pair of scissors, you can create a soft, fringed blanket that’s perfect for fall evenings.
Supplies You’ll Need:
- 2–3 yards of flannel fabric (depending on the desired size)
- Fabric scissors (sharp ones for clean cuts)
- Measuring tape or ruler
- Chalk or fabric marker (optional, for marking cuts)
Step-by-Step Instructions:
- Choose and Prep Your Fabric
- Pick a flannel pattern you love—classic plaids work beautifully for fall.
- Wash and dry the fabric before cutting to prevent shrinkage later.
- Cut to Size
- Decide how large you want your blanket (a standard throw is about 50″ × 60″).
- Trim the edges so they’re straight and even.
- Make the Fringe
- Along each edge, measure and mark 4–5 inches in.
- Cut strips about 1 inch wide up to the marked line. This creates fringe along the edges.
- Finish the Edges
- Tug gently on each strip to stretch it slightly, giving the fringe a finished look.
- If you’d like, knot each strip for added durability and texture.
Extra Tips for Success:
- Double It Up: Use two layers of flannel (different patterns or colors) back-to-back. Cut fringe through both layers and knot the strips together for a thicker, reversible blanket.
- Fabric Choice: Pre-brushed flannel is extra soft and cozy; choose medium-weight for warmth without being too heavy.
- Styling Idea: Drape it over an armchair, basket, or bed for instant fall charm—even when you’re not using it.
3. DIY Tassel or Pom-Pom Garland
A handmade garland adds a playful and cozy touch to your fall décor. Whether you choose tassels or pom-poms, this project is beginner-friendly and a great way to use up leftover yarn.
Supplies You’ll Need:
- Yarn (in fall colors such as mustard, rust, cream, or burgundy)
- Scissors
- A piece of cardboard (to help wrap yarn evenly)
- Twine or string (for threading the garland)
- Large yarn needle (optional, but makes threading easier)
Step-by-Step Instructions for Tassels:
- Wrap the Yarn
- Cut a piece of cardboard to about 4–5 inches wide (this will determine tassel length).
- Wrap yarn around the cardboard 20–30 times, depending on desired thickness.
- Create the Tassel Top
- Carefully slide the wrapped yarn off the cardboard.
- Tie a short piece of yarn around the top, about 1 inch down, to create the “head” of the tassel.
- Trim the Ends
- Cut through the loops at the bottom of the tassel and trim for evenness.
Step-by-Step Instructions for Pom-Poms:
- Wrap the Yarn
- Wrap yarn around your fingers or a piece of cardboard 40–50 times.
- Tie and Secure
- Slide the yarn bundle off and tie tightly around the center with another piece of yarn.
- Trim into a Ball
- Cut the loops and trim the yarn until it forms a neat, round pom-pom.
Assemble the Garland:
- Thread your tassels or pom-poms onto twine using a yarn needle.
- Space them evenly or cluster them for a fuller look.
- Hang across a mantel, shelf, or doorway for a fun seasonal accent.
Extra Tips for Success:
- Mix & Match: Combine tassels and pom-poms for extra texture.
- Color Palette: Stick to 2–3 coordinating colors for a cohesive look.
- Durability: Double-knot the yarn when tying tassels and pom-poms so they don’t come apart with use.
4. Sweater-Wrapped Planters
Give your plants a cozy fall makeover with this simple, no-sew project. Repurposing an old sweater turns ordinary planters into warm, textured décor—perfect for adding seasonal charm to any space.
Supplies You’ll Need:
- Old knit sweater (cotton or wool works best)
- Plant pot or vase
- Scissors
- Optional: hot glue or safety pins (for extra security)
Step-by-Step Instructions:
- Choose Your Sweater
- Pick a sweater with a cozy knit texture. Chunky cable knits or ribbed patterns look especially nice.
- Measure & Cut
- Slip the sweater sleeve (or body, depending on pot size) over your planter.
- Trim the fabric so it covers the planter neatly, leaving a little extra at the top and bottom to fold under if desired.
- Fit the Sweater
- Pull the sweater snugly over the planter.
- Fold the edges under for a clean finish.
- Secure (Optional)
- If needed, use a dab of hot glue or a small safety pin to keep the fabric in place.
- Style Your Plant
- Place your newly dressed planter anywhere you want a touch of fall coziness—windowsills, shelves, or coffee tables.
Extra Tips for Success:
- Fabric Choice: Medium-weight knits hold their shape best; avoid very stretchy or delicate fabrics.
- Mix & Match: Use different sweater textures and colors for a layered look.
- Seasonal Flair: Add a small fall leaf or mini pumpkin tucked beside the planter for extra seasonal style
Rustic Twine-Wrapped Bottles
Transform empty bottles into charming fall décor with just a little twine. These rustic accents are perfect for displaying dried flowers, wheat stalks, or seasonal branches—simple, budget-friendly, and quick to make.
Supplies You’ll Need:
- Empty glass bottles or jars (wine bottles, juice bottles, or mason jars all work)
- Twine, jute, or thin rope
- Hot glue gun (or strong craft glue)
- Scissors
- Optional: dried flowers, wheat stalks, or faux blooms
Step-by-Step Instructions:
- Prepare the Bottle
- Clean and dry your bottle or jar thoroughly. Remove any labels if desired.
- Attach the Twine
- Dab a small amount of hot glue at the bottom of the bottle.
- Press the end of the twine into the glue to secure.
- Wrap the Bottle
- Wrap the twine tightly around the bottle, working your way upward.
- Add a small dot of glue every few inches to keep the twine in place.
- Finish the Top
- Once you reach the top, cut the twine and secure the end with glue.
- Add Seasonal Touches
- Fill the bottle with dried flowers, wheat stalks, or faux fall blooms for a cozy accent.
- Arrange bottles in clusters of 2–3 for a centerpiece or mantel display.
Extra Tips for Success:
- Vary Heights: Use bottles of different sizes to create visual interest.
- Color & Texture: Mix natural twine with colored yarn for a playful look.
- Extra Cozy Touch: Wrap a small ribbon or attach a mini pinecone at the top for added charm.
6. DIY Upholstered Footstool or Ottoman
Give a tired ottoman a fresh fall makeover with a new fabric cover. This simple DIY adds texture, color, and seasonal charm to any room—no fancy tools required beyond a staple gun.
Supplies You’ll Need:
- Old footstool or ottoman
- Fall-themed fabric (plaid, velvet, or a cozy textured fabric works well)
- Scissors
- Staple gun and staples
- Measuring tape
- Optional: batting for extra cushioning
Step-by-Step Instructions:
- Measure and Cut Fabric
- Measure the top, sides, and bottom of your footstool.
- Cut your fabric to allow a few extra inches on all sides for folding and stapling.
- Prep the Footstool
- Remove the old fabric if necessary.
- If desired, add a layer of batting for extra softness.
- Attach the Fabric
- Start on one side: pull the fabric taut and staple it to the underside of the ottoman.
- Move to the opposite side, pulling evenly, then staple.
- Repeat for the remaining sides, smoothing as you go.
- Finish the Corners
- Fold corners neatly like wrapping a present and staple securely.
- Style Your New Footstool
- Place it in your living room or bedroom and enjoy a fresh, cozy accent for fall.
Extra Tips for Success:
- Fabric Choice: Choose medium-weight fabrics; too thin may tear, too thick can be hard to staple.
- Pattern Alignment: If using plaid or stripes, make sure patterns align neatly across visible surfaces.
- Mix & Match: Coordinate the footstool fabric with other fall textiles, like pillows or throws, for a cohesive look.
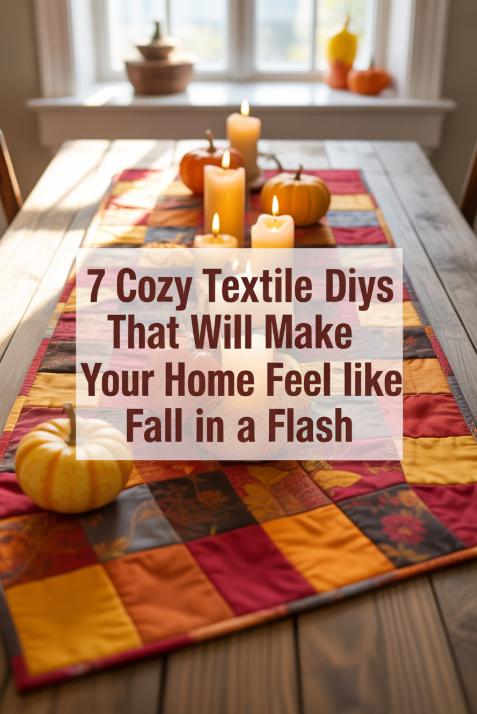
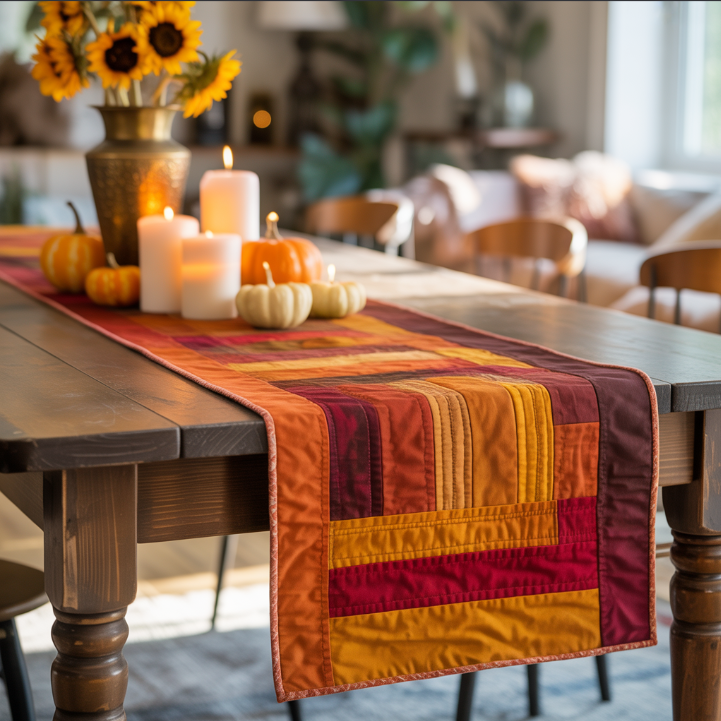
7. Quilted Table Runner
Add a warm, homemade touch to your dining table with a quilted table runner. This project is a great way to use fabric scraps and bring cozy fall vibes to your space.
Supplies You’ll Need:
- Fabric squares or scraps (in fall colors or patterns)
- Sewing machine or needle and thread
- Scissors or rotary cutter
- Measuring tape or ruler
- Iron and ironing board
- Optional: batting for a padded look
Step-by-Step Instructions:
- Plan Your Layout
- Arrange your fabric squares in a pattern or color sequence you like.
- Decide the desired length and width of your runner (standard is around 14–16″ wide by 48–60″ long).
- Sew the Squares Together
- Stitch squares together row by row, then join the rows to form the runner top.
- Press seams open with an iron for a smooth finish.
- Add Batting (Optional)
- For a padded runner, cut batting to the same size as your runner and layer it under the quilt top.
- Create the Backing
- Cut a piece of fabric the same size as the runner top for the backing.
- Pin the top and backing together, right sides facing each other (batting in between if using).
- Sew the Edges
- Stitch around the perimeter, leaving a small opening to turn right side out.
- Turn the runner right side out, press, and top-stitch the edges to finish.
Extra Tips for Success:
- Color Palette: Stick to 2–3 coordinating colors for a cohesive fall look.
- Fabric Choice: Medium-weight cotton or linen works best; avoid slippery fabrics.
- Mix & Match: Combine patterned and solid fabrics for visual interest.
- Styling: Layer the runner over a plain tablecloth or directly on your table for a seasonal accent.
Wrapping It Up
And there you have it—seven simple textile DIYs to instantly cozy up your home for fall. From hand-painted pillows to quilted table runners, each project adds texture, warmth, and that inviting autumn vibe we all crave.
Even if you’re short on time or not a seasoned crafter, these ideas are approachable, budget-friendly, and perfect for layering in small touches that make a big impact. Grab a cup of something warm, put on a playlist, and enjoy turning your space into a cozy fall haven—one DIY at a time.