Note: this post contains affiliate links. I may earn a small commission if you purchase through these links.
- Introduction
- Tools and Clay Materials to Get Started
- Step 1: Prep Your Workspace
- Step 2: Prep and Condition the Clay
- Step 3: Shape and Build with Precision
- Step 4: Drying the Right Way
- Step 5: Sand Your Clay Form Until It Feels Smooth
- Step 7: Paint Your Clay Project (Optional)
- Step 8: Sealing for Durability and Shine
- Troubleshooting: Fixing Common Mistakes
- Frequently Asked Questions
- Next Steps: Leveling Up Your Clay Creations
Introduction
Air dry clay is one of the most accessible craft materials to start with for making higher end DIY decor, but many beginners run into the same frustrating problems.
When I first gave air dry clay a try, I realized that clay is surprisingly sticky and hard to shape. Projects crack while drying. Edges look rough instead of smooth. Paint goes on streaky. And the finished piece doesn’t quite look the way you imagined.
Common Beginner Challenges with Air Dry Clay
- Cracking while drying
- Uneven textures or fingerprints
- Rough or lumpy edges
- Paint streaks or dull finishes
- Uncertainty about sealing or protecting finished pieces
The good news? Most of these issues aren’t about creativity or skill — they come down to a few simple techniques that make a big difference.
In this beginner’s guide, you’ll learn the step-by-step process for working with air dry clay so your projects turn out smooth, sturdy, and polished.
We’ll cover everything from preparing your workspace to shaping clay properly, drying it without cracks, and finishing it with sanding, paint, and sealers.
Whether you’re making trinket dishes, ornaments, jewelry, or small home decor pieces, these tips will help your air dry clay projects look more professional and last longer.
If you’re ready to start creating, let’s walk through the process step by step.
What You’ll Learn in This Guide
- How to prep your workspace for clay projects
- How to condition air dry clay so it doesn’t crack
- How to roll and shape clay evenly
- How to join pieces so they stay attached
- How to dry clay properly
- How to sand for a smooth finish
- How to paint and decorate your project
- How to seal and protect your finished piece
This guide addresses each challenge step by step.
Tools and Clay Materials to Get Started
If you’re brand new to air dry clay, the first step is picking the right materials to set yourself up for success. Not all clay is the same, and having just a couple of simple tools on hand makes shaping and smoothing much easier.
Pick the Right Clay
- Best for Beginners: Look for a smooth, all-purpose clay like Crayola Air Dry Clay (widely available, budget-friendly, and easy to find) or DAS Air Hardening Clay (dries firm and smooth).
- Avoid at First: Lightweight clays (they’re spongy and harder to finish) or specialty clays for sculpting miniatures (they dry too quickly for beginners).
- Starter Tip: If you’re not sure what to buy, choose a white clay—you can paint it any color later.
Must-Have Tools (Most You Already Own!)
You don’t need to spend much to start. Many common household items double as clay tools.
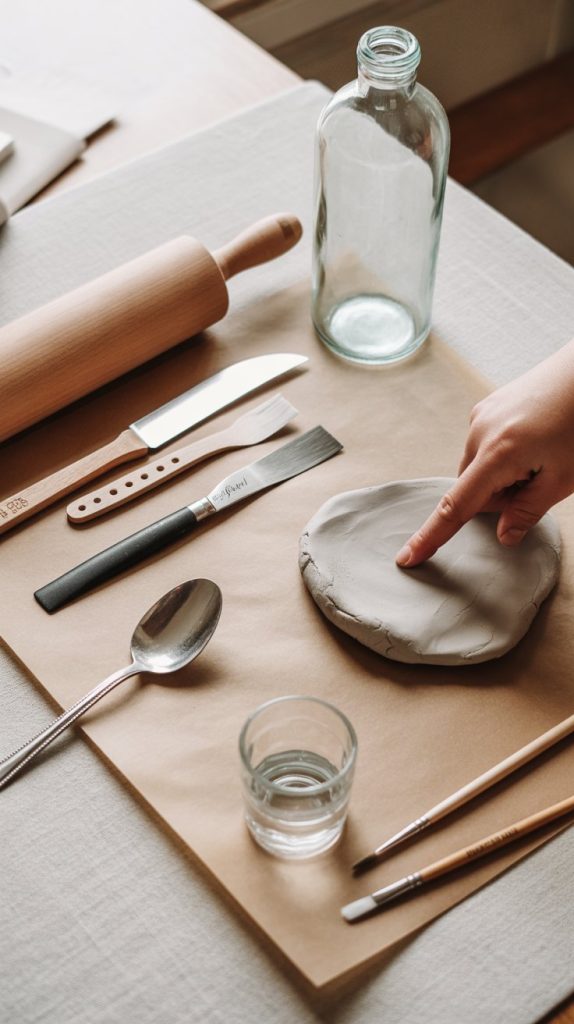
- Rolling Pin: Flattens clay evenly (a smooth glass bottle works in a pinch). I like using a stainless steel rolling pin with thickness guides like this Rolling Pin.
- Cutting Tool: A plastic knife, butter knife, or even a sturdy card edge.
- Smoothing Tool: A spoon, straw, or your fingertip dipped in water.
- Surface Protector: Parchment paper, wax paper, or a silicone baking mat to prevent sticking. This extra large silicone mat is a great choice.
- Water Cup + Brush: For blending seams and keeping clay workable.
- Optional: if you want to invest in more dedicated tools, try a pottery sculpting tool set like this.
Pro Tips for Beginners
- Start Small: Begin with little projects like keychains, ornaments, or ring dishes before tackling larger builds.
- Keep It Covered: Always store unused clay wrapped in a damp paper towel and then sealed in an airtight bag or wrap it in plastic wrap to keep it from drying out.
- Moisture is Key: If your clay feels stiff, dip your fingertips in water and knead until it softens.
Once you have your clay and tools ready, the next step is setting up your workspace so you can shape and work with the clay comfortably.
Step 1: Prep Your Workspace
Before you start shaping clay, take a few minutes to set up your workspace. A simple setup makes the process smoother and helps prevent common beginner frustrations like clay sticking to the table or drying out too quickly.
The goal is to create a clean, comfortable space where your tools are within reach and your clay stays workable while you craft.
Protect Your Work Surface
Air dry clay can stick to some surfaces, especially unfinished wood or textured countertops. To avoid this, place a protective layer underneath your project.
Good options include:
- parchment paper
- wax paper
- a protective silicone mat
These surfaces prevent sticking and make cleanup much easier when you’re finished.
Gather Your Tools First
It’s much easier to work with clay when everything you need is already nearby. Clay can start to dry if you leave it sitting out while searching for tools.
As mentioned above, at a minimum, you’ll want:
- a rolling pin or smooth glass bottle
- a cutting tool (butter knife or plastic knife works well)
- a spoon or fingertip for smoothing
- a small cup of water and a brush
Having these ready helps you stay focused on shaping your project.
Workspace Setup Checklist
Before moving on, make sure you have:
- a protected work surface
- your rolling and cutting tools nearby a small cup of water and brush
- paper towels or a damp cloth for cleanup
Once your workspace is ready, you can move on to preparing the clay itself.
Quick Tip
Keep any clay you’re not using wrapped in plastic or sealed in its packaging. Air dry clay begins to harden when exposed to air, so covering the extra clay keeps it soft and workable for longer.
Common Beginner Mistake
Starting with a cluttered workspace.
When tools are scattered or surfaces aren’t protected, clay can stick, dry out, or pick up dust and debris. A quick setup at the beginning makes the entire project easier.
Step 2: Prep and Condition the Clay
Before you start shaping, it’s important to condition your clay. Think of it like warming up before exercise—it makes the clay easier to work with and helps prevent problems later. Conditioning ensures your clay is soft, flexible, and free of hidden air bubbles that can cause cracks as it dries.
If you’ve ever had air dry clay crumble, split, or feel stiff while working with it, the clay probably wasn’t conditioned enough. A little kneading makes the clay more flexible and much easier to shape.
How to Condition Clay

Start With a Small Amount
Break off the amount of clay you plan to use for your project. Keep the rest wrapped in plastic or sealed in its packaging so it doesn’t start drying out while you work. Wrapping the clay in a damp paper towel before wrapping in plastic will further help avoid drying out. Working with smaller pieces makes the clay easier to handle and helps you keep the texture consistent.
Warm the Clay in Your Hands
Roll the clay between your hands like you’re making a ball of playdough. The warmth from your hands helps soften the clay and makes it easier to work with. This quick step often makes a noticeable difference, especially if the clay feels firm when you first take it out of the package.
Knead the Clay
Next, press, fold, and stretch the clay for a couple of minutes, similar to kneading bread dough. This distributes moisture evenly and makes the clay more flexible. Continue kneading until the clay feels smooth and easy to bend without cracking.
Check the Clay Texture
Properly conditioned clay should feel:
- smooth and slightly cool
- soft but not sticky
- flexible enough to bend gently without cracking
If the clay still feels stiff or crumbly, keep kneading for another minute or two.
If the Clay Feels Too Dry or Hard
- Dip your fingertips in water and gently knead it in. Add just a drop at a time—too much water makes it sticky.
- Wrap stubbornly dry clay in a damp paper towel, seal it in a plastic bag, and let it sit for 30 minutes before trying again.
If the Clay Feels Too Sticky
- Lightly dust your hands and work surface with cornstarch or flour.
- Avoid adding more water—it will only make stickiness worse.
Pro Tips for Beginners
- Cut Out Air Pockets: Roll clay into a ball, then press it flat and repeat a few times. This pushes out tiny trapped air bubbles.
- Work in Batches: Only condition what you’ll use right away. Unused conditioned clay can dry quickly if left uncovered.
- Don’t Overwork It: If the clay starts feeling crumbly or rough, you may have over-handled it. Knead in a tiny drop of water to bring it back.
Common Beginner Mistake
Skipping the conditioning step.
Unconditioned clay often leads to cracks, uneven texture, and pieces that break while shaping. Taking a minute or two to knead the clay can prevent many of these issues.
Step 3: Shape and Build with Precision
Now that your clay is prepped and conditioned, it’s time to shape it into something beautiful! This is where projects start to take form — but it’s also the stage where little mistakes (like fingerprints or uneven edges) can make things look less polished.
Basic Shaping Techniques
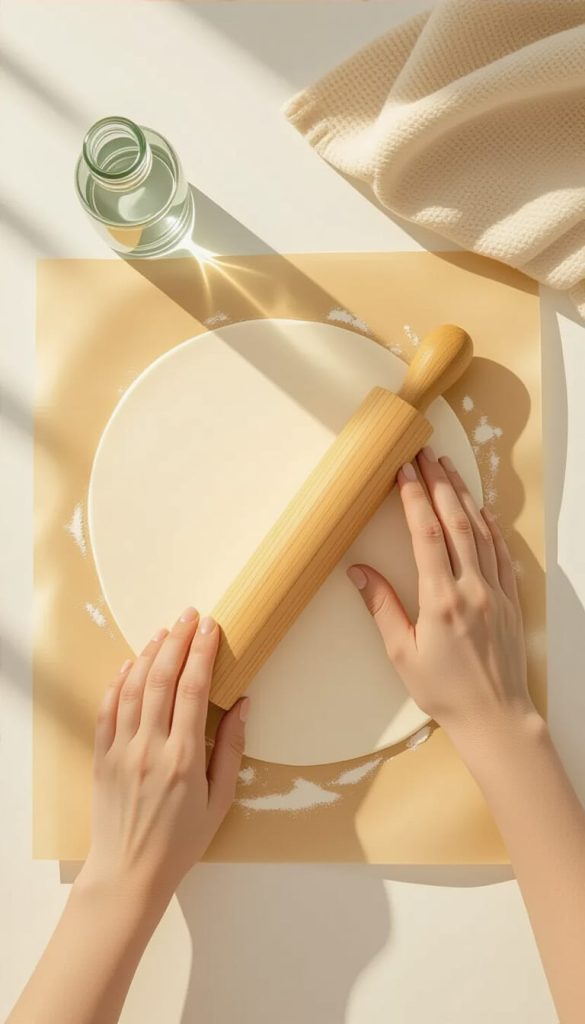
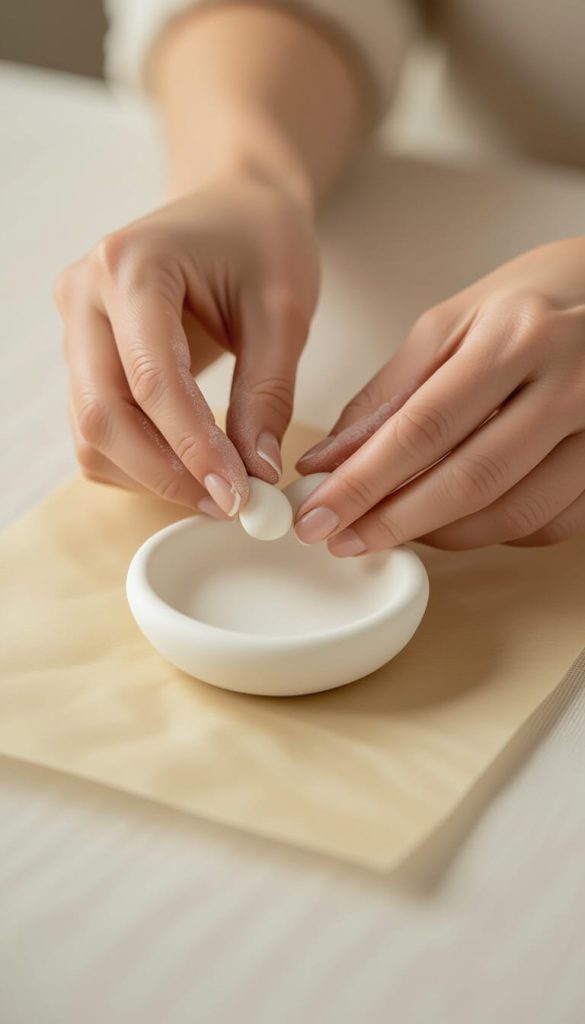
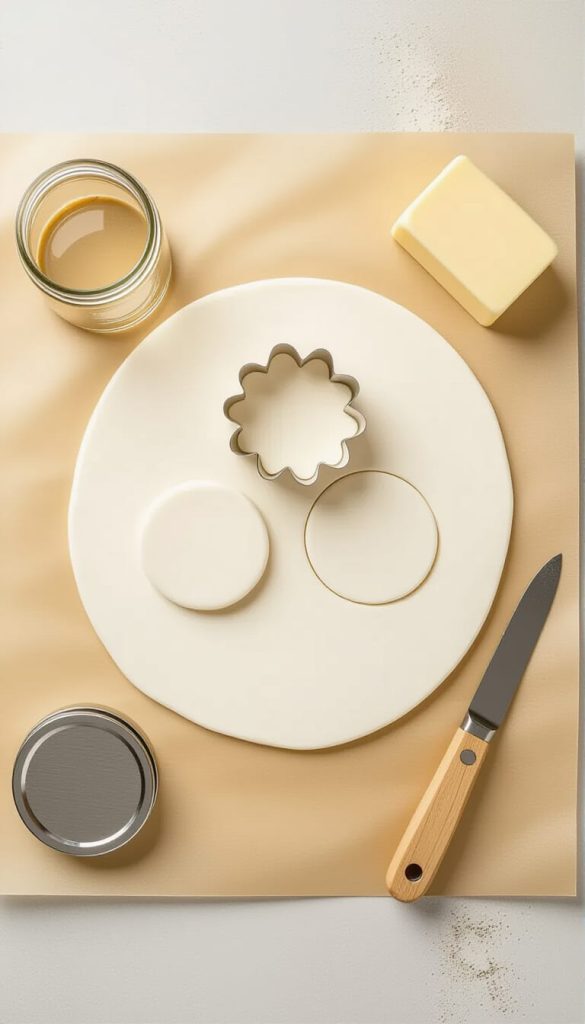
- Flattening: Roll your clay evenly using a rolling pin or a glass bottle. Aim for about ¼ inch thick — thick enough to be sturdy, but not so thick that it takes days to dry. Any thinner than ¼”, ad the clay will be more likely to crack.
- Cutting Shapes: Use cookie cutters, jar lids, or a butter knife to cut clean shapes. For circles, try tracing around a cup.
- Forming by Hand: Pinch and press the clay gently. Work slowly, as rushing leads to dents or rough patches.
Building and Joining Pieces
Sometimes you’ll want to attach two pieces together (like adding a handle to a mug-shaped sculpture). Here’s how to make sure they stick:

- Score the Surface: Lightly scratch both surfaces with a clay sculpting tool – or you could use a toothpick or the edge of a butter knife. This gives the pieces of clay more surface area to adhere to.
- Add Water “Glue”: Mix a little watered down clay into a paste, and dab it where the pieces will connect, making sure to apply to both surfaces.
- Press Firmly: Gently press the pieces together, smoothing the seam with a damp finger or brush.
Smoothing as You Go
This is the secret to avoiding the “lumpy DIY” look.
- Dip your fingertip or a soft brush in water and lightly smooth over any rough areas.
- For larger surfaces, use a damp sponge and sweep in one direction.
- Always fix imperfections before drying—once hardened, clay is much harder to correct.
Pro Tips for Beginners
- Keep It Simple: Start with easy projects like trinket dishes, coasters, or pendants before moving on to sculpted figures.
- Avoid Overhandling: The more you poke and press, the more fingerprints you’ll leave. Handle gently and use tools when possible.
- Test Fit Before Gluing: If combining pieces, “dry fit” them together first so you can adjust the size and shape before sealing with water.
Step 4: Drying the Right Way
Drying is one of the most important parts of working with air dry clay. If clay dries too quickly or unevenly, it can crack or warp. The good news? With a little patience and the right setup, you can keep your projects smooth and strong.
The Basics of Drying Air Dry Clay
- Room Temperature Is Best: Let clay dry naturally at room temperature. Don’t rush it with a hair dryer, oven, or heater—heat causes cracks.
- Flat, Ventilated Surface: Place your piece on parchment paper, cardboard, or a wire rack so air can circulate underneath.
- Patience Pays Off: Small items usually dry in 24 hours, while larger or thicker items may take 2–3 days.
How to Prevent Cracking and Warping
- Flip Larger Pieces: If your project is thicker than ½ inch, gently flip it once or twice during the drying process. This keeps the bottom from staying damp and prevents warping.
- Avoid Direct Sunlight: Sunlight or fans dry the surface too fast while the inside is still damp, which leads to cracks.
- Slow It Down for Big Projects: For large sculptures, cover loosely with plastic wrap or a light towel for the first day. This slows drying and makes it more even.
How to Tell When It’s Fully Dry
- The clay should feel cool at first, but once dry, it will feel room temperature.
- Color may lighten as it dries (especially white clay).
- Tap it lightly—if it sounds solid (not soft or hollow), it’s ready.
Pro Tips for Beginners
- Work on Multiple Projects: Since drying takes time, start a few small pieces at once. That way you won’t feel impatient waiting.
- Protect From Dust: Drape a clean cloth or paper towel over drying projects to keep them clean.
- Don’t Move Too Soon: Clay is fragile when half-dry. Always wait until it’s fully hardened before sanding, painting, or sealing.
Step 5: Sand Your Clay Form Until It Feels Smooth
Once your clay has fully cured, sanding will remove rough edges and give it that clean, polished feel.
Start with fine-grit sandpaper (around 220–400 grit) and gently sand the entire surface of the clay. Focus on smoothing any bumps, fingerprints, or uneven spots from shaping.
If you want an extra-smooth finish, switch to higher grits like 600–800 and continue sanding lightly.
A few quick tips:
- Sand in small circular motions
- Avoid pressing too hard
- Check the shape frequently so you don’t remove too much material
When finished, your ring should feel soft and smooth to the touch, with crisp edges and an even surface.
Optional: Lightly wet the sandpaper (called wet sanding) to reduce dust and create an even smoother finish.
Step 7: Paint Your Clay Project (Optional)
If you want to add extra color, patterns, or small details, now is the perfect time to paint your project.
Use acrylic paint, which works well on polymer clay and dries quickly. With a small brush, carefully apply your design to the clay. This could be simple color blocking, tiny dots, abstract lines, or delicate patterns.
A few tips for best results:
- Apply thin layers of paint instead of one thick coat
- Allow each layer to dry fully before adding another
- Use a fine detail brush for small designs
If you prefer a minimal look, you can also paint just a small accent area or add a thin stripe around the band.
Beginner Tip: Try a neutral base coat first (white or beige) before adding bright colors. It helps paint look more vibrant.
Once the paint has completely dried, you’re ready for the final step: sealing your ring to protect the design.
Step 8: Sealing for Durability and Shine
Polymer clay is durable on its own, but sealing your project can add extra protection and a beautiful finish for that polished, store-bought quality.
Apply a thin layer of clear sealant or glaze using a small brush. This helps protect the ring from scratches and gives it either a matte or glossy look, depending on the finish you choose.
Sealant options:
- Glossy Finish (ceramic look): Use clear gloss varnish or Mod Podge Gloss.
- Matte Finish (natural pottery look): Use matte varnish or Mod Podge Matte.
- Spray Sealers: Quick and easy for large pieces, but always spray outdoors.
A few helpful tips:
- Apply thin layers instead of one thick coat
- Let each layer dry completely before adding another
- Rotate the ring while it dries to prevent drips or pooling
Most sealants dry within 30 minutes to a few hours, but always check the instructions on your product.
Beginner Tip: Test your sealer on the underside first—some can slightly darken paint colors.
Decorative Finishing Ideas
- Add metallic accents with gold leaf, metallic markers, or shimmer paint.
- Create a “speckled” pottery look by flicking diluted paint with a toothbrush.
- For jewelry, attach metal findings (like earring hooks or jump rings) after sealing.
Troubleshooting: Fixing Common Mistakes
Even if you follow every step carefully, little issues can still pop up. Don’t worry—most problems with air dry clay can be fixed (or even prevented next time). Here’s how to handle the most common beginner struggles:
1. Cracks in the Clay
Why it happens: Clay dried too quickly or wasn’t conditioned enough.
How to fix it:
- Mix a little clay and water into a paste (called clay slip).
- Fill the crack with slip using a toothpick or small brush.
- Let it dry fully, then gently sand smooth.
How to prevent next time: Always condition your clay and let it dry slowly. Cover larger projects loosely with plastic wrap during the first 24 hours.
2. Warped or Bent Pieces
Why it happens: The clay dried unevenly or wasn’t flipped during drying.
How to fix it:
- If still damp, gently press it back into shape and let it finish drying on a flat surface.
- If fully dry, try sanding the bottom flat or use the “imperfection” as a design feature (for example, a wavy trinket dish).
How to prevent next time: Dry flat projects (like coasters or trays) on parchment paper or a wire rack and flip them halfway through.
3. Rough Edges or Fingerprints
Why it happens: Handling clay too much or not smoothing before drying.
How to fix it:
- Use fine-grit sandpaper or a nail file to smooth edges.
- For fingerprints, sand lightly and then seal to hide imperfections.
How to prevent next time: Smooth as you go with a damp sponge or fingertip dipped in water. Handle with tools when possible instead of fingers.
4. Paint Looks Streaky or Patchy
Why it happens: Paint was applied too thickly or on an unsealed, dusty surface.
How to fix it:
- Sand lightly if the surface feels uneven.
- Wipe dust off and repaint with thin layers, letting each layer dry before the next.
How to prevent next time: Always wipe clay clean before painting, and use multiple thin coats instead of one thick coat.
5. Clay Sticking to the Table
Why it happens: Clay is moist and grabs onto the work surface.
How to fix it:
Smooth the bottom with damp fingers.
How to prevent next time: Always work on parchment paper, wax paper, or a silicone mat.
Carefully peel the clay up with a flat tool (like a butter knife).
Glossary of Beginner Terms
- Clay slip: Clay + water paste to fix cracks or join pieces
- Sealer/varnish: Protective topcoat (gloss or matte)
- Conditioning: Kneading clay to make it soft and workable
Frequently Asked Questions
Next Steps: Leveling Up Your Clay Creations
Once you’ve mastered the basics, there are plenty of ways to make your projects more polished, creative, and professional-looking. Check out some beginner-friendly “advanced” techniques to try in this post!

Final Thoughts
With patience, the right tools, and careful finishing touches, even a beginner can create air dry clay projects that look professional and store-bought. Smooth edges, careful drying, painting, and sealing are the keys to success.
Grab your clay, start small, and enjoy transforming simple DIY projects into polished masterpieces!