
Every year when I pull out our Christmas ornaments, the handmade ones are always the first that make me smile. There’s something special about knowing your tree is decorated with tiny pieces of time—things you crafted on cozy afternoons, or projects your kids proudly created at the dining table. Paper ornaments capture that feeling perfectly. They’re inexpensive, easy to customize, and surprisingly beautiful when you play with layers, textures, and color.
In this post, you’ll find several DIY paper ornament ideas that range from simple and sentimental to more intricate showstoppers. Each one can be tailored to your style—minimalist neutrals, Nordic red-and-white, glam metallics, or joyful pastels. Whether you’re decorating a full-size tree or sprucing up a small tabletop version, these projects will help you fill your branches with meaningful, handmade magic.
1. Layered Paper Snowflakes (Chic & Dimensional)
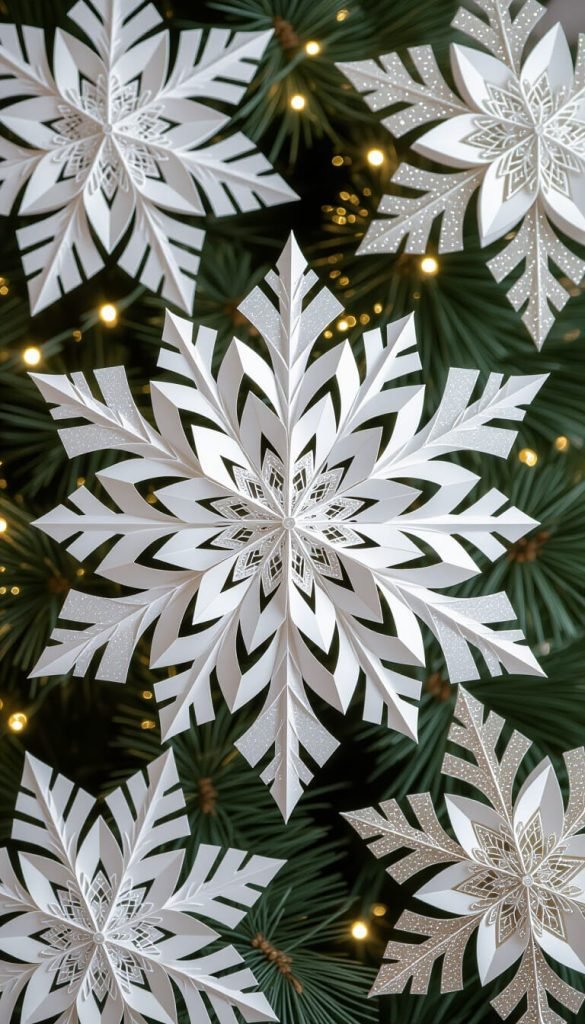
Create elegant snowflakes that look like high-end décor pieces but take just minutes to make.
How to Make Them
Cut several snowflake shapes in varying sizes (you can fold paper into sixths and cut by hand, or use a Cricut/Silhouette file for precision). Layer them with foam adhesive dots or hot glue to create depth. Aim for at least 2–4 layers for the prettiest dimensional look.
Extra Helpful Tips
- Use multiple paper textures: Mixing matte cardstock with a metallic layer or vellum layer adds subtle luxury.
- Try tone-on-tone: White layered on cream—or silver on pearl—creates an elegant, snowy look without feeling flat.
- Curl the edges: Lightly curl the snowflake arms with a pencil for a soft, three-dimensional shape.
- Reinforce the center: Add a small punched circle of cardstock behind the middle to help the snowflake hold its shape.
- Hang in sets: Three snowflakes of slightly different sizes make a beautiful cluster on one branch.
Perfect For
Snowy, monochromatic trees; modern minimal holiday décor; winter wonderland themes.
2. Rolled Paper Bead Ornaments (Whimsical & Textured)
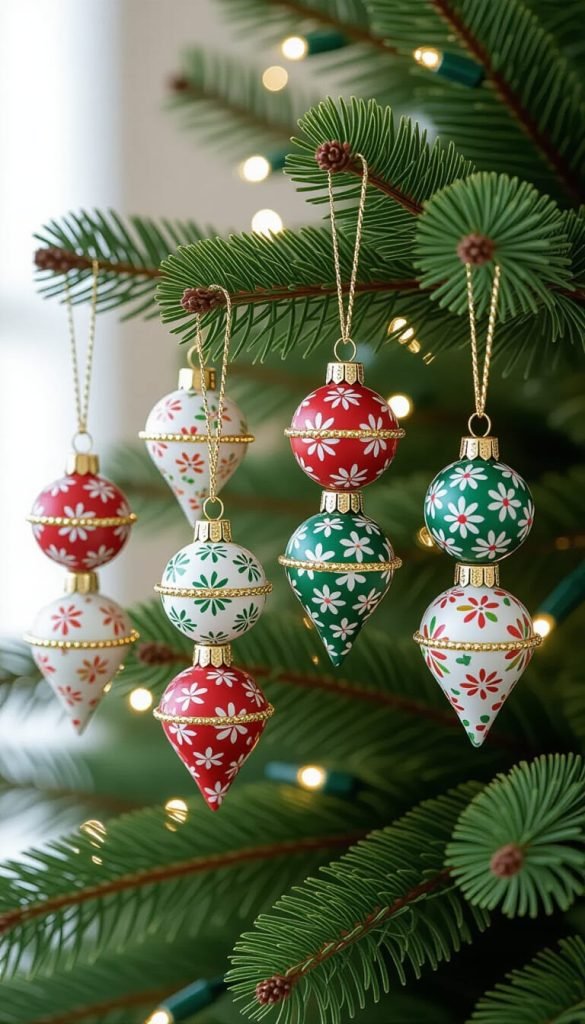
Rolled paper beads are incredibly relaxing to make and can be turned into ornaments, garlands, or even whimsical tassels.
How to Make Them
Cut long, tapered triangles from scrapbook paper or leftover gift wrap. The wider end determines the bead’s diameter; the length affects its thickness. Roll tightly around a toothpick or wooden skewer, secure the end with glue, then slide off to dry.
Extra Helpful Tips
- Seal for longevity: Brush beads with Mod Podge or clear-drying glue to strengthen them and give a polished finish.
- Mix bead shapes: Try skinny beads, chunky barrel shapes, and tiny spacer beads to give your ornament movement.
- Create color stories: Stick to one palette—like blush pinks, forest greens, icy blues, or kraft neutrals—to keep everything cohesive.
- Make mini tassel ornaments: String 4–6 beads, tie off the end, and finish with a fringe of paper strips or yarn.
- Turn leftovers into garlands: Smaller beads look adorable strung together and wrapped around mini trees or wreaths.
Perfect For
Boho, whimsical, colorful, or handmade-focused Christmas tree themes.
3. Scandinavian Woven Heart Baskets

These classic woven hearts add warmth, tradition, and a little nostalgia to the tree.
How to Make Them
Cut two matching pieces shaped like long ovals with flat ends. Fold each piece in half and cut 2–3 slits up from the folded edge. Weave the slits together—over and under—to create a little pocket.
Extra Helpful Tips
- Use sturdy paper: Cardstock or laminated paper prevents ripping when weaving.
- Try unexpected color combos: Beyond traditional red/white, try black + kraft, forest green + gold, blush + cream, or Scandinavian neutrals.
- Add a decorative edge: Use scalloped scissors or a decorative punch along the top for a polished detail.
- Turn them into mini gift holders: Slip in candy canes, small treats, handwritten notes, or little sprigs of pine.
- Hang with ribbon loops: Velvet ribbon or jute twine instantly elevates the look.
- Create a whole color story: Make sets of 12–20 woven hearts in complementary tones to give the tree a cohesive Nordic vibe.
Perfect For
Minimalist, Nordic, hygge-inspired, cottage-style, or traditional holiday trees.
4. 3D Paper Starbursts (Eye-Catching & Modern)

These bold, sculptural starbursts instantly elevate any tree and look shockingly high-end for how little they cost to make.
How to Make Them
Cut multiple identical strips of cardstock—usually 8, 10, or 12 pieces depending on how full you want the starburst. Accordion-fold each strip, then glue the ends together to form individual “fans.” Attach the fans into a complete circle, creating a full starburst sphere or sunburst shape. Add a small paper circle to the back for stability.
Extra Helpful Tips
- Use thicker cardstock for crisp shapes: Thin paper tends to collapse; 65–110 lb works best.
- Double-sided paper makes a huge difference: When the ornament moves or spins, both sides look intentionally designed.
- Try metallics for impact: Gold, champagne, silver, or rose-gold cardstock creates a luxe, modern-glam look.
- Experiment with scale: Make oversized starbursts for the lower half of the tree and mini versions for upper branches.
- Add glitter “confetti edges”: Brush the tips with glue and dip into fine glitter for subtle sparkle.
- Hang from fishing line: The near-invisible string makes them look like they’re floating.
Perfect For
Modern, glam, eclectic, and dramatic holiday tree styles.
5. Vintage-Inspired Paper Rosettes
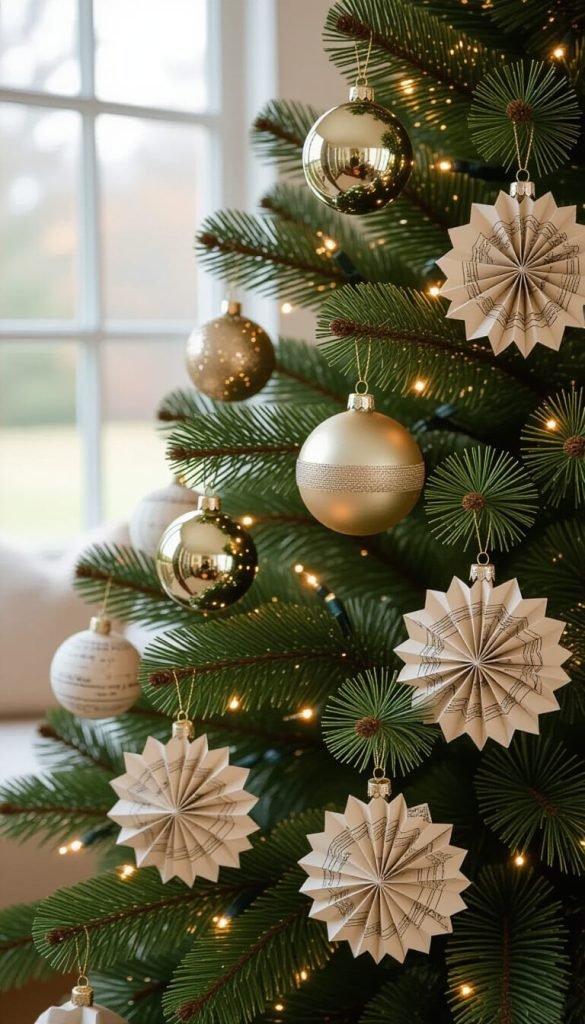
Rosettes are a timeless favorite—easy to make, endlessly customizable, and perfect for filling bare spots on the tree.
How to Make Them
Accordion-fold a long strip of paper (⅜” or ½” folds work well). Glue the ends together, forming a loop. Press the loop down in the center to flatten it into a rosette, then secure the center with hot glue. Add a decorative topper such as a button, mini wreath embellishment, or printed circle.
Extra Helpful Tips
- Layer them: Stack two or three rosettes of different sizes and patterns to create dimensional, boutique-style ornaments.
- Age the edges: Lightly brush the perimeter with distress ink or watered-down brown paint for a vintage patina.
- Use special papers: Sheet music, book pages, wrapping paper, and old maps give unique texture and charm.
- Add structural support: Glue a cardstock circle to the back so the ornament stays flat over time.
- Make mini rosettes for filler: They’re great for balancing sparse branches or adding small pops of pattern.
- Turn them into medallions: Add ribbon tails or tiny banners for an extra festive look.
Perfect For
Vintage, traditional, nostalgic, or cozy cottage Christmas trees.
6. Paper Quilled Snowflakes & Shapes
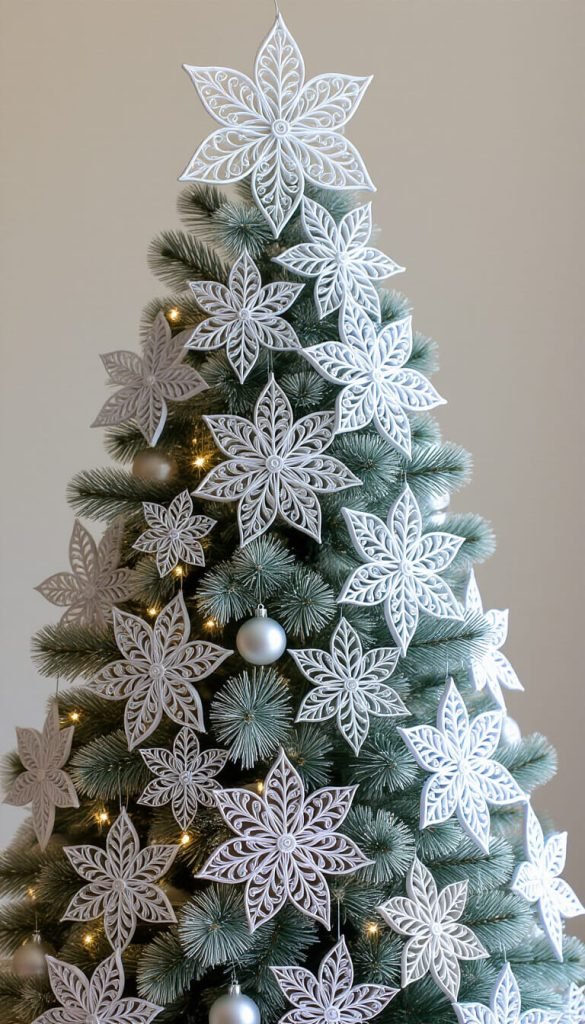
Paper quilling brings intricate beauty to your tree with surprisingly simple supplies—just thin strips of paper and a curling tool.
How to Make Them
Roll narrow strips of paper into coils, pinched droplets, S-curves, and scrolls. Arrange the shapes into a snowflake or star pattern, or experiment with trees, angels, or abstract designs. Glue all pieces together, then seal with Mod Podge to strengthen the ornament.
Extra Helpful Tips
- Use pre-cut quilling strips: They save time and ensure consistent widths—crucial for neat designs.
- Work on wax paper: It keeps glue from sticking and makes cleanup easier.
- Start with small snowflakes: Simple six-point designs help beginners get the feel before trying intricate patterns.
- Seal both sides: This prevents shapes from warping and makes them more durable for yearly storage.
- Add sparkle intentionally: A dab of glitter on the tips or a metallic bead in the center adds polish without overwhelming the design.
- Mix sizes for balance: Larger quilled snowflakes make great statement pieces; smaller ones add delicate detail throughout the tree.
Perfect For
Elegant, delicate, Nordic, or artistic holiday themes.
7. Paper Houses & Mini Village Ornaments
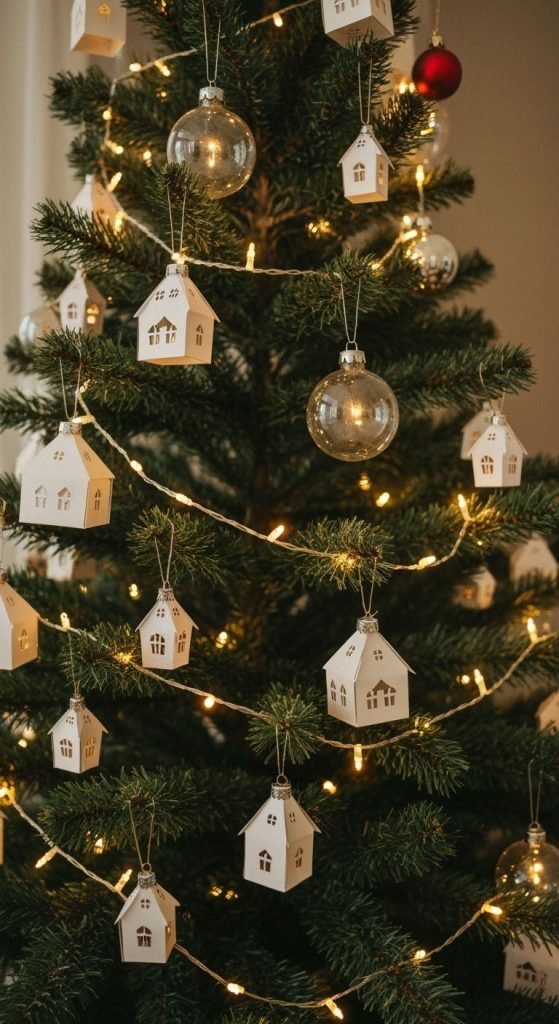
Turn your Christmas tree into a whimsical storybook village by hanging tiny handmade paper houses.
How to Make Them
Download or sketch simple house templates. Cut the shape from cardstock, score the fold lines, and assemble using craft glue. Leave open windows or back them with vellum, metallic foil, or colored paper. Create roofs separately and glue them on top.
Extra Helpful Tips
- Use kraft, white, or neutral paper for a Scandinavian vibe.
- Add snowy texture: Brush the roof with thick white craft paint or sprinkle faux snow/glitter before the glue dries.
- Create “lit” windows: If you’re not concerned about heat, slide a battery-powered mini LED behind branches so the vellum windows glow.
- Personalize each house: Add mini wreaths, drawn shingles, tiny address numbers, or little chimney shapes.
- Vary the architecture: Make tall townhouses, A-frame cabins, gingerbread cottages, or modern geometric homes for visual variety.
- Turn them into hanging ornaments or shelf décor: Tie with baker’s twine or create an entire mantel-top paper village.
Perfect For
Cottagecore, whimsical, pastel, Scandinavian, handmade, or kids’ Christmas themes.
Here is an expanded, blog-ready FAQ section for your post DIY Paper Ornament Ideas for a Beautiful Handmade Christmas Tree.
Tone matches your Color Joy Home style—warm, helpful, beginner-friendly, and SEO-optimized for DIY Christmas ornaments and homemade Christmas ornaments.
FAQ
What kind of paper works best for DIY Christmas ornaments?
Cardstock (65–110 lb) is the most durable option for ornaments that need to hold their shape. It works beautifully for snowflakes, starbursts, woven hearts, and mini houses.
However, lighter papers like book pages, sheet music, scrapbook paper, and gift wrap add charm and flexibility—especially for rosettes or rolled paper beads.
If you want maximum longevity, choose acid-free scrapbook cardstock so the ornaments don’t yellow over time.
How do I keep paper ornaments from bending or collapsing?
A few tricks help paper ornaments last for years:
- Choose thicker paper for structural designs (stars, houses, quilling bases).
- Add cardstock reinforcement circles to the back of snowflakes or rosettes.
- Lightly brush Mod Podge or clear-drying glue over the surface to stiffen it.
- Store ornaments flat between sheets of cardboard or inside a rigid ornament box.
Can kids help make homemade Christmas ornaments?
Absolutely—several of these designs are perfect for little hands.
Kid-friendly options: woven hearts, paper rosettes, rolled beads, simple snowflakes.
Adult or older-kid projects: quilled snowflakes, 3D starbursts, mini paper houses.
For younger crafters, pre-cut the shapes so they can help with assembling and decorating.
Do I need special tools to make these ornaments?
Most ornaments only require scissors, glue, and a hole punch.
A few optional tools can make the process smoother:
- A scoring board for crisp folds
- Quilling tool for detailed snowflakes
- Paper trimmer for straight, uniform strips
- Craft punches for circles and decorative centers
- A cutting machine (Cricut/Silhouette) if you want speed and precision
None of these are required, but they’re helpful if you plan to make ornaments every year.
What’s the best way to hang paper ornaments?
Ribbon loops, baker’s twine, or thin jute all work well.
To prevent tearing:
- Punch holes slightly away from the paper’s edge
- Add a small cardstock reinforcement tab
- Or glue the string between two small paper circles
These little reinforcements make a big difference in durability.
Can I add glitter without making a mess?
Yes—use glitter glue pens or fine glitter mixed with Mod Podge.
Apply only along edges or details for a cleaner, more intentional look.
For mess-free sparkle, try iridescent mica flakes or metallic paint pens.
How should I store homemade Christmas ornaments after the holidays?
Keep them in a dry, cool place away from humidity.
Place each ornament between two pieces of cardstock or parchment, then stack them in a rigid box.
Store 3D shapes (like starbursts or paper houses) in small compartment boxes or tuck tissue around them so they don’t flatten.
How long do paper ornaments last?
With proper storage, many last 5–10 years or more.
Heavily layered or sealed ornaments can last even longer.
Sun exposure, damp storage areas, and very thin paper can shorten their lifespan.