Introduction
The holiday season is full of anticipation, joy, and cozy family moments — and crafting together is one of the best ways to celebrate it all. Whether you’re decorating your home, making handmade gifts, or simply looking for a fun indoor activity during the chilly days leading up to Christmas, a little creativity goes a long way.
This collection of seven easy, family-friendly crafts gives you a full week of projects to enjoy with your kids. Each idea is simple enough for beginners, budget-friendly, and filled with that festive handmade charm. Many use common household supplies (like flour, paper, or old socks) and can be adapted for different age levels.
From sparkly ornaments to sweet cinnamon-scented creations, here’s your guide to “A Week of Holiday Crafts”—a joyful mix of projects to make together, one day (or weekend afternoon) at a time.
1. Salt Dough Ornaments
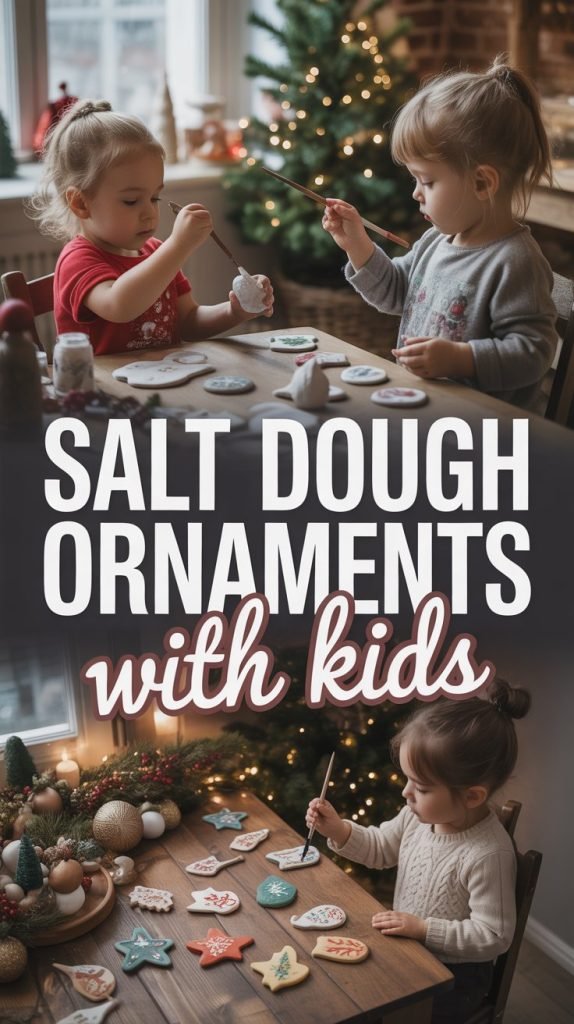
A classic holiday craft that never goes out of style, salt dough ornaments are perfect for creating keepsakes and personalized gifts. Kids love rolling, cutting, and painting them — and you’ll love how easy they are to make with simple pantry ingredients.
Supplies:
- 2 cups all-purpose flour
- 1 cup salt
- ¾ cup warm water (plus a little extra if needed)
- Mixing bowl and spoon
- Rolling pin
- Holiday cookie cutters (stars, trees, hearts, etc.)
- Straw or skewer (for making holes)
- Baking sheet and parchment paper
- Acrylic paints or tempera paints
- Paintbrushes
- Clear varnish or Mod Podge (optional, for sealing)
- Ribbon or twine for hanging
Steps:
- Mix the dough: Combine flour and salt in a large bowl. Gradually stir in warm water until a soft dough forms. If it’s sticky, add a bit more flour; if it’s crumbly, add a few drops of water.
- Roll and cut: Lightly flour your surface and roll the dough to about ¼ inch thick. Use cookie cutters to make shapes, then gently transfer them to a parchment-lined baking sheet.
- Add hanging holes: Use a straw or skewer to poke a small hole at the top of each ornament for your ribbon.
- Bake: Bake at 200°F (93°C) for 2–3 hours, or until completely hard. Flip once halfway through for even drying. Alternatively, air dry for 2–4 days if you prefer not to bake.
- Decorate: Once cool, paint with acrylic paints. You can add glitter, stamp designs, or use metallic markers for extra detail.
- Seal (optional): For a glossy, long-lasting finish, brush on a coat of clear Mod Podge or varnish once the paint is dry.
- Finish and hang: Thread a ribbon through the hole, tie a bow, and hang them on the tree, gift packages, or doorknobs.
Helpful Hints:
- Press a child’s handprint into the dough before baking for a meaningful keepsake ornament.
- Try adding a teaspoon of cinnamon or nutmeg to the dough for a subtle festive scent.
- To make your ornaments extra smooth, sand any rough edges lightly with fine sandpaper before painting.
2. Snowy Pinecone Trees
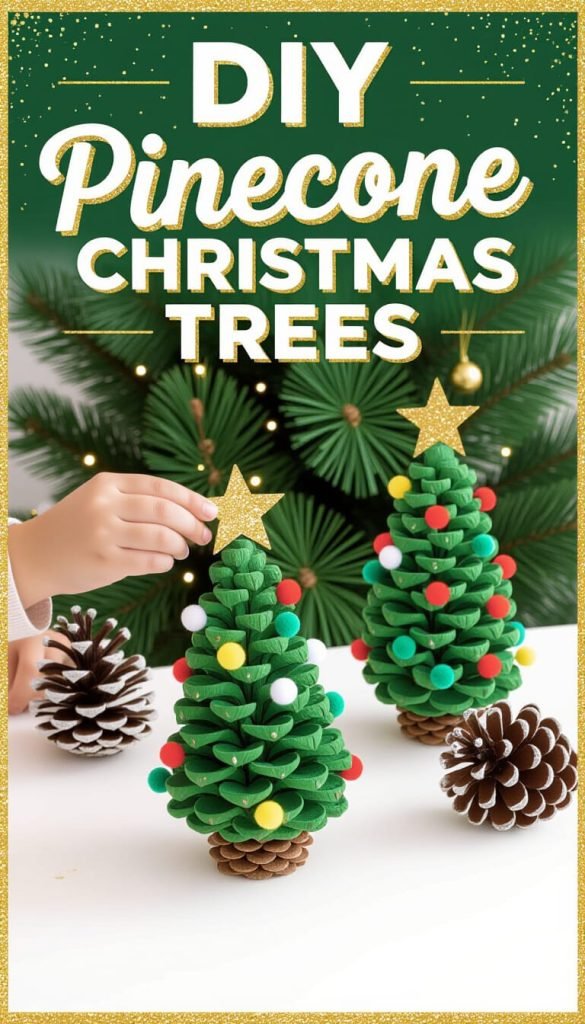
Turn simple pinecones into adorable miniature Christmas trees that look charming on windowsills, mantels, or dining tables. This easy nature craft lets kids get creative with paint, glitter, and tiny “ornaments.”
Supplies:
- Pinecones (clean and dry)
- Acrylic paint (green, white, and accent colors)
- Paintbrushes or foam brushes
- Small pom-poms, beads, or sequins
- White glue or hot glue gun (with adult supervision)
- Glitter (optional)
- Mini terra-cotta pots, bottle caps, or wood slices for bases
- Small star stickers or wooden stars for toppers
Steps:
- Prepare your pinecones: If you’ve gathered them outdoors, bake them on a foil-lined baking sheet at 200°F for about 30 minutes to remove bugs and sap. Let cool completely.
- Paint your trees: Use green paint to cover the pinecone scales, leaving some natural brown showing for texture. For snowy versions, dry-brush white paint lightly on the tips.
- Add sparkle: While the paint is still damp, sprinkle a touch of glitter for a frosty shimmer.
- Decorate: Glue tiny pom-poms, beads, or sequins between the scales to mimic ornaments. Kids can mix colors or create themed looks—try all gold, pastel, or rainbow.
- Mount your tree: Use glue to attach each pinecone to a mini pot, bottle cap, or wood slice base for stability.
- Top it off: Add a small star, bead, or paper cutout to the top point for a finishing touch.
Helpful Hints:
- For younger kids, skip painting and use colored pom-poms or stickers to decorate natural pinecones.
- Group several together in a tray with faux snow or cotton batting for a festive forest centerpiece.
- You can spray the finished trees with clear sealer to prevent glitter from shedding.
3. Paper Snowflake Garland
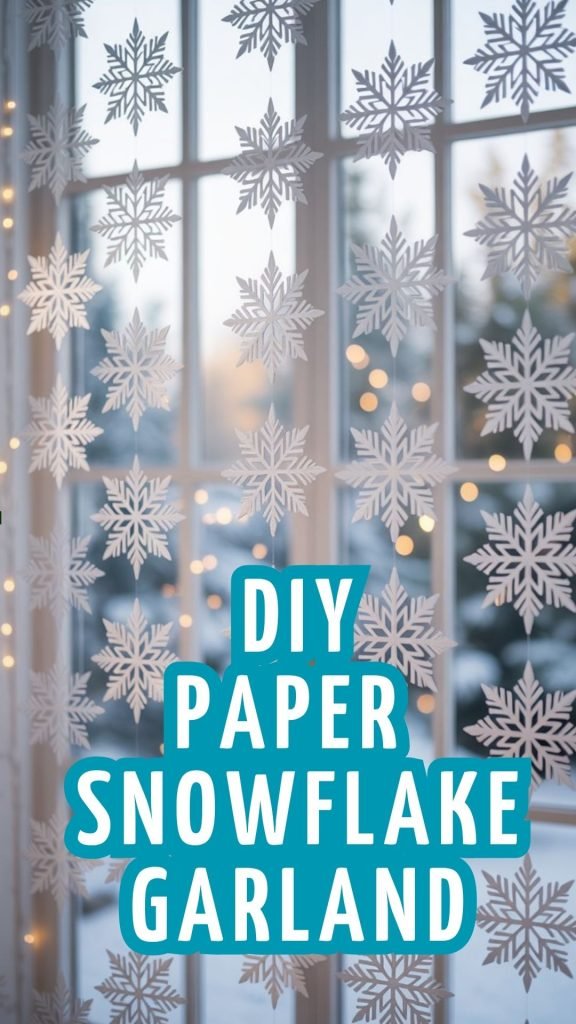
Nothing feels more festive than a flurry of handmade paper snowflakes drifting across your walls or windows. This classic craft is mess-free, budget-friendly, and endlessly creative.
Supplies:
- White printer paper or lightweight craft paper
- Scissors
- Pencil (optional for sketching patterns)
- String, ribbon, or twine
- Clear tape, mini clothespins, or glue dots
- Glitter glue or metallic markers (optional for decorating)
Steps:
- Fold your paper: Start with a square piece of paper. Fold it in half diagonally to make a triangle. Fold that triangle in half again, then into thirds, overlapping slightly to form a wedge shape. Trim the uneven edge straight across.
- Cut designs: Use small scissors to cut shapes out along the folded edges—triangles, curves, and small notches all create unique results.
- Unfold carefully: Gently open your snowflake to reveal your design. Flatten it under a book for a few minutes if needed.
- Decorate (optional): Add a dusting of glitter glue or trace edges with silver or gold marker for sparkle.
- Create the garland: Cut a long piece of string or ribbon. Tape, glue, or clip each snowflake along the string, spacing them evenly.
- Hang and enjoy: Display across a window, mantel, or wall. The light shining through adds an extra bit of holiday magic.
Helpful Hints:
- Stack several sheets of paper to cut multiple snowflakes at once for faster crafting.
- Try using patterned wrapping paper, metallic foil sheets, or colored cardstock for variation.
- Use fishing line instead of string for a floating, delicate effect.
4. Cinnamon Stick Reindeer
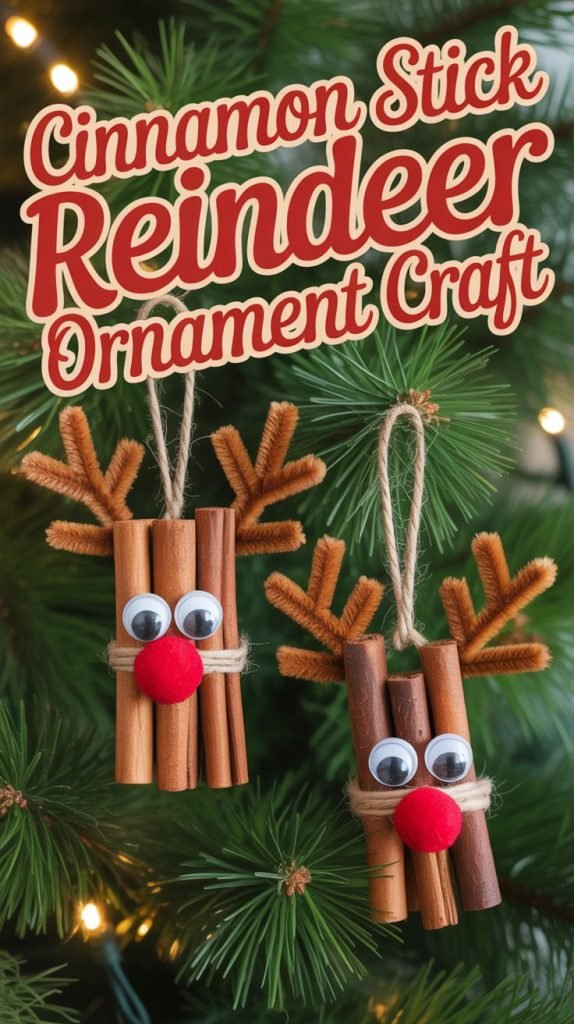
These adorable reindeer ornaments bring cozy, rustic charm and a wonderful scent of cinnamon to your holiday décor. They’re quick to make, fun for kids of all ages, and look great hanging on the tree or tied to wrapped gifts.
Supplies:
- 3 cinnamon sticks per reindeer
- Hot glue gun or strong craft glue
- Small red pom-poms (for noses)
- Googly eyes or small black beads
- Small twigs, pipe cleaners, or felt pieces (for antlers)
- Ribbon, jute string, or twine (for hanging)
- Optional: tiny bells, bows, or name tags for embellishment
Steps:
- Create the reindeer frame: Arrange three cinnamon sticks in a triangle with one point facing up. Glue the corners together and let dry for a few minutes.
- Add the face: Glue on googly eyes near the top of the triangle and a red pom-pom nose at the bottom point.
- Attach antlers: Break small twigs into shape or twist short pieces of pipe cleaner into “V” shapes. Glue them behind the top point of the triangle.
- Add a hanger: Tie a loop of twine or ribbon to the top for hanging.
- Decorate: Personalize your reindeer with tiny bows, bells, or name tags to make each one unique.
Helpful Hints:
- Use mini cinnamon sticks to create smaller reindeer perfect for gift wrapping or table settings.
- For a natural variation, substitute small wooden craft sticks or twigs instead of cinnamon sticks.
- Add a drop of essential oil (like orange or clove) to enhance the scent before hanging.
5. Sock Snowmen
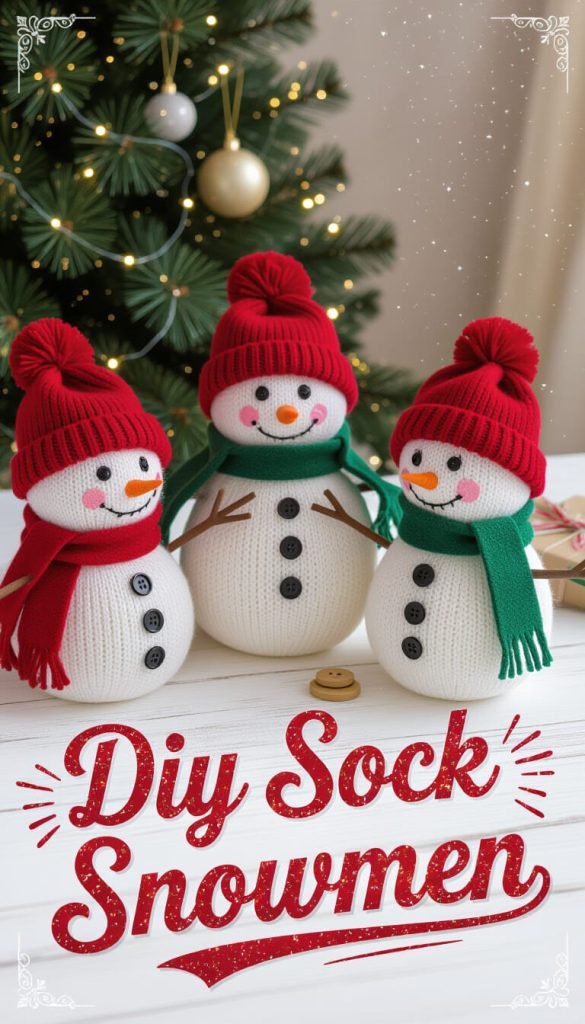
These charming, no-sew sock snowmen are soft, cheerful, and perfect for kids to create on a cozy winter afternoon. They make wonderful gifts, desk buddies, or mantel decorations—and the best part is that you probably already have everything you need at home.
Supplies:
- White crew socks (clean, no holes)
- Scissors
- Rice, dry beans, or polyfill stuffing
- Rubber bands or string
- Small socks or fabric scraps (for hats and scarves)
- Buttons, ribbon, and markers
- Hot glue gun or craft glue
- Optional: felt, twine, mini pom-poms, or tiny accessories for extra details
Steps:
- Cut and fill: Cut the white sock just above the heel. Turn it right-side out and fill the bottom with rice or beans until it forms a plump base.
- Shape the snowman: Use a rubber band or string to tie off the top. Add another band around the middle to form the head and body sections.
- Add a hat: Take the leftover sock top or a small colored sock, roll up the edge to create a cuff, and place it on the snowman’s head like a beanie.
- Dress it up: Wrap a strip of fabric, ribbon, or felt around the “neck” as a scarf.
- Decorate: Glue on buttons down the front, draw or glue eyes and a carrot-shaped felt nose, and add any other fun touches.
- Secure everything: Add a dab of glue under the hat and scarf ends to keep them in place if desired.
Helpful Hints:
- Use patterned or colored socks to make each snowman’s outfit unique.
- For a lighter version, fill with polyfill or cotton balls instead of rice.
- Create a “snow family” by using socks of different sizes for parents and kids.
- If gifting, wrap your finished snowman in cellophane and tie it with a festive ribbon for a sweet handmade present.
6. Handmade Holiday Cards
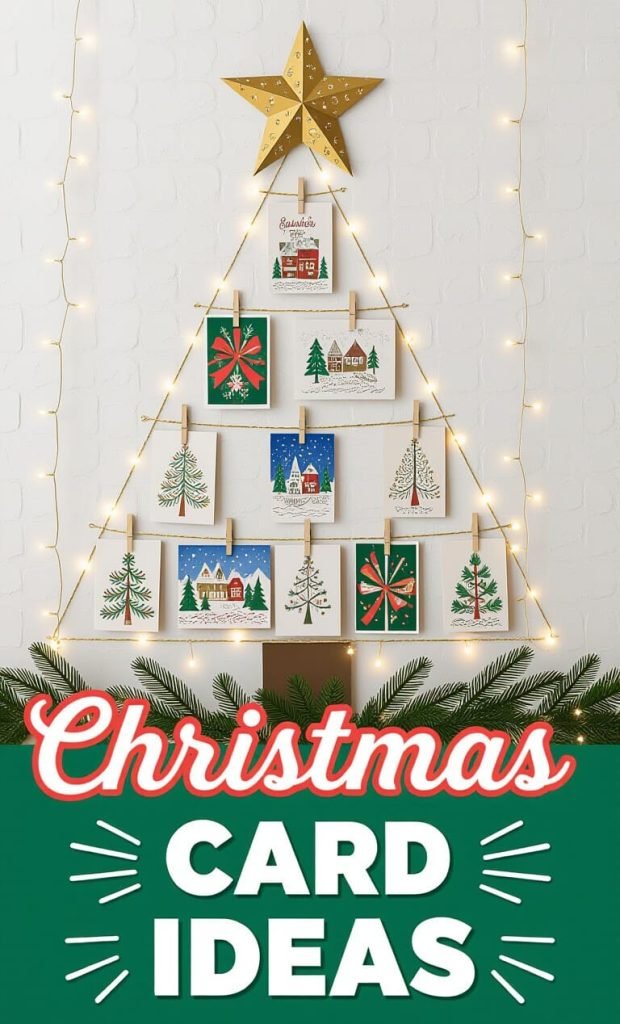
There’s something special about a handmade card—especially when it’s crafted with care (and maybe a little glitter) by your kids. These cards are simple, heartfelt, and perfect for gifting to teachers, family, and friends.
Supplies:
- Blank cardstock or folded construction paper
- Scissors
- Glue sticks or double-sided tape
- Markers, crayons, or colored pencils
- Washi tape, stickers, or decorative paper
- Optional: stamps, metallic pens, and small embellishments like buttons or ribbon
Steps:
- Prepare your base: Fold a piece of cardstock or construction paper in half to create your card. Choose festive colors like red, green, gold, or snowy white.
- Add a background: Decorate the front with a strip of wrapping paper, a washi tape border, or a collage of patterned paper pieces.
- Create your design: Let the kids choose a theme — Christmas trees, snowmen, reindeer, stars, or even their own abstract designs. Draw or glue shapes directly onto the front.
- Add details: Use markers or metallic pens to outline, write messages, or draw tiny accents like snowflakes, twinkling lights, or ornaments.
- Personalize the inside: Write a warm holiday greeting or have kids trace their handprints inside for a personal touch.
- Finishing touches: Add buttons, ribbon bows, or stickers to embellish the design.
Helpful Hints:
- Use fingerprints or thumbprints dipped in paint to create string-light bulbs, reindeer faces, or wreaths.
- Set up a “card-making station” with organized supplies so kids can make several cards in one sitting.
- Encourage creativity—every card can be different! Add the year on the back for a keepsake.
- To make cards extra special, include a family photo or a small flat ornament inside.
7. Glitter Jar “Snow Globes”

These shimmering glitter jars—sometimes called “calm-down jars”—are a magical, mess-free way to capture the look of swirling snow. Kids will love watching the glitter float and sparkle, and you’ll love how easy they are to make.
Supplies:
- Clear plastic or glass jars with tight lids (baby food jars, mason jars, or plastic bottles)
- Warm water
- Clear glue or liquid glycerin
- Glitter (fine and chunky mixed for best effect)
- Small holiday figurines or charms (optional)
- Food coloring or mica powder (optional for tinting)
- Spoon and measuring cup
- Super glue or hot glue gun (for sealing lid)
Steps:
- Fill the jar: Pour warm water into the jar until it’s about three-quarters full.
- Add the magic ingredient: Stir in a tablespoon of clear glue or a teaspoon of glycerin—this helps the glitter float more slowly.
- Mix in the sparkle: Add a generous pinch of glitter, combining fine and chunky textures for depth. If you want a tinted “snowstorm,” mix in one drop of food coloring or a touch of shimmery mica powder.
- Add decorations (optional): Drop in a small figurine or charm, like a tiny snowman, tree, or star.
- Top it off: Fill the rest of the jar with warm water, leaving a little room at the top. Stir gently to combine.
- Seal securely: Apply glue around the inside of the lid before closing tightly to prevent leaks. Shake gently and watch the snow swirl!
Helpful Hints:
- Use plastic jars for younger kids to make this craft safer and easier to handle.
- Adjust the glue amount—more glue makes the glitter fall slower, less makes it swirl faster.
- For a themed look, try color palettes like silver and blue for winter, red and gold for Christmas, or pink and white for a whimsical style.
- These jars make great calming gifts or nightstand decorations for kids’ rooms.
Troubleshooting & Crafting Tips
Even simple holiday crafts can have their hiccups! Here are a few common challenges (and easy fixes) to help keep your week of crafting fun and stress-free:
1. Dough Cracking or Puffing Up (Salt Dough Ornaments)
- Cause: Oven temperature too high or dough too thick.
- Fix: Bake low and slow at 200°F, and keep ornaments around ¼-inch thick. If they puff, try air drying next time.
2. Pinecones Closing Up While Painting (Snowy Pinecone Trees)
- Cause: Moisture or cold paint makes pinecones contract.
- Fix: Bake pinecones before use (200°F for 30 minutes) to dry and open them. Paint with small brushes and allow each coat to dry thoroughly.
3. Paper Snowflakes Tearing or Ripping
- Cause: Too many folds or cuts too close to the edges.
- Fix: Use lighter paper and sharp scissors. Make fewer, larger cuts for younger kids. Flatten under a heavy book before hanging.
4. Cinnamon Stick Reindeer Not Sticking Together
- Cause: Glue not strong enough or sticks too slick.
- Fix: Use hot glue or roughen the ends of sticks with sandpaper before gluing. Let each section dry completely before decorating.
5. Sock Snowmen Losing Shape or Leaking Rice
- Cause: Sock material too thin or not tied tightly.
- Fix: Double up thin socks or tie off the ends with two rubber bands. For extra durability, use polyfill instead of rice.
6. Cards Curling or Warping
- Cause: Too much glue or paint saturation.
- Fix: Use minimal glue and let each layer dry before adding more. Place finished cards under a heavy book overnight to flatten.
7. Glitter Jars Leaking or Glitter Clumping
- Cause: Lid not sealed tightly or too much glue in the mix.
- Fix: Always glue the lid closed securely, and use no more than 1–2 tablespoons of glue per 8 oz of water. Stir well before sealing.
Pro Tip:
Keep a small “craft repair kit” nearby — extra glue, wipes, paper towels, and a small trash bag — so cleanup and quick fixes don’t interrupt the creative flow.
FAQ: Holiday Crafting with Kids
Q: What age range are these crafts best for?
Most of these projects are great for ages 4 and up, with minor adjustments. Preschoolers will love simple tasks like gluing or painting, while older kids can handle cutting, assembling, and adding details.
Q: How can I make these crafts less messy?
Cover your workspace with a plastic tablecloth or kraft paper, keep wipes and paper towels handy, and use small trays or muffin tins to hold supplies. For glitter crafts, work over a baking sheet for easy cleanup.
Q: Can I make these projects ahead of time for a party or classroom?
Absolutely. Many (like salt dough ornaments, pinecone trees, and cards) can be prepped in stages. Bake and dry materials one day, then decorate the next.
Q: How should I store finished crafts?
Once fully dry, store ornaments and pinecones in tissue paper or small boxes. Keep sock snowmen and paper garlands in a cool, dry spot to avoid moisture damage.
Q: Can I make these eco-friendly?
Yes! Use recycled paper, natural pinecones, leftover fabric, and biodegradable glitter. You can also reuse packaging materials for craft bases or storage.
Q: What’s the best way to display our creations?
Hang ornaments on the tree, use garlands over windows or mantels, cluster pinecone trees on a tray with faux snow, and place sock snowmen on shelves or tabletops for a cheerful winter scene.
Q: How can I turn these crafts into gifts?
Add a tag or small note, wrap them in clear cellophane with ribbon, or tie one onto a wrapped present. Homemade gifts like ornaments, snowmen, and glitter jars are always appreciated.
Q: What if my child loses interest halfway through?
No problem! Many of these crafts can be paused and finished later. Keep sessions short (20–30 minutes) and let kids focus on the steps they enjoy most—like painting or decorating.
Conclusion
A week of crafting together can turn ordinary afternoons into magical memories — full of laughter, creativity, and the sparkle of the season. These seven simple projects let kids explore their imagination while helping your home feel warm and handmade for the holidays.
Whether you display your creations proudly, gift them to loved ones, or tuck them away as keepsakes, the joy of making is what truly counts. Keep the supplies handy—you might find that this week of holiday crafts becomes a yearly family tradition.