Introduction
There’s something magical about a beautifully wrapped gift — it shows care, thought, and a little bit of personality before the box is even opened. The best part? You don’t need fancy supplies or store-bought wrapping paper to make it feel special. With a few simple materials and a touch of creativity, you can turn even the most basic package into something elegant and memorable.
In this post, I’m sharing 10 elegant DIY gift wrapping ideas that look high-end but are totally doable with items you probably already have at home. Think kraft paper, string, greenery, fabric scraps, and clever little details that make your gifts stand out under the tree (or on the gift table).
1. Floral and Feminine
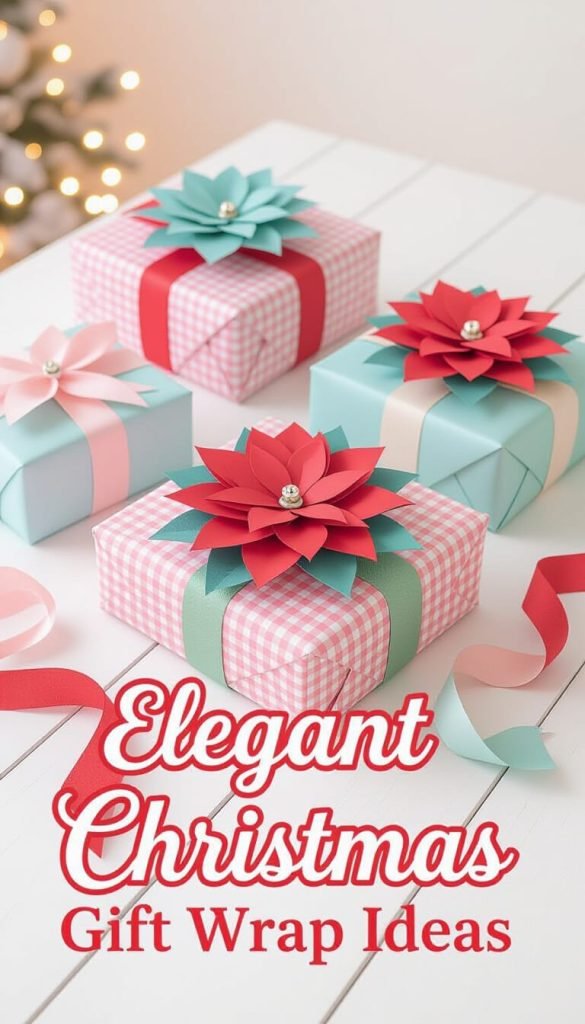
If you love gift wrap that feels delicate, romantic, and a little bit special, floral-inspired details are the perfect choice. Layered paper flowers, soft pastel papers, and silky ribbons instantly add charm without feeling overdone. This style leans feminine but still polished — ideal for Christmas gifts, birthdays, or anytime you want your wrapping to feel thoughtful and beautifully handcrafted.
With just a few simple supplies and a gentle color palette, floral accents turn everyday packages into something that feels almost like a keepsake.
DIY Paper Flower Topper – This is the star of the look.
Materials:
- Cardstock in complementary colors:
- Coral red
- Teal/mint
- Soft pink
- Scissors or a cutting machine
- Hot glue or strong craft glue
- Small metallic bead, pearl, or jingle bell for the center
How to make it:
- Cut petal shapes in graduated sizes (largest for the bottom layer, smallest for the top).
- Slightly curl the petals upward using your fingers or a pencil to add dimension.
- Layer petals in alternating colors, rotating each layer slightly so they fan out.
- Glue layers together from largest to smallest.
- Finish with a single metallic bead or bell glued in the center.
The flower should sit fairly flat but still have visible dimension.
Attaching the Topper
- Center the flower where the ribbon crosses.
- Secure it with hot glue or double-sided foam tape for a slightly raised look.
Color Palette Tips
Repeat colors across multiple gifts to create a cohesive set rather than matching everything exactly.
Keep the palette soft but festive:
Pink + red + teal works because the tones are muted, not neon.
2. Fabric Wraps (The No-Tape Trick)
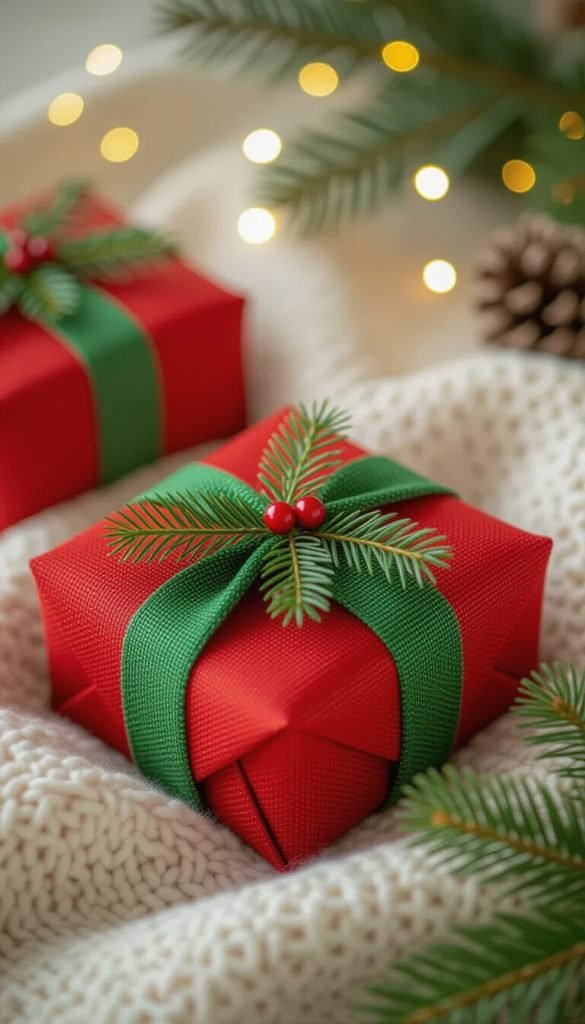
Inspired by the Japanese art of furoshiki, fabric wrapping is both eco-friendly and effortlessly elegant. Instead of traditional paper, you’ll use fabric squares — think cotton napkins, linen remnants, or even old scarves — to create beautiful, reusable wrapping.
To start, lay your fabric flat, place your gift diagonally in the center, and fold two opposite corners over the box. Then tie the remaining two corners into a neat knot on top. For smaller gifts, a ribbon or twine bow over the knot adds polish; for larger boxes, you can slip in a dried flower stem or sprig of greenery for a delicate touch.
Tips for best results:
- Choose the right size: The fabric should be roughly three times the width of your gift so the corners tie comfortably.
- Press the fabric first: Smooth folds look intentional and refined.
- Mix textures: Try linen for a rustic vibe, silky scarves for luxury, or plaid flannel for cozy winter charm.
The beauty of this method is that it’s both sustainable and beautiful — the recipient can reuse the fabric as a napkin, scarf, or wrap for their next gift.
3. Nature-Inspired Embellishments

There’s something timeless about adding a touch of nature to your gift wrap. Fresh greenery, dried citrus, pinecones, or even cinnamon sticks can turn a simple package into something that feels earthy and luxurious.
Start with a neutral wrapping base like kraft paper, parchment, or solid white paper. Then, tie your ribbon or twine snugly around the box, slipping in a small sprig of cedar, rosemary, or eucalyptus under the bow. For an aromatic twist, add a cinnamon stick or dried orange slice — it looks beautiful and smells amazing.
If you love a more polished look, try grouping natural accents in small bundles and securing them with floral wire before attaching them to the package. You can even mist evergreen sprigs lightly with metallic spray paint or glitter for a subtle shimmer.
Pro tip: Choose accents that complement the season — pine and berries for winter, lavender for spring, or olive branches for summer weddings. This simple detail makes each gift feel curated and thoughtful.
4. Monochrome Magic

If you love a clean, modern aesthetic, monochrome wrapping is your secret weapon. Sticking to one color palette — like all white, all black, or soft neutrals — creates a cohesive and upscale look with minimal effort.
Start with solid-colored wrapping paper (matte finishes work best) and choose ribbons, tags, or embellishments in slightly varied shades or textures of the same color. For example, pair white paper with a cream satin ribbon and a matte white tag, or black paper with a velvet black bow and a glossy wax seal. The tonal contrast adds depth while keeping things elegantly understated.
Tips to elevate the look:
- Use different materials — mix satin, velvet, and paper textures for visual interest.
- Add a small metallic accent (like a gold charm or silver bell) for a hint of festive glamour.
- Group gifts in the same color scheme together for a striking display under the tree or on a gift table.
Monochrome wrapping feels intentional and designer-level, but it’s easy to recreate using leftover ribbons or inexpensive solid paper. It’s proof that simple really can be stunning.
5. Minimalist White Wrap

White-on-white wrapping never goes out of style. It’s crisp, timeless, and effortlessly chic — like the gift-wrap version of a classic button-down shirt. The simplicity allows any small detail to really shine, making it ideal for weddings, holidays, or modern minimalist themes.
Start with plain matte white paper (avoid glossy versions, which can look cheap or show tape marks). Then, layer on subtle textures — think cotton string, linen ribbon, or soft silk bows. You can even wrap a band of white lace or vellum paper around the center for a tone-on-tone look that feels elevated but simple.
Ideas to personalize it:
- Add a wax seal in gold or silver for an elegant accent.
- Use vellum tags or handmade paper for name labels instead of store-bought tags.
- Sprinkle a bit of faux snow or glitter over the top for a wintery finish.
Pro tip: White wrap photographs beautifully — it’s a dream for flat lays and Pinterest boards. If you’re gifting to multiple people, vary the ribbon materials (linen, satin, or jute) to keep each package unique while staying cohesive.
6. Gift Toppers That Steal the Show
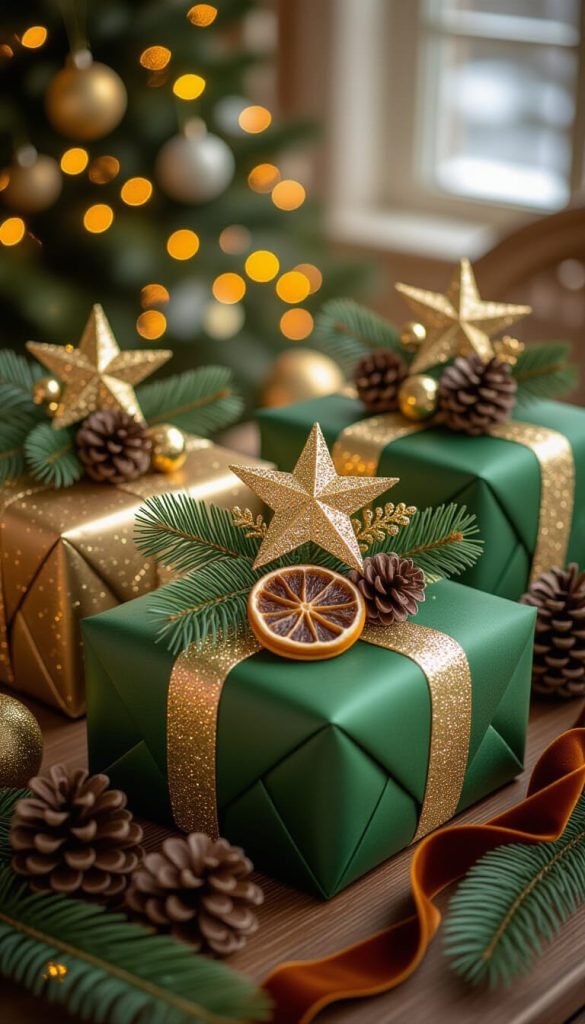
Sometimes, the most memorable part of a wrapped gift is what’s on top. A well-chosen topper can turn even plain paper into something that looks boutique-worthy. Think of it as the finishing touch that adds personality, sparkle, or seasonal flair.
You can use almost anything as a topper — ornaments, mini pinecones, dried flowers, cookie cutters, or handmade paper stars. Keep it cohesive by choosing one material palette (metallics, naturals, or pastels) and repeating it across several gifts.
To attach your topper, tie it securely under the ribbon or with a bit of thin wire. For heavier accents like ornaments, anchor them with twine first, then add a ribbon over top for a polished finish.
Ideas to try:
- For a cozy winter look, use a cinnamon stick and dried orange slice combo.
- For something glam, go with metallic ribbons and a gold star ornament.
- For handmade charm, cut a star or snowflake from thick cardstock and write the recipient’s name in gold ink.
Pro tip: When gifting several items together, use matching toppers in varied sizes — it creates that coordinated “designer gift table” look without much effort.
7. Layered Ribbons and Textures

When one ribbon just isn’t enough, layering is the way to go. This technique instantly adds dimension and a designer-quality finish to your gift — no fancy paper required.
Start with a simple base like kraft, white, or solid-color paper. Then, combine ribbons of different widths and materials — for example, a wide satin base with a narrow velvet or grosgrain ribbon on top. You can also mix textures, such as burlap with silk or lace with twine, for a look that feels rich and creative.
Tips for a balanced look:
- Stick to one color family (like blush and ivory or black and gold) to keep it elegant.
- Use contrasting textures to make the layers pop — matte against shiny, rough against smooth.
- Finish with a statement bow or knot and a small charm, bell, or tag tucked beneath the top layer.
Pro tip: If you have leftover ribbon scraps, use them creatively — tie small pieces at intervals along a long ribbon strand for a layered, boho-inspired finish. It’s the perfect way to use what you already have while adding tons of style.
8. Metallic & Luxe

If you want your gifts to feel instantly glamorous, metallic wrapping is the way to go. Shimmering silver, champagne gold, and rich red foil papers create a festive, high-end look that feels classic and celebratory — perfect for Christmas and special occasions where you want a little extra sparkle.
To recreate this style, start with metallic or glitter-finish wrapping paper in a cohesive palette. Keep the look polished by pairing each box with wide satin or grosgrain ribbon in bold holiday tones like crimson red, soft gold, or champagne. A simple bow tied neatly at the center is all you need — the shine of the paper does most of the work.
Styling tips for a refined finish:
- Stick to solid metallics rather than busy patterns to keep the look elegant.
- Use wired ribbon for fuller, structured bows that hold their shape.
- Mix metallic shades thoughtfully — silver and gold work beautifully together when balanced with a consistent ribbon color.
This wrapping style feels timeless and luxurious, making even the simplest gift feel special. When grouped together, metallic packages create a stunning, tree-worthy display that instantly elevates your holiday décor.
9. Recycled Paper Layers
Old book pages, sheet music, or even newspaper can make surprisingly elegant wrapping when styled thoughtfully. The key is how you layer and pair them — this look is all about texture and contrast.
Start by wrapping your gift in plain kraft or white paper as a base layer (this keeps the recycled paper from looking too busy). Then, wrap a strip of book page or music sheet around the center like a belly band. Finish with a slim ribbon or string to hold it in place and tie on a small charm, dried flower, or wax seal.
If you’re using newspaper, go for the black-and-white sections — skip the color print for a more classic, high-contrast look. Adding a crisp white or gold ribbon instantly transforms it from casual to elegant.
Tips for success:
- Mix in different paper types for texture — thin newsprint, heavier book paper, or even an old map.
- To keep it wrinkle-free, iron the paper on low heat between two sheets of parchment before using.
- For a personal touch, wrap with a page that includes a meaningful word or lyric.
This style feels nostalgic and sustainable — a clever way to give old materials new life while keeping your wrapping beautifully understated.
10. Chalkboard Wrap
For a creative twist that looks high-end but costs next to nothing, try a chalkboard-style wrap. This idea uses matte black paper (or even black kraft paper) as the base and transforms it with white or metallic pens for a personalized, hand-drawn finish.
Wrap your gift neatly in black paper, then use a white paint pen, chalk marker, or metallic gel pen to doodle festive designs — stars, snowflakes, holly, or simple lettering like “Joy” or the recipient’s name. The effect is graphic and bold, yet surprisingly elegant when paired with minimal embellishments.
Ideas to elevate the look:
- Add a simple twine bow or thin velvet ribbon for contrast.
- Draw a “frame” around the edges to mimic a chalkboard border.
- For a holiday version, sprinkle faux snow or tie on a tiny bell.
Pro tip: Practice your lettering on scrap paper first, or use stencils for clean lines. This style works beautifully for kids’ gifts too — they can decorate the paper themselves for an adorable, personalized touch.
FAQ: DIY Gift Wrapping Ideas
Q: What materials should I always keep on hand for DIY wrapping?
A few versatile basics go a long way: kraft paper, plain white paper, twine, ribbons in neutral tones, scissors, double-sided tape, and a few natural accents like dried greenery or small ornaments. These simple items can be mixed and matched to create dozens of looks.
Q: How can I make my wrapping look more professional?
Clean folds and neat edges are everything. Use double-sided tape to hide seams, crease the paper edges sharply with your fingers, and trim ribbon ends at an angle. Small details like matching tags or layered ribbons instantly elevate the presentation.
Q: What can I use instead of traditional wrapping paper?
Try fabric scraps, brown paper bags, book pages, or newspaper. You can even reuse old maps, sheet music, or decorative tissue paper from packaging. Adding a ribbon or greenery keeps these materials looking elegant instead of improvised.
Q: How can I wrap oddly shaped gifts without making a mess?
Gift bags, fabric wraps, or kraft paper bundles work best for non-boxed items. You can also wrap them loosely in tissue paper, tie the top with twine, and add a decorative topper — it looks intentional and polished.
Q: How early can I wrap gifts before giving them?
If you’re using natural greenery or fresh herbs, wait until a few days before gifting so they stay fresh. Otherwise, most wrapped gifts will look great for weeks if stored in a cool, dry spot away from sunlight.
Conclusion
Elegant gift wrapping doesn’t have to mean expensive materials or hours of effort. With a few simple supplies and a little creativity, you can make every present look like it came straight from a boutique — even if it started with kraft paper or a leftover ribbon.
Whether you prefer the cozy charm of natural greenery, the clean lines of monochrome, or the creativity of chalkboard-style wrap, these DIY ideas prove that presentation is part of the gift itself. It’s the thought, care, and handmade touch that make it feel truly special.
So this season, gather your paper, twine, and a little imagination — and turn your gift wrapping into an art form that’s just as memorable as what’s inside.