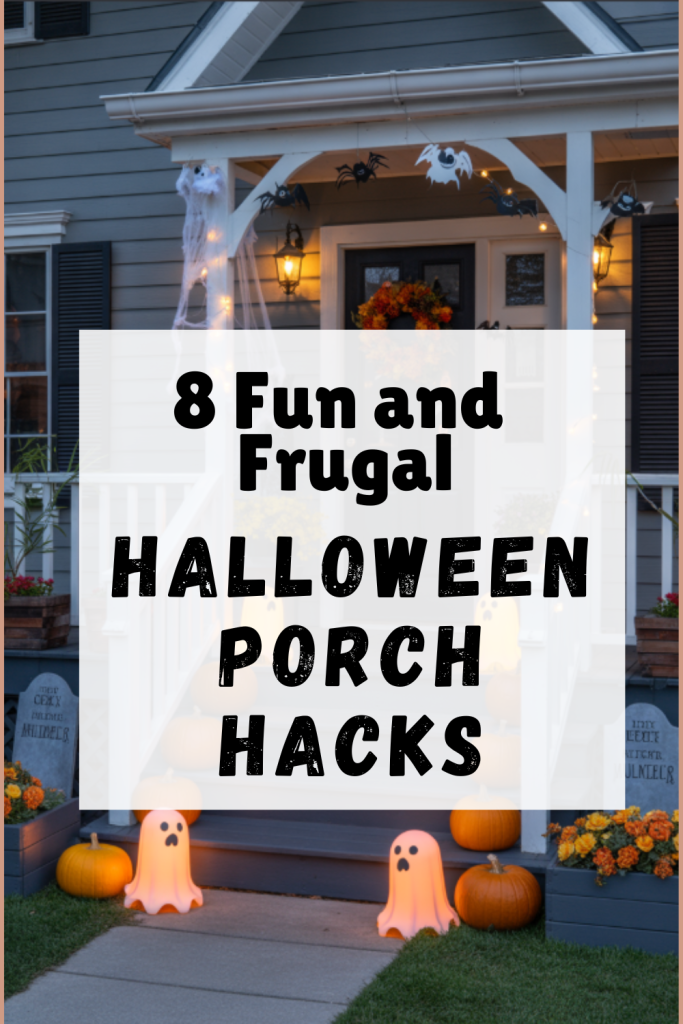
Halloween is the perfect time to transform your porch into a festive, spooky scene—but decorating doesn’t have to mean spending a fortune. With a little creativity, a few everyday items, and some DIY spirit, you can create a porch that wows trick-or-treaters and neighbors alike without breaking the bank. From ghostly lanterns to playful tombstones, these budget-friendly ideas prove that a little imagination goes a long way. In this post, we’re sharing 8 easy, affordable ways to make your porch feel spooky, fun, and totally Instagram-worthy—all while keeping your wallet happy.
1. DIY Milk Jug Ghost Lanterns
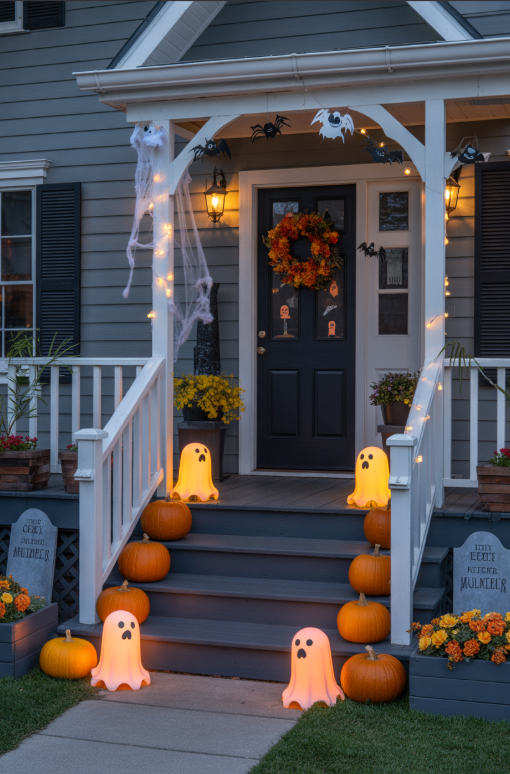
Looking for a spooky porch decoration that’s easy, eco-friendly, and practically free? Milk jug ghost lanterns are a classic Halloween hack that’s perfect for budget-friendly decorating—and a fun way to reuse items you already have at home. These glowing ghosts add instant Halloween charm and are safe for kids to help make.
What You’ll Need:
- Empty, clean milk jugs (white works best; half-gallon or gallon sizes both work)
- Black permanent marker or black craft paint for faces
- String or twine for hanging (optional)
- Battery-operated tea lights, LED candles, or small string lights
- Optional: glue, tissue paper, or fake cobwebs for added flair
Step-by-Step Instructions:
- Prep the jugs: Remove the labels and wash your milk jugs thoroughly to avoid any lingering odors. Make sure the jugs are completely dry before decorating.
- Draw spooky faces: Using a black marker or paint, draw ghostly expressions—smiling, scary, or goofy. Encourage creativity—no two ghosts have to look the same. For a fun twist, let kids design their own faces!
- Light them up: Place a battery-operated tea light or small string lights inside each jug. Avoid real candles for safety, especially if the ghosts are hanging or near flammable materials.
- Hang or display: You can line the jugs along the porch steps, cluster them near planters, or hang them from hooks or tree branches. If hanging, poke two small holes near the handle, thread string or twine, and secure tightly.
- Add texture and movement (optional): For extra spook factor, drape the jugs with a thin layer of tissue paper, gauze, or fake cobwebs. The movement from a breeze can make your ghosts look like they’re floating.
Extra Tips to Make Them Pop:
- Use different sizes of milk jugs to create a “ghost family” effect.
- Paint or color the inside of the jug with glow-in-the-dark paint for an eerie nighttime glow.
- Cluster a few glowing ghosts near a small tombstone or pumpkin display to create a mini Halloween scene.
- For a whimsical touch, tie ribbons or scraps of fabric around the jug neck to make them look like they have “clothes” or “capes.”
Why This Works:
Not only is this a zero-to-low-cost project, but it also encourages creativity, repurposes materials, and gives your porch a fun, welcoming Halloween vibe. Plus, these ghosts are safe to display and weather-resistant for a few nights if it’s a little damp outside.
2. Pumpkin Patch Without the Price
You don’t need to spend a fortune on real pumpkins to create a charming Halloween porch display. With a little creativity, you can make a budget-friendly pumpkin patch that looks festive and fun without breaking the bank.
What You’ll Need:
- Cardboard, paper-mâché, or thrifted pumpkins
- Orange spray paint or acrylic paint
- Black marker or paint for details (like pumpkin lines or faces)
- Optional: small hay bales, fake leaves, or autumn-themed props
Step-by-Step Instructions:
- Choose your pumpkin base:
- Repurpose cardboard by cutting it into pumpkin shapes. For a 3D effect, layer cardboard or use paper-mâché over a balloon or crumpled paper base.
- Check thrift stores, garage sales, or dollar stores for inexpensive fake pumpkins. Sometimes you can find them for $1–$3 each.
- Paint your pumpkins:
- Use orange spray paint or acrylic paint to give your pumpkins a classic look.
- Add details like vertical lines, stems, or even silly faces with black paint or a marker.
- Create a patch display:
- Arrange your pumpkins in clusters along your porch steps, near planters, or on small hay bales.
- Mix sizes and shapes for a natural “pumpkin patch” feel.
- Add seasonal accents:
- Scatter fake leaves, twigs, or small gourds around your pumpkins.
- You can even include a few milk jug ghosts or DIY tombstones nearby for a layered, whimsical scene.
Extra Tips to Make It Pop:
- Paint some pumpkins with glow-in-the-dark paint for a magical nighttime effect.
- Personalize your patch with chalkboard signs that say “Pick Your Pumpkin” or spooky phrases like “Beware of Pumpkins!”
- For a playful touch, stack a few pumpkins to make a pumpkin “totem” or tower.
Why This Works:
This pumpkin patch hack is affordable, reusable, and fully customizable. You can adjust the size and complexity depending on your budget and creativity. Best of all, it gives your porch a warm, festive vibe that feels seasonal without the ongoing cost of real pumpkins.
3. Spooky Wreaths from Everyday Items
A Halloween wreath is a simple way to give your porch instant festive charm, and you don’t need to buy an expensive one. With a few items you already have at home—or inexpensive finds from a thrift store—you can create a unique, budget-friendly wreath that fits your spooky style.
What You’ll Need:
- A base: wire coat hanger bent into a circle, cardboard cut into a circle, or a thrifted wreath frame
- Twigs, branches, or grapevines (gathered from your yard or a nearby park)
- Fabric scraps, old ribbons, or tulle
- Small Halloween-themed decorations (plastic spiders, mini pumpkins, bats, or fake cobwebs)
- Hot glue gun or craft glue
Step-by-Step Instructions:
- Make the base:
- If you don’t have a wreath frame, bend a wire coat hanger into a circle or cut a sturdy piece of cardboard into a circular shape.
- Add texture with natural materials:
- Wrap twigs, branches, or grapevines around the frame to create a textured base. This gives your wreath a rustic, spooky vibe.
- Incorporate fabric and ribbon:
- Tie strips of black, orange, or purple fabric around the wreath.
- You can also braid or twist the strips for added interest.
- Decorate with Halloween accents:
- Hot glue small plastic spiders, bats, or mini pumpkins to your wreath.
- For a more eerie look, stretch fake cobwebs across the wreath and tuck in some “creepy crawlies.”
- Hang and enjoy:
- Use a ribbon, string, or hook to hang your wreath on your front door or porch wall.
- Step back and adjust any decorations until it looks balanced and spooky-perfect.
Extra Tips to Make It Pop:
- Spray a few twigs with glitter or metallic paint for a subtle, magical glow.
- Mix in small battery-operated fairy lights for a glowing effect at night.
- Encourage kids to make mini wreaths for an extra fun craft activity.
Why This Works:
This DIY wreath is completely customizable, inexpensive, and lets you get creative with what you already have at home. It adds instant Halloween charm to your porch and can be updated each year with different decorations, making it a reusable, versatile décor piece.
4. DIY Tombstones
Nothing says “Halloween porch” quite like a little graveyard scene—and the best part is, you don’t need to spend a fortune on fancy tombstones. With some cardboard, paint, and a dash of creativity, you can make fun and spooky tombstones that bring your porch to life.
What You’ll Need:
- Cardboard or foam board (recycled boxes work great)
- Gray spray paint or acrylic paint
- Black marker or paint for lettering and designs
- Optional: wooden stakes or sticks for stability
- Optional: fake cobwebs, moss, or small props for added effect
Step-by-Step Instructions:
- Cut your tombstone shapes:
- Use cardboard or foam board to cut out classic tombstone shapes—rounded tops, rectangles, or even fun, exaggerated spooky silhouettes.
- Make a few different sizes to create depth in your graveyard.
- Paint the tombstones:
- Spray or paint each piece gray to mimic stone.
- Once dry, lightly dab or brush on darker shades for a weathered, aged effect.
- Add inscriptions:
- Use a black marker or paint to write spooky or funny epitaphs. Some ideas: “RIP Pumpkin,” “Here Lies a Candy Lover,” or “Boo Forever.”
- You can also add simple designs like skulls, cobwebs, or cracks to make them look more realistic.
- Set them up:
- Place cardboard tombstones directly on the porch or yard.
- For extra stability, attach them to wooden stakes and push them into flower pots, planters, or the ground if you have a garden area.
- Enhance with extras:
- Add fake cobwebs, moss, or small skeleton hands for a more eerie display.
- Cluster a few tombstones together with pumpkins, milk jug ghosts, or lanterns to create a mini graveyard scene.
Extra Tips to Make It Pop:
- Make some tombstones slightly crooked or leaning for a realistic, spooky effect.
- Use metallic silver paint on lettering for a subtle, haunted shimmer.
- Layer different heights and sizes to create depth and visual interest.
Why This Works:
DIY tombstones are incredibly cheap, easy to customize, and instantly make your porch feel more festive. Plus, you can recycle the materials for next year or swap out inscriptions to keep your graveyard fresh and fun.
5. String Light Silhouettes
Give your porch a subtle but spooky glow with string light silhouettes—an easy and inexpensive way to add Halloween atmosphere without bulky decorations. These glowing cutouts are perfect for evening trick-or-treaters and create a professional-looking effect on a budget.
What You’ll Need:
- Battery-operated or plug-in string lights
- Black cardstock, construction paper, or thin cardboard
- Scissors or craft knife
- Tape, string, or small clips for hanging
- Optional: glow-in-the-dark paint for added effect
Step-by-Step Instructions:
- Choose your shapes:
- Draw or print spooky silhouettes like bats, witches, ghosts, or cats.
- Keep them simple for easy cutting and visibility when backlit.
- Cut out the silhouettes:
- Carefully cut the shapes out of black cardstock or cardboard.
- Make sure edges are clean for a sharp shadow effect.
- Attach to string lights:
- Clip or tape each silhouette directly onto the string lights.
- Position the cutouts so they hang slightly in front of the lights, allowing the glow to shine around them for a dramatic effect.
- Display on your porch:
- Hang the lights across your porch railing, along a doorway, or draped over a planter box.
- For extra spookiness, layer a few silhouettes at different heights.
- Optional enhancements:
- Add a few glow-in-the-dark details to the silhouettes for a subtle, eerie shimmer at night.
- Mix in a few small LED lanterns or milk jug ghosts nearby for a fuller Halloween scene.
Extra Tips to Make It Pop:
- For a moving effect, attach the silhouettes with a loose twist so they sway slightly in the breeze.
- Mix different shapes and sizes for a playful, dynamic display.
- Use leftover cardstock from other crafts to cut extra silhouettes—this is a perfect way to repurpose scrap materials.
Why This Works:
String light silhouettes are cost-effective, reusable, and easy to customize. They add a magical, glowing element to your porch that’s visually impressive without requiring expensive or bulky décor.
6. Thrifted Scarecrow or Skeleton
Add personality and a little spook to your porch without spending a lot by creating a thrifted scarecrow or skeleton display. These fun characters give your porch life and charm while keeping costs low.
What You’ll Need:
- Old clothes (jackets, pants, hats, scarves) from your closet or thrift store
- Thrifted props like straw hats, gloves, or shoes
- A stuffed skeleton (often available at thrift stores) or make a scarecrow with straw, newspaper, or old fabric
- Optional: twine, string, or wooden stakes for support
- Optional: small props like pumpkins, mini signs, or lanterns
Step-by-Step Instructions:
- Choose your character:
- Decide whether you want a spooky skeleton, a cheerful scarecrow, or something in between.
- Thrift stores are great for inexpensive props like skeletons, hats, or old clothes.
- Assemble the scarecrow (if using):
- Stuff old clothes with straw, newspaper, or fabric scraps to give it shape.
- Tie off limbs and attach a hat or scarf for personality.
- Use twine or wooden stakes to secure it upright on your porch or in planters.
- Set up the skeleton (if using):
- Pose a thrifted skeleton in a chair, against the railing, or holding props like a pumpkin or sign.
- Add clothes, hats, or scarves for extra character and humor.
- Add props and accessories:
- Surround your character with pumpkins, milk jug ghosts, or lanterns for a festive scene.
- Consider small, cheap additions like mini signs, fake leaves, or twinkle lights to enhance the display.
Extra Tips to Make It Pop:
- Mix and match characters for a “porch party” effect—maybe a skeleton reads a spooky book while a scarecrow waves to visitors.
- Pose characters in funny or playful ways to make your display memorable.
- Use thrifted or recycled materials exclusively to keep costs near zero.
Why This Works:
A thrifted scarecrow or skeleton adds a focal point to your porch that’s charming, spooky, and totally budget-friendly. You can customize it each year with different clothes, props, or poses to keep your Halloween décor fresh and fun.
7. Mason Jar Lanterns
Mason jar lanterns are a classic, budget-friendly Halloween decoration that add a cozy glow to your porch. They’re easy to make, reusable, and perfect for creating an inviting atmosphere for trick-or-treaters.
What You’ll Need:
- Mason jars or any clear glass jars you have at home
- Battery-operated tea lights or LED candles
- Black cardstock or paint for spooky designs
- Optional: paint pens, glow-in-the-dark paint, or Halloween stickers
- Optional: ribbon, twine, or fake cobwebs for extra flair
Step-by-Step Instructions:
- Prep the jars:
- Remove labels and clean your jars thoroughly. Make sure they are completely dry before decorating.
- Add spooky designs:
- Use black cardstock to cut out shapes like bats, pumpkins, or ghost faces and attach them to the outside of the jars with glue or tape.
- Alternatively, draw designs directly onto the jars with a paint pen or glow-in-the-dark paint.
- Light them up:
- Place a battery-operated tea light or LED candle inside each jar. Avoid real candles to keep things safe on a porch with kids or pets.
- Display your lanterns:
- Line them along the porch steps, hang them from hooks or railings, or cluster them in groups near other Halloween décor like pumpkins or ghost lanterns.
- Optional finishing touches:
- Tie a ribbon or twine around the jar neck for added charm.
- Stretch a bit of fake cobweb over the jars to make them look extra spooky at night.
Extra Tips to Make It Pop:
- Use jars of different sizes for visual interest and a layered look.
- Mix in glow-in-the-dark paint for a subtle, eerie nighttime effect.
- Personalize with names or funny Halloween messages for a whimsical touch.
Why This Works:
Mason jar lanterns are inexpensive, reusable, and versatile. They bring a warm glow to your porch, pair well with other DIY decorations, and let you get creative with colors, shapes, and designs—all without spending much money.
8. Hanging Bats or Spiders
Add movement and spooky charm to your porch with hanging bats or spiders. This inexpensive DIY is easy to make, kid-friendly, and instantly makes your space feel more dynamic and Halloween-ready.
What You’ll Need:
- Black construction paper, cardstock, or thin cardboard
- Scissors
- String, fishing line, or thread
- Tape, glue, or small hooks for hanging
- Optional: glow-in-the-dark paint or glitter for extra effect
Step-by-Step Instructions:
- Choose your shapes:
- Draw or print bat or spider shapes onto your black paper. Keep them simple for easy cutting.
- Cut out the shapes:
- Carefully cut out each bat or spider. For spiders, you can make small ones or larger statement pieces.
- Attach the string:
- Tape or glue a piece of string or fishing line to the top of each shape. The string should be long enough to allow the decorations to hang at different heights.
- Hang them around your porch:
- Hang the bats or spiders from your porch ceiling, railing, tree branches, or even along the eaves.
- For a natural, spooky effect, hang them at slightly different heights so they “float” in the air.
- Optional enhancements:
- Add a little glitter or glow-in-the-dark paint to the edges for a subtle shimmer at night.
- Combine with string lights or lanterns to highlight the shapes after dark.
Extra Tips to Make It Pop:
- Mix small and large bats or spiders to create depth and visual interest.
- For a playful twist, position a few “spiders” crawling along the porch railing.
- Use recycled cardboard or scrap paper for an eco-friendly and cost-saving option.
Why This Works:
Hanging bats or spiders are simple, nearly free, and add instant movement and energy to your porch display. They work well with other DIY decorations like ghost lanterns or mason jar lanterns, helping to create a layered, spooky scene that feels creative and polished.
Conclusion
Decorating your porch for Halloween doesn’t have to be expensive or complicated. With a little creativity and some budget-friendly hacks, you can transform your space into a spooky, festive, and fun display that delights trick-or-treaters and neighbors alike. From glowing milk jug ghosts to thrifted scarecrows, DIY tombstones, and playful hanging bats, each of these ideas proves that imagination and resourcefulness go a long way.
Mix and match these decorations to suit your style, available space, and budget. Don’t be afraid to repurpose materials you already have at home or add your own personal touches—sometimes the quirkiest, homemade details are the ones that make your porch truly memorable.
So grab some supplies, get creative, and start building a Halloween display that’s spooky, stylish, and surprisingly affordable. And don’t forget to share your porch transformation with friends, family, or on social media—because the best Halloween decorations are the ones that inspire a little joy (and maybe a little fright) in everyone who visits.