Introduction
Welcome back to the Craft Room Makeover series!
So far, we’ve talked about how to assess your space and needs (Part 1) and how to choose a color palette that sparks creativity (Part 2). Now it’s time to bring your vision to life with one of the most exciting parts of any makeover: planning your layout and picking the perfect furniture.
Your craft room should work for you—not the other way around. The right setup can make every project easier, from grabbing your favorite scissors to switching between painting and sewing without clearing your whole table. In this post, we’ll dive into smart layout ideas and functional furniture choices that help you stay organized, inspired, and ready to create.
Whether you’re working with a tiny nook or a full-sized studio, you’ll find tips for arranging your space, choosing pieces that multitask, and setting up a layout that fits your workflow. Let’s turn your craft space into a place that’s both beautiful and brilliantly efficient.
Step 1: Start with Your Workflow
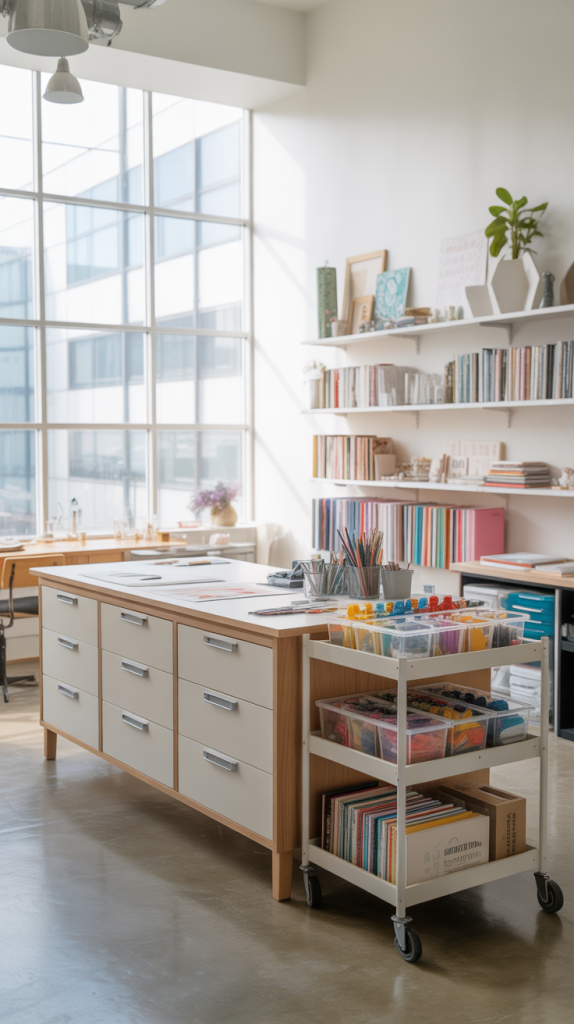
Before you start shopping for furniture or rearranging your space, take a moment to think about how you actually craft. Every crafter works a little differently — some of us spread out across every available surface, while others like having neat, defined zones for each task. Understanding your workflow is the foundation for a layout that feels natural and easy to use.
Map out your creative process.
Think through a typical project from start to finish:
- Where do you cut or assemble materials?
- Do you need a surface for painting or sewing?
- Where do you store your tools and supplies between steps?
- Do you like to sit, stand, or move around while you work?
Answering these questions helps you identify the zones your craft room should have — for example, a cutting and prep zone, a work or assembly zone, a drying or finishing area, and a clean storage zone. Even in a small space, a few thoughtful adjustments can make a huge difference in how efficiently you move between tasks.
Sketch your layout before moving anything.
Grab a notebook or use an online room planner to experiment with different arrangements. Don’t worry about being exact — just mark out your key work areas, furniture pieces, and traffic flow. This step often reveals “dead zones” or crowded corners you might not notice otherwise.
Plan for easy access to essentials.
Keep your most-used tools within arm’s reach of your main workspace, and store less-used items a bit farther away. For example:
- Scissors, glue guns, and rulers → right on your table or in a rolling cart beside it.
- Paints, extra fabrics, or bulk supplies → on shelves or in labeled bins nearby.
This setup saves time and keeps you in the creative flow without constant stops to dig for supplies.
Leave room for flexibility.
Your crafting interests might evolve — today it’s card-making, tomorrow it’s resin art or Cricut projects. Choose a layout that can adapt. Rolling carts, foldable tables, and modular shelving units let you reconfigure your space as your projects change.
Pro Tip:
Tape off furniture outlines on the floor using painter’s tape before committing to a setup. It’s a quick way to visualize how much walking space you’ll have — and whether your layout actually feels comfortable in real life.
Step 2: Choosing Multi-Functional Furniture
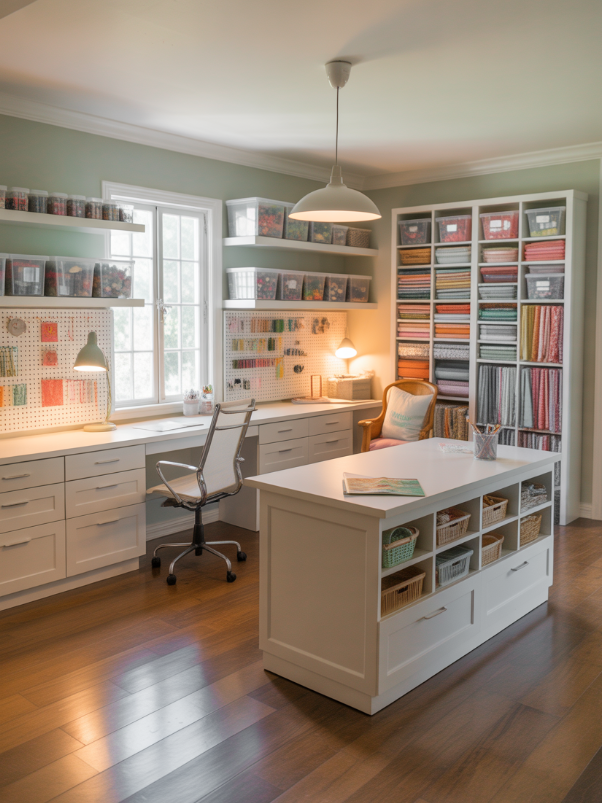
In a craft room, every inch of space counts — so the best furniture doesn’t just look good, it works hard too. Choosing pieces that serve more than one purpose can make your space feel bigger, more organized, and way easier to maintain.
Think in layers of function.
Before buying or repurposing furniture, ask yourself: Can this piece do double duty? For example:
- A large worktable with drawers underneath can hold tools or supplies you use daily.
- A storage bench offers extra seating and a place to tuck away bulky items like fabric bins or yarn.
- A rolling cart can act as a mobile supply station, snack table, or even a mini photo setup for finished projects.
You don’t need fancy studio furniture to make this work — even IKEA finds or thrifted pieces can be customized with the right inserts, baskets, or wheels.
Go vertical whenever possible.
If your square footage is limited, think upward.
Wall-mounted shelves, pegboards, or tall cabinets make it easy to store more without cluttering your workspace. Add hooks for scissors, rulers, and washi tape, or use hanging bins to sort smaller supplies.
Tip: Keep your most-used items between shoulder and hip height — this range is easiest to reach and keeps your workflow smooth.
Choose pieces that can grow with you.
Modular furniture is your best friend here. Adjustable shelving, expandable desks, or cube systems can change as your crafting evolves. For example, swap out fabric bins for clear ones when you want to see your supplies, or rearrange cubes to make room for a new machine.
Mobile furniture = instant flexibility.
Rolling carts, stools, and tables let you easily reconfigure your setup depending on what you’re working on. You can pull a cart beside you while crafting, then roll it back against the wall when you’re done — no cleanup stress required.
Style it your way.
Functional doesn’t mean boring! Paint your storage furniture in your chosen color palette, add pretty drawer pulls, or use matching baskets for a clean, coordinated look. Even simple updates make your craft room feel intentional and cohesive.
Pro Tip:
If you’re on a budget, look for kitchen islands, office desks, or garage storage units — they often offer the same sturdy surfaces and storage options at a lower price point.
Step 3: Maximizing Storage Without Clutter
Storage is the secret to a craft room that actually stays functional. When every tool and supply has a home, cleanup is quicker, projects run smoother, and your space feels calm instead of chaotic. The goal isn’t to hide everything — it’s to organize in a way that’s both beautiful and practical.
Start with a clear-out before you store.
Before adding more bins or shelves, do a quick edit. Sort supplies into categories like keep, donate, or toss. This helps you design a storage system for what you actually use, not what’s just taking up space.
Mix open and closed storage.
A good balance keeps your room looking curated instead of cluttered:
- Open storage: Pegboards, floating shelves, or glass jars make your supplies visible and easy to grab — perfect for colorful materials like thread, ribbons, or markers.
- Closed storage: Cabinets, drawers, or decorative boxes hide the not-so-pretty stuff like cords, glue refills, and packaging.
Tip: Keep open storage limited to one or two “zones.” Too much visual clutter can make even an organized space feel messy.
Go vertical and take advantage of wall space.
If you’re short on square footage, walls can be your best friends. Try:
- A full pegboard wall for tools and small supplies.
- Floating shelves for jars, paints, or décor.
- Hanging file racks or magazine holders for papers and vinyl sheets.
- Hooks or rails for scissors, rotary cutters, and tape.
These solutions keep your work surface clear and everything within reach.
Label everything.
It might sound simple, but labeling is a game changer — especially if you have multiple storage bins or drawers. Use a label maker, printable tags, or even hand-lettered labels that match your aesthetic. When everything’s clearly marked, it’s so much easier to find (and return) what you need.
Use clear containers wisely.
Clear bins make it easy to see what’s inside, but they can look chaotic if not arranged carefully. Group similar items together and line bins up neatly on shelves. Add simple labels for a polished, intentional look.
Create a “drop zone.”
Have one basket or bin where you can toss things mid-project — scraps, extra pieces, or items you’ll sort later. This prevents piles from spreading across your workspace and helps you stay focused while crafting.
Pro Tip:
Choose matching or coordinated storage containers for a clean, unified look. Even dollar-store bins can look stylish when they’re all in the same color palette or material.
Step 4: Layout Strategies
Once you know how you work and what furniture you’ll use, it’s time to pull it all together with a layout that feels natural and efficient. A thoughtful room layout can make the difference between a space that feels cramped and one that flows beautifully. The right setup keeps your creative energy high — and your supplies within easy reach.
Start with your room’s shape.
Every space has strengths you can play up. Instead of forcing a layout that doesn’t fit, let the shape of your room guide your design:
- Square rooms often work best with a central table or island.
- Long or narrow rooms benefit from an L-shaped setup that hugs the walls.
- Corner spaces or small nooks can shine with a compact desk and vertical storage.
Sketch your layout or tape it out on the floor to see how furniture will fit and where traffic flows naturally.
Explore popular craft room layouts:
- U-Shaped Layout: Great for larger rooms or multi-step crafting (like sewing or Cricut projects). It gives you three distinct surfaces — one for cutting, one for assembly, and one for tools or machines. Keep your swivel chair in the center and you can reach everything easily without getting up.
- L-Shaped Layout: Perfect for smaller rooms or corner setups. Use one leg of the “L” for your main workspace and the other for storage or equipment. Add a tall shelving unit on the open wall for bonus organization.
- Island / Open Concept Layout: Ideal for larger spaces or shared studios. A central work island lets you spread out and collaborate. Surround it with shelving or carts along the walls to keep supplies close but out of the way.
- Creative Nook Layout: Great for small homes, offices, or multi-purpose spaces. Use a slim desk or folding table, pegboard storage above, and pretty baskets below. Even a corner can become your creative haven with the right setup.
Plan your “zones.”
Organize your layout into functional areas:
- Work zone: Your main desk or table for hands-on projects.
- Storage zone: Shelves, drawers, or carts for supplies.
- Inspiration zone: A pinboard, open shelving for display, or even a cozy chair.
- Finishing zone: A clean, clutter-free surface for photos, packing, or drying projects.
Dividing your space into zones keeps your workflow intuitive and prevents the all-too-common “craft explosion” across every surface.
Mind your movement.
Keep at least 3 feet of space between large pieces of furniture. You’ll want enough room to walk comfortably, roll carts around, or pull out chairs without bumping into anything.
Pro Tip:
Think of your layout as flexible — not final. Live in your setup for a few weeks before making any big changes. You’ll quickly notice what works, what feels cramped, and where you naturally reach for things. Small adjustments can make a big difference in how smoothly your space functions.
Step 5: Comfort and Ergonomics
A beautiful layout means little if your space isn’t comfortable to work in. Crafting often involves long hours of sitting, leaning, or standing — so it’s worth taking the time to set up your room in a way that supports your body and your creativity. Think of this step as designing for longevity: the more comfortable you are, the more you’ll want to spend time creating.
Choose the right chair.
Invest in a supportive, adjustable chair that suits your main crafting height.
- For sewing or Cricut work, a standard desk chair with good back support works perfectly.
- If you stand often (for painting, cutting, or assembling), consider a counter-height stool so you can switch between sitting and standing easily.
Tip: Look for a chair with wheels if your workspace spans multiple zones — you’ll glide between them without constantly standing up.
Match your table height to your tasks.
Having the right surface height makes a big difference:
- Seated work (drawing, writing, small crafts): 28–30 inches tall.
- Standing work (cutting fabric, assembling decor, large projects): 36–38 inches tall.
If you do both, consider an adjustable-height table or a mix of two surfaces.
Light your space thoughtfully.
Good lighting isn’t just about visibility — it sets the tone and helps you see true colors in your materials. Layer your lighting:
- Overhead lighting: Bright, diffused light for general illumination.
- Task lighting: A focused desk lamp or clamp light directly over your workspace.
- Accent lighting: String lights, sconces, or soft lamps to add warmth and personality.
Pro Tip: Choose daylight-balanced LED bulbs to minimize color distortion and eye strain.
Add comfort touches that inspire.
Little comforts make a big difference:
- A small rug to warm up the floor under your chair.
- A cozy throw or cushion in your inspiration corner.
- A diffuser or candle with a scent that helps you focus.
- Background music or a small Bluetooth speaker to set the mood.
Mind your posture and movement.
Keep your most-used tools at or just below elbow level. If you find yourself constantly reaching or bending, it’s a sign something needs to shift. Rearrange until you can craft comfortably without strain.
Pro Tip:
Add a small anti-fatigue mat near standing workstations — your feet and back will thank you after a long day of creating!
Step 6: Personalizing Your Furniture Choices
Once your layout and furniture are functional, it’s time for the fun part — making everything feel like you. Personal touches are what transform a practical craft space into a creative sanctuary. Even the most utilitarian furniture can look stylish and inspiring with a few thoughtful updates.
Start with color and finish.
Your furniture doesn’t have to match perfectly, but a cohesive color story helps the room feel calm and intentional.
- Paint mismatched shelves or tables in one of your palette colors from Part 2.
- Keep larger pieces neutral (white, wood, or black) so your colorful supplies shine.
- Add a pop of color to drawer fronts, cabinet doors, or legs for a cheerful accent.
Tip: A quart of paint and new hardware can completely change the look of a thrifted table or storage unit.
Upgrade the details.
Small changes can make your furniture feel custom:
- Swap out plain knobs for decorative pulls that match your style — think vintage glass, brass, or colorful ceramic.
- Line drawers or shelves with patterned paper for a hidden touch of charm.
- Add self-adhesive wallpaper or peel-and-stick tiles to the back of open shelving for a pop of pattern.
Mix open and closed storage for a curated look.
Show off your prettiest supplies — spools of thread, jars of buttons, colorful paints — but balance them with closed cabinets or bins for visual calm. This mix keeps your room looking creative but not cluttered.
Incorporate personal or sentimental pieces.
Your craft room should feel like your story in a space. Include:
- A framed quote or print that inspires you.
- A few favorite projects displayed on shelves.
- Vintage jars or baskets passed down from family.
- A pinboard with photos, sketches, or magazine clippings that spark ideas.
Blend form and function.
If you’re short on room, combine decor with utility — for example, a pretty mug as a pen holder, woven baskets for storage, or a thrifted tray to corral small tools. These pieces add warmth while keeping your space organized.
Pro Tip:
When choosing decorative accents, think about how they’ll photograph. If you share your projects online or create content, a cohesive, styled backdrop makes your photos look polished without extra effort.
Conclusion
Designing a functional craft room isn’t just about fitting in tables and storage — it’s about creating a space that supports how you create. By mapping out your workflow, choosing multi-purpose furniture, maximizing storage, and fine-tuning your layout for comfort and efficiency, you’re setting yourself up for a space that’s both inspiring and practical.
Whether your craft room is a spare bedroom, a basement corner, or a bright nook by the window, remember that function and beauty can absolutely coexist. A well-organized, comfortable setup means more time for creativity — and less time searching for your scissors.
In the next post in this series, we’ll take things a step further with Part 4: Decor and Finishing Touches. That’s where the magic happens — we’ll talk about styling your craft room to reflect your personality, adding cozy details, and turning your workspace into a place that makes you smile every time you walk in.
Your space is coming together beautifully — one step at a time.